Brewed, Not Stirred (part two of a series)
Leave a commentMarch 5, 2013 by Jason Rice MD
Yes, that title is a reference to instant coffee…it’s tough to come up with a good brewing pun that doesn’t involve “something’s brewing…” You might say I could have not used a pun at all…but you would be wrong. Anyway, moving on. In the first post on coffee we covered grinders in fairly extensive detail, and since that was several days ago, I imagine you are surrounded by piles of ground coffee and have no idea what to do next. (If that is actually true, you should probably stop reading this blog now and seek some help, because you likely have deeper concerns than brewing coffee.)

So, once you’ve selected your grinding method of choice, the next step is turning the grounds into some delicious brew. Most of us first experienced coffee from some type of automatic electric drip brewer. I am not going to write about these brewers because they are pretty self-explanatory. They make an adequate cup of coffee and typically have convenient features like a brew timer so that your coffee is waiting for you when you get up in the morning. All fine and well, but coffee can be much more than just a wake-up call, and for that, we must move on to some brewing methods that allow us more control over the process than just pressing start.

I will discuss three very different methods of brewing your daily coffee in this post:
- French Press
- Moka Pot
- Pour-Over Brewing
Later in this series, I plan to cover espresso, but that is a fairly detailed topic, so we will stick with simpler daily brewing styles for this post. The three styles above each have distinct strengths and weaknesses, and I will do my best to explain them as well as describe the characteristics of the coffee they yield.
Up first is the French press. This is a fairly popular manual style brewer. I got my first one in college when I wasn’t allowed to have a coffeemaker due to fire code. I have yet to see a coffeemaker spontaneously combust, but the fire code did force me to broaden my coffee horizons, so there’s a silver lining in every bureaucratic code I suppose.
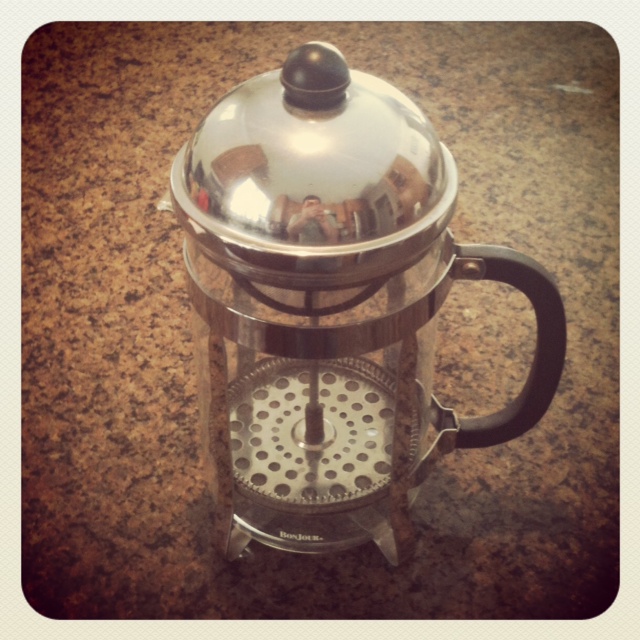
The French press is a simple machine. You put ground coffee into the bottom of the pitcher and pour hot water over the grounds. Stir and let it brew for about four minutes. Once time is up, press the plunger down and the filter forces the grounds to the bottom and the coffee stays on top ready to pour. The press yields the oiliest, heaviest brew of the methods we’re talking about today. It’s a very full flavored brew, and it is a great way to explore the nuances of beans from different growing regions and different roasting styles.
The big drawback for me here is maintenance. It can be a hassle cleaning the press, and it gets even worse if you’re in a hurry and try to clean it at the end of the day when you get home from school or work. The other major drawback is that it is nearly impossible to keep all the grounds out of the coffee. If you’re willing to forego your last sip or two, this isn’t such a big deal, but especially in a travel mug where you can’t see your coffee, the risk of getting a mouthful of grounds is fairly high. So, final verdict is: great coffee, higher maintenance. I like this best in the evening or with guests when time is less of a concern.
Up next is the moka (not mocha) pot.
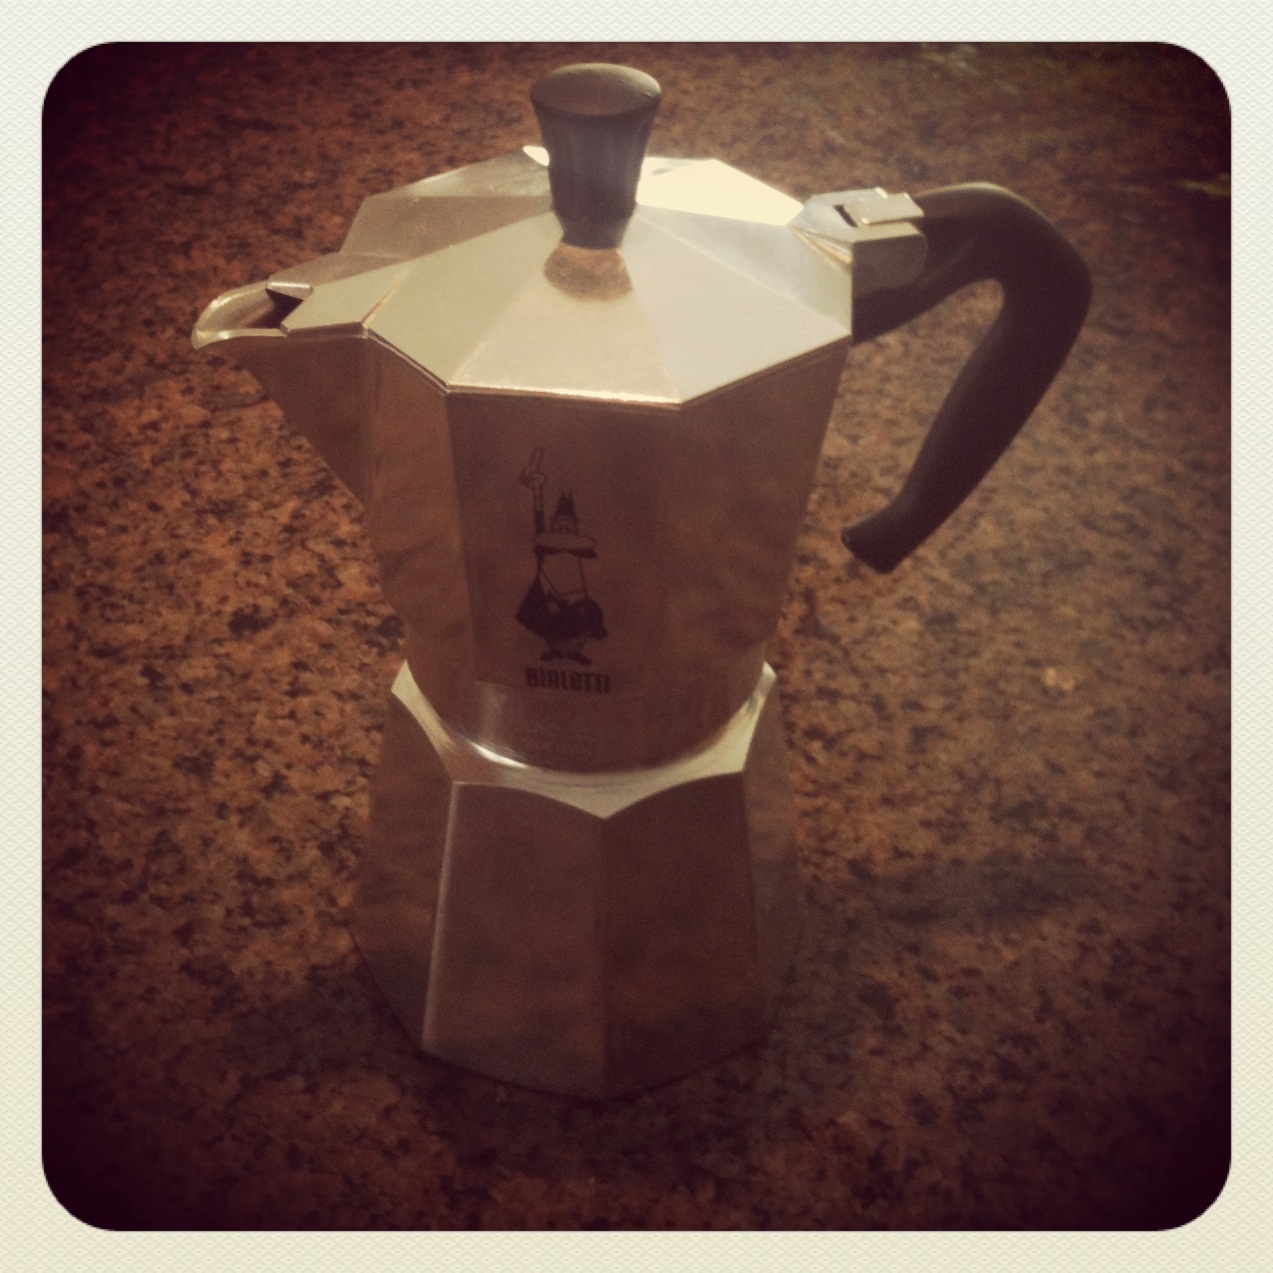
This is commonly known as (and sold as) a stovetop espresso maker. It is not an espresso maker. It makes moka pot coffee. It is a thick, concentrated coffee, but it doesn’t meet the criteria of true espresso (again, more on this in a future post on espresso). The moka pot is a fun brewer to play with. It makes a set amount of coffee, but comes in variety of sizes, so choose wisely. Mine makes one mug full, which is perfect for me.
The pot has three components: a water chamber on the bottom, a filter, and a collection chamber on top.
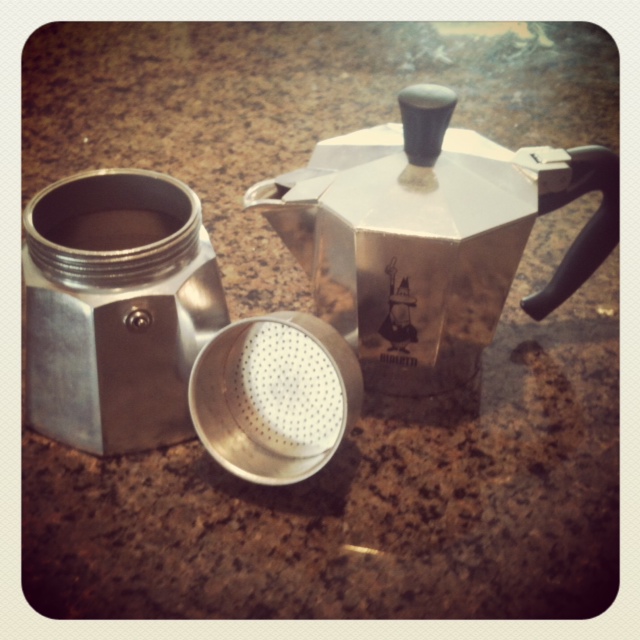
You fill the bottom with water, fill the filter with finely ground coffee and place the pot on the stove.
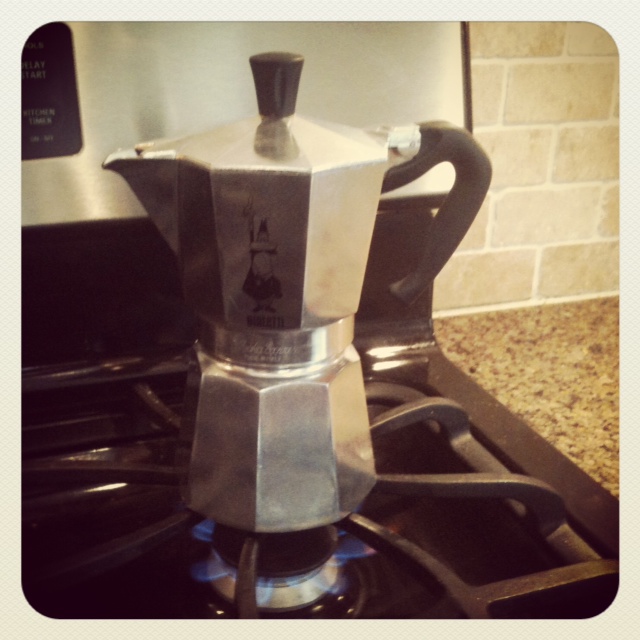
The water boils, which forces it up through the filter and into the collection chamber.
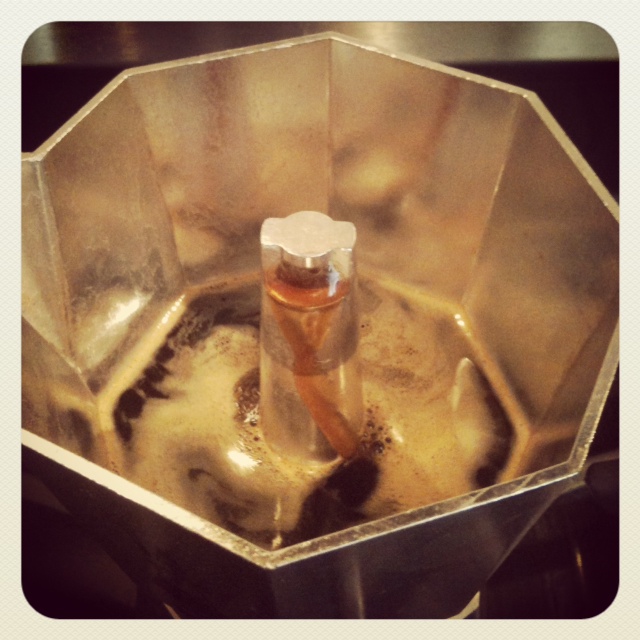
As you can see, the coffee has a creamy froth, similar to espresso, which leads to the misconception that this is espresso. Regardless, the coffee is very sweet and concentrated in this style. It is excellent as is, but also holds up very well to cream, soy or milk if you like to lighten your coffee. Clean-up is easier than the press. You simply dump out the filter and rinse the rest of the parts. Soap does bad things to aluminum, so rinsing alone is sufficient. Overall, I do like this method a lot, and it was my daily coffee for a few years. The only major drawback is that it does require some attention and time because you need to turn off the flame when the brewing slows down to avoid damaging the pot.
Last up is my current brewing method of choice – pour-over brewing.
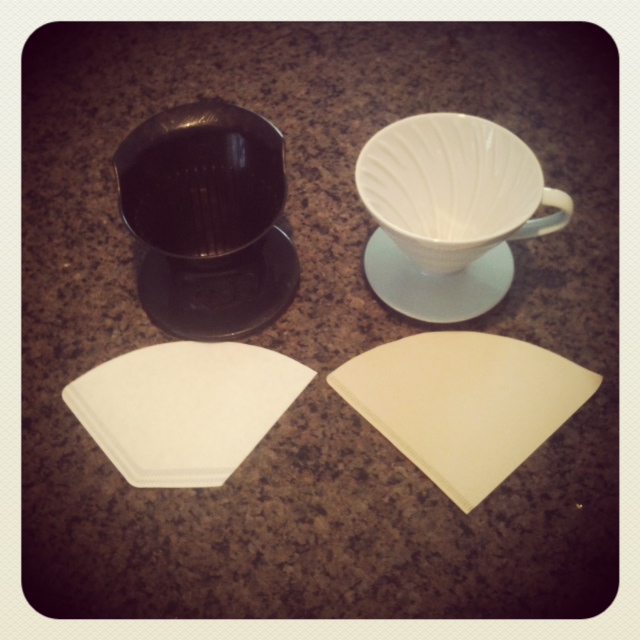
I have two different pour-over brewers, each of which I still use regularly. The black one is a very inexpensive (think $2-$3) plastic pour-over brewer. It uses a cone filter with a flattened bottom. The white one is a more expensive (about $20) ceramic version that uses a pointed-tip cone filter. The short story here is that the pointed-tip and ceramic brewer make better coffee. They prolong the contact between the water and the beans for a more consistent result. The longer story is that sometime a $2 brewer is really ideal. I like to use the ceramic one at home where I know I can take care of it, but the plastic ones are great to keep in your office, on vacation or anywhere else you don’t want to worry about something being expensive and/or breakable.
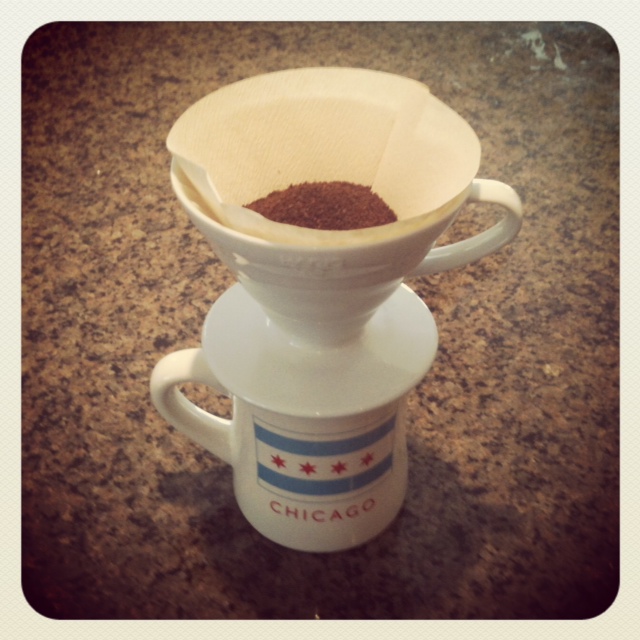
The process for the pour-over brewer is pretty self-explanatory. Place your coffee grounds in the filter and place the brewer over your mug (and yes, there are large pour-over brewers that can be used with a carafe for larger groups, but I don’t have one, so I can’t comment on how well it works). You heat water and start by pouring just enough of hot water to soak the grounds and let them start to bubble. Let the wet grounds sit for a few seconds before adding more water.
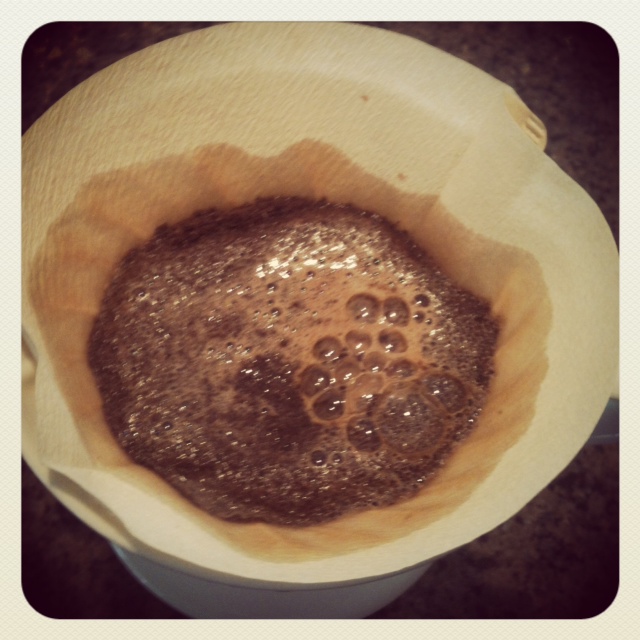
Then slowly pour the rest of the water into the brewer in small circles near the center of the brewer. The easiest way to do this is to heat just enough water for your cup so you do not have to try to estimate when you have poured enough water or worry about overflowing your mug.
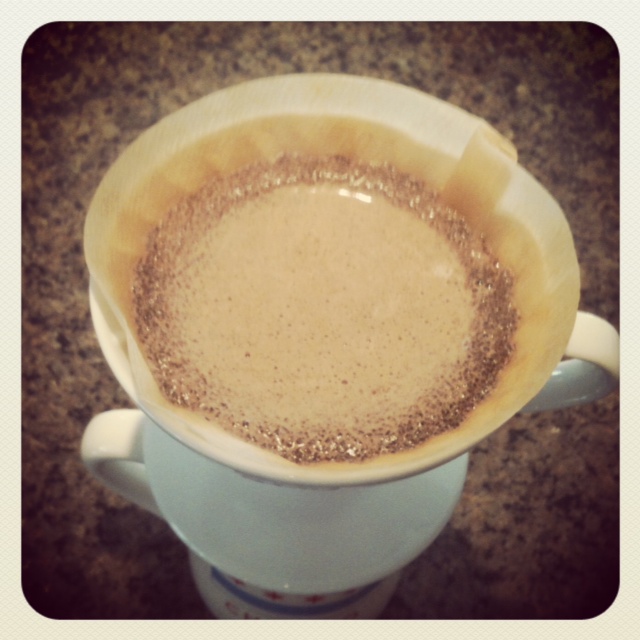
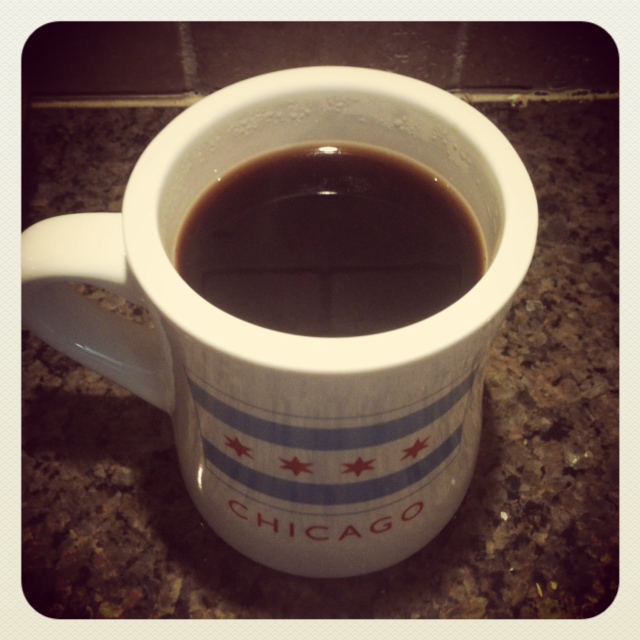
The mechanism of brewing here is basically the same as the electric drip brewer, but you have more control over the brew speed and more control over how evenly the grounds come into contact with the water. Much like an electric drip brewer, pour-over brewing produces a very clean cup of coffee. Excess oils and grounds are easily trapped by the filter and the resulting brew is the smoothest of the three methods listed here.
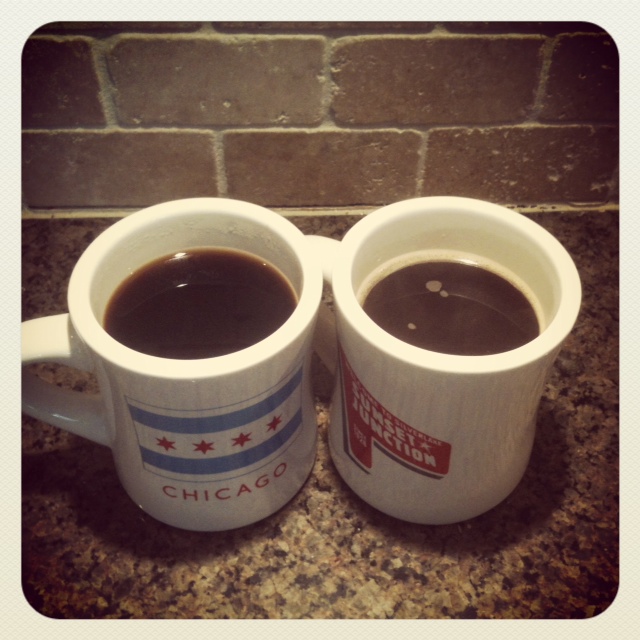
The mug on the left was made with a pour-over brewer, and the mug on the right was made with a moka pot. This photo shows the difference in brew consistency between these methods, but try them both for yourself and see what you prefer.
In the end, with all the technological advances of various coffee brewing machines, I have found the best-tasting cup of coffee comes from hand-ground coffee made in a pour-over brewer. It allows me to be involved physically with the entire brewing process, and the results are always excellent. However you like your coffee – black, sweetened, with or without cream – try some of the above brewing methods and see which suits you best.
Enjoy!

