Dutch Oven Chicken
2September 10, 2013 by Jason Rice MD
As I write this, the temperatures have soared back into the 90s despite the fact that it’s September – so firing up the oven may not be top on your list at the moment.
However, the few days of cooler weather we experienced over the last week were enough to get me excited about fall and the return of comfort foods. This chicken recipe is one that has been evolving over the years, but the basic principles are the same, and the results are always delicious, juicy chicken with a great natural gravy produced in the process.
Note: I make this recipe in my dutch oven because of the convenience of going straight from the stovetop to the oven. If you don’t have a dutch oven (or some other similar cooking vessel that can go stove to oven and has a lid), my first suggestion is to go get a nice one – something heavy made of cast iron is ideal. However, I used to make this recipe without a dutch oven, so it is still possible. Instead of going straight from the flame to the oven, you will simply need to transfer everything from a pan on the fire to an oven-safe cooking dish with a lid (for me, this was an old Corningware casserole with a glass lid)
However you choose to do it, this is a great way to make chicken in the oven, imparting great flavors into the meat. All the juices are kept in the pan instead of evaporating, which yields a delicious gravy and keeps things moist leaving you a nice margin of error as far as cooking time without drying things out.
Ingredients:
- 1 whole chicken, quartered with wings removed (or buy just the pieces you like best, but you want skin and bones included)
- 2 roma tomatoes, seeded and chopped
- 1 yellow onion, chopped
- 4-6 cloves of garlic, chopped
- 1 tsp smoked paprika
- 1-2 tsp of poultry seasoning or herb blend of choice, to taste
- salt and pepper to taste
- salted butter
- extra virgin olive oil
Procedure:
First off, you may have notice that the first ingredient was a whole chicken, quartered. You can go about this however you like, but I have to say, there is something very satisfying about breaking down your own meat.

Note: The cleaver in this photo is really just for the effect. A good, sharp chefs knife is my tool of choice for breaking down a chicken – much less messy and much safer. That cleaver sure does look cool, though…
It is certainly more time-consuming, but with practice, you’ll do a much better job than you’re used to with machine-butchered chicken. You’ll also save quite a bit of money. (Note: A whole 4-5 lb chicken is typically less than $10 while a 1 lb pack of boneless/skinless breasts frequently exceeds $10.) If you choose to do it yourself, here’s a nice little guide. I like to do 4 large pieces (two breasts pieces and two thigh/drum pieces, and I reserve the wings for making stock, but that’s another post). You can, of course, butcher it into whatever pieces suit your tastes best, though.
Once you have the chicken in pieces, gently pull back the skin but be careful not to completely detach it. Season with salt, pepper, herbs and paprika. Replace the skin over the herbs and spices. You will also want to preheat your oven to 375 degrees so that it will be hot and ready when you finish the stove top portion of the cooking.
In your dutch oven, or whatever pan you are using, heat a combination of olive oil and butter over a medium flame. The combination of butter and oil gives you the browning benefits of cooking in butter but reduces the saturated fats by cutting the butter with the oil. Saute the onions until they are translucent and just starting to brown. Add the chopped garlic and the remaining paprika to the onions and cook for one more minute. Push the onions and garlic to the perimeter of the pan.
Add a little butter or oil to the pan if needed, and sear the chicken skin side down for about 5 minutes or until the skin starts to brown. When the chicken is ready to be flipped, the skin will release relatively easily, so if you’re struggling, give it another minute or two before trying to flip again.
Once the skin side of the chicken has been seared, flip the chicken pieces over. Top with the chopped tomatoes and remaining herbs, and place the lid on your dutch oven.
(If using two vessels, this is the point where you want to transfer everything to your oven-safe dish. Scrape as much of the cooked on bits off your pan as possible, and consider a quick deglaze with a little chicken stock if needed to get as much flavor out of the pan and into the baking dish as possible.)
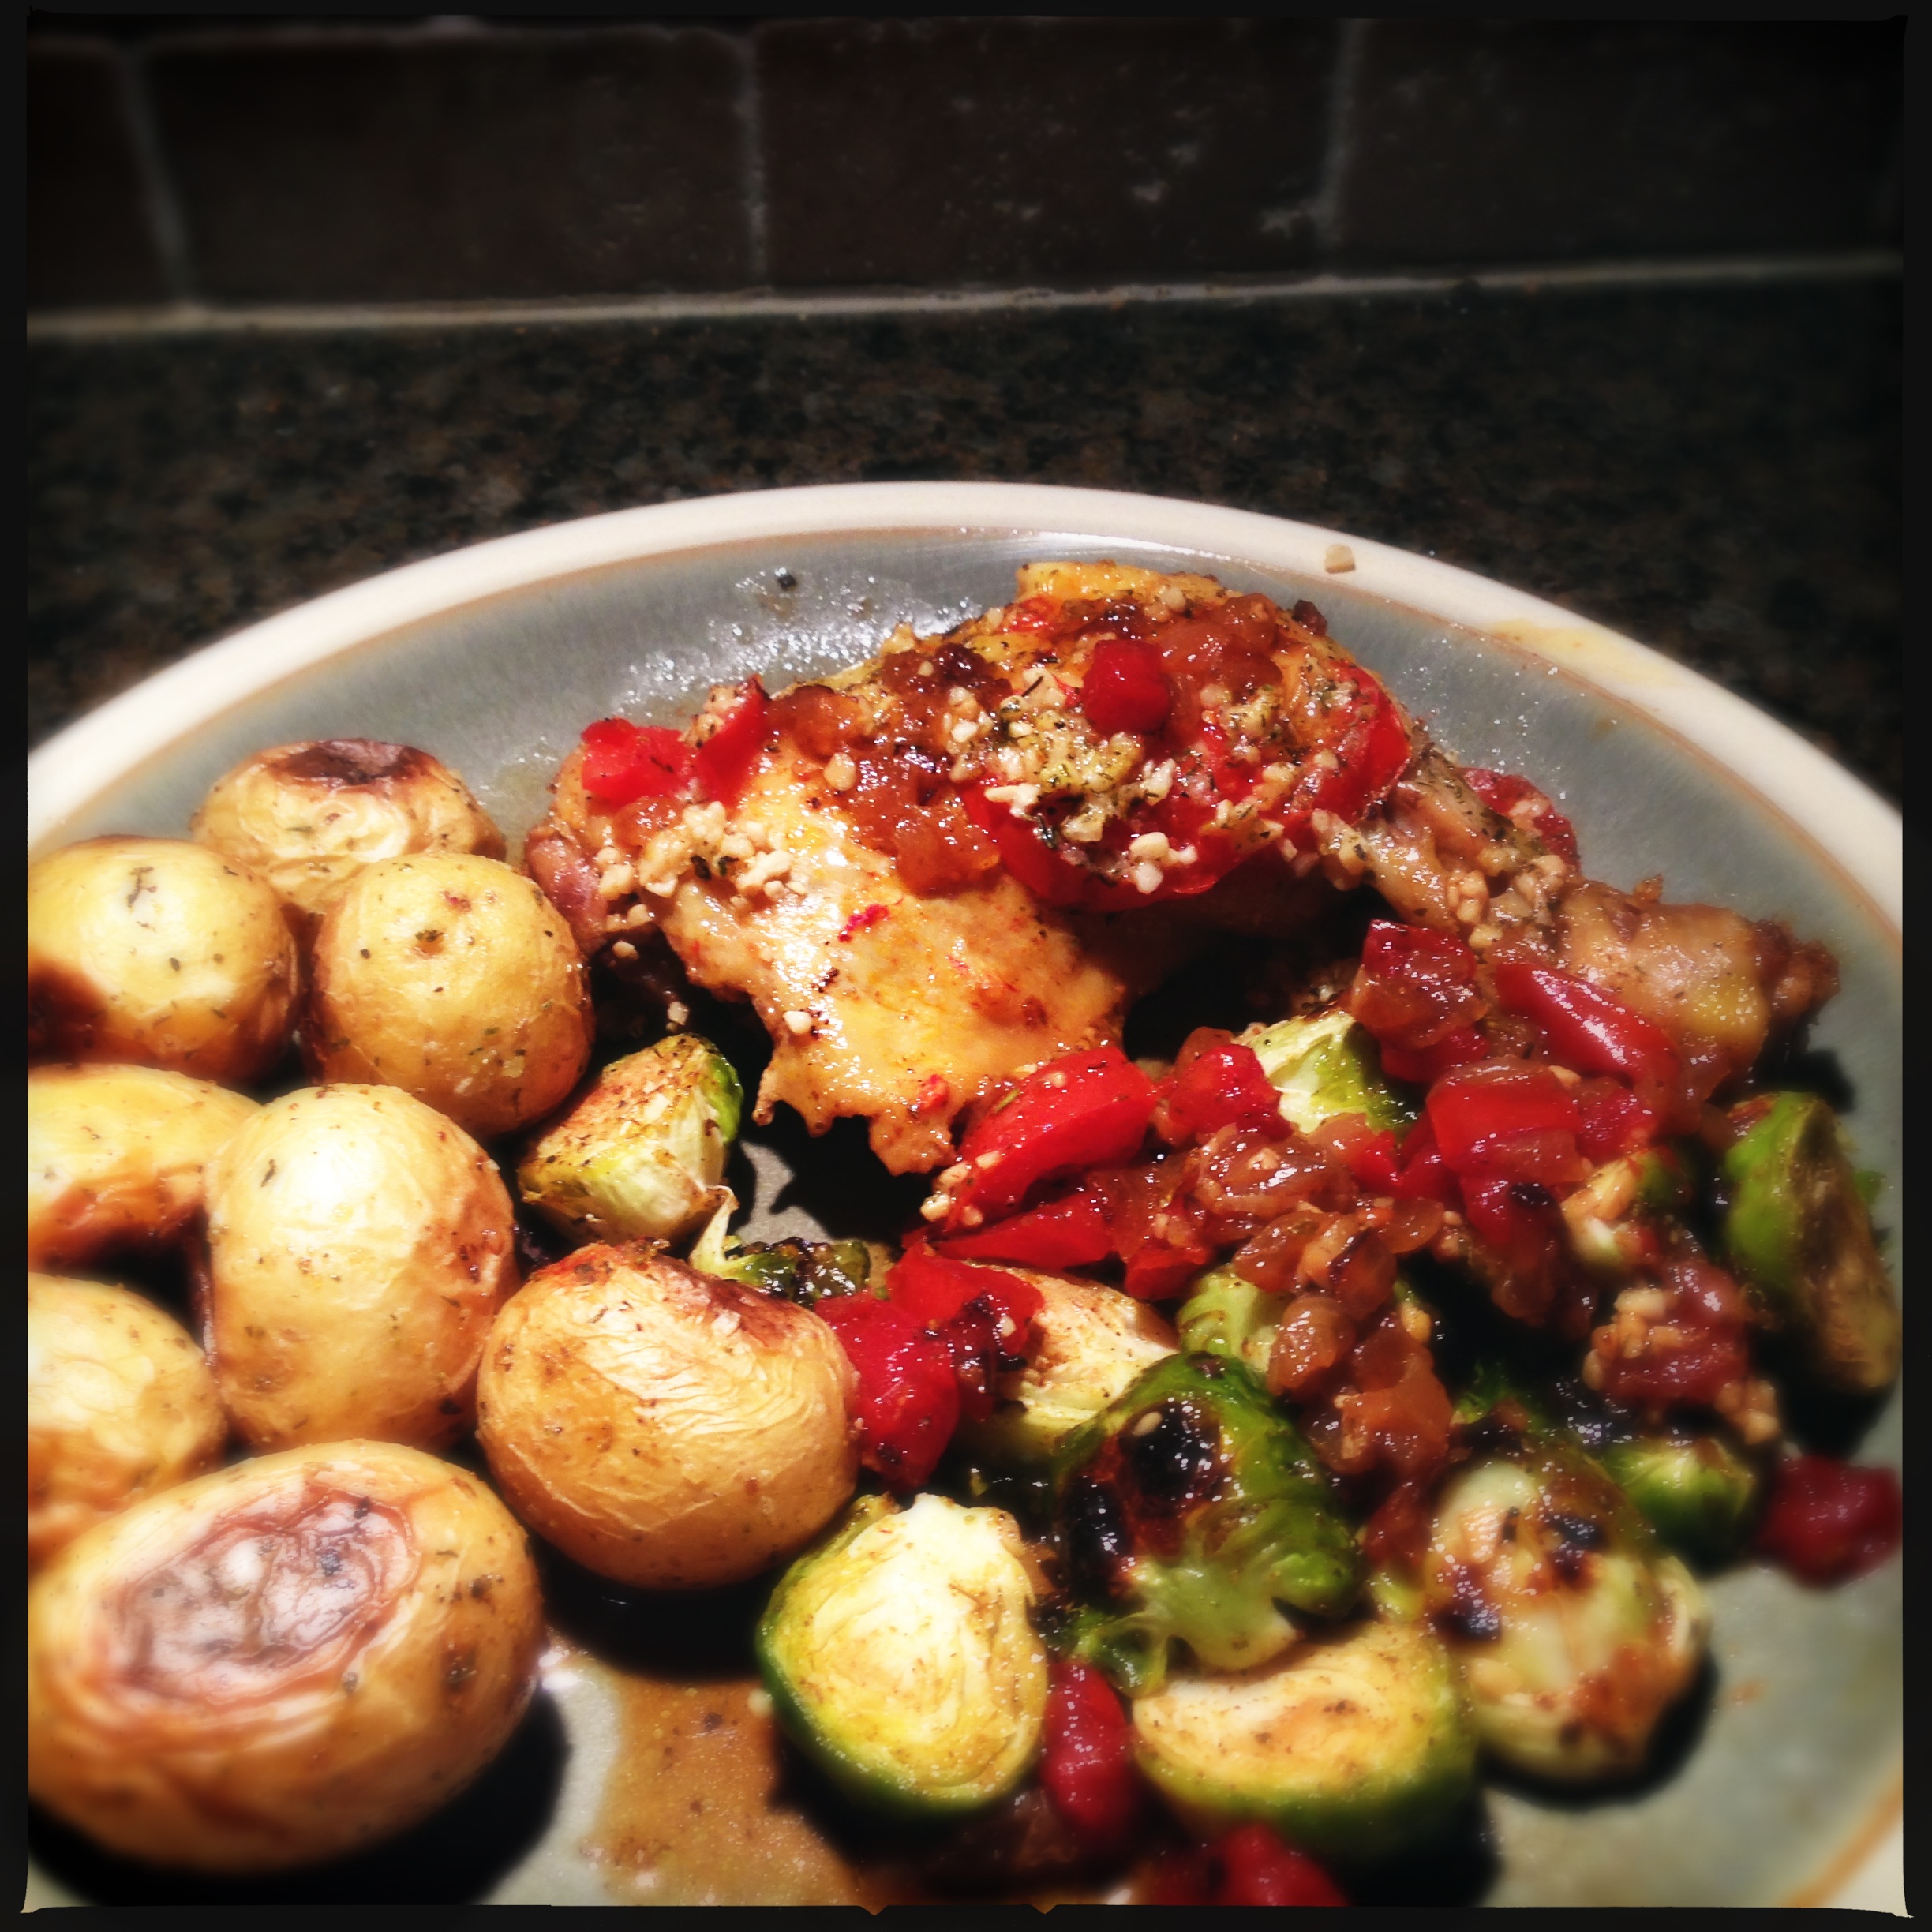
Place the covered dutch oven into the oven and bake at 375 for 30-40 minutes. The fats from the skin and the liquid from the tomatoes will keep things juicy even if you cook this dish a little longer than needed. I like to pair this with other goodies out of the oven as it gives me some time to relax and enjoy the aromas while everything is cooking. Typically I serve it with roasted brussels sprouts and roasted potatoes. Mashed potatoes also pair very well with it, especially covered with a healthy dose of the drippings from the chicken.

You can make this a lot healthier by removing the skin before you eat it as well. The skin lends a ton of great flavor to the chicken by keeping it intact while cooking, but you’ll save yourself a lot of unnecessary fat by enjoying the flavors in the meat and forgoing eating the skin itself. There’s also lots of room to adjust the vegetables and seasoning on this recipe, but hopefully it serves as a versatile blueprint to help you elevate your chicken and create some truly memorable and comforting meals as the leaves start to fall, the days get shorter and the air cools. Enjoy!


[…] ← Dutch Oven Chicken […]
[…] be the first truly homemade stock I’ve posted. This recipe is the result of leftovers from my dutch oven chicken recipe. The drippings, along with the leftover vegetables and chicken, were used to start the […]