Smoking a Chuckie
2October 11, 2015 by Jason Rice MD
I’ve smoked many pork shoulders over the past few years. Enough that I feel like I can do it on auto-pilot. Time to try something new.
Time to smoke some beef.
The quintessential beef for BBQ is brisket.
But, brisket is expensive. And unforgiving. Not a good combination in my mind. Plus, when I think of BBQ, I think of pulled pork. It’s what I make the most, and it’s what I like the most. So, I decided to smoke a chuck roast, and make “pulled beef.”
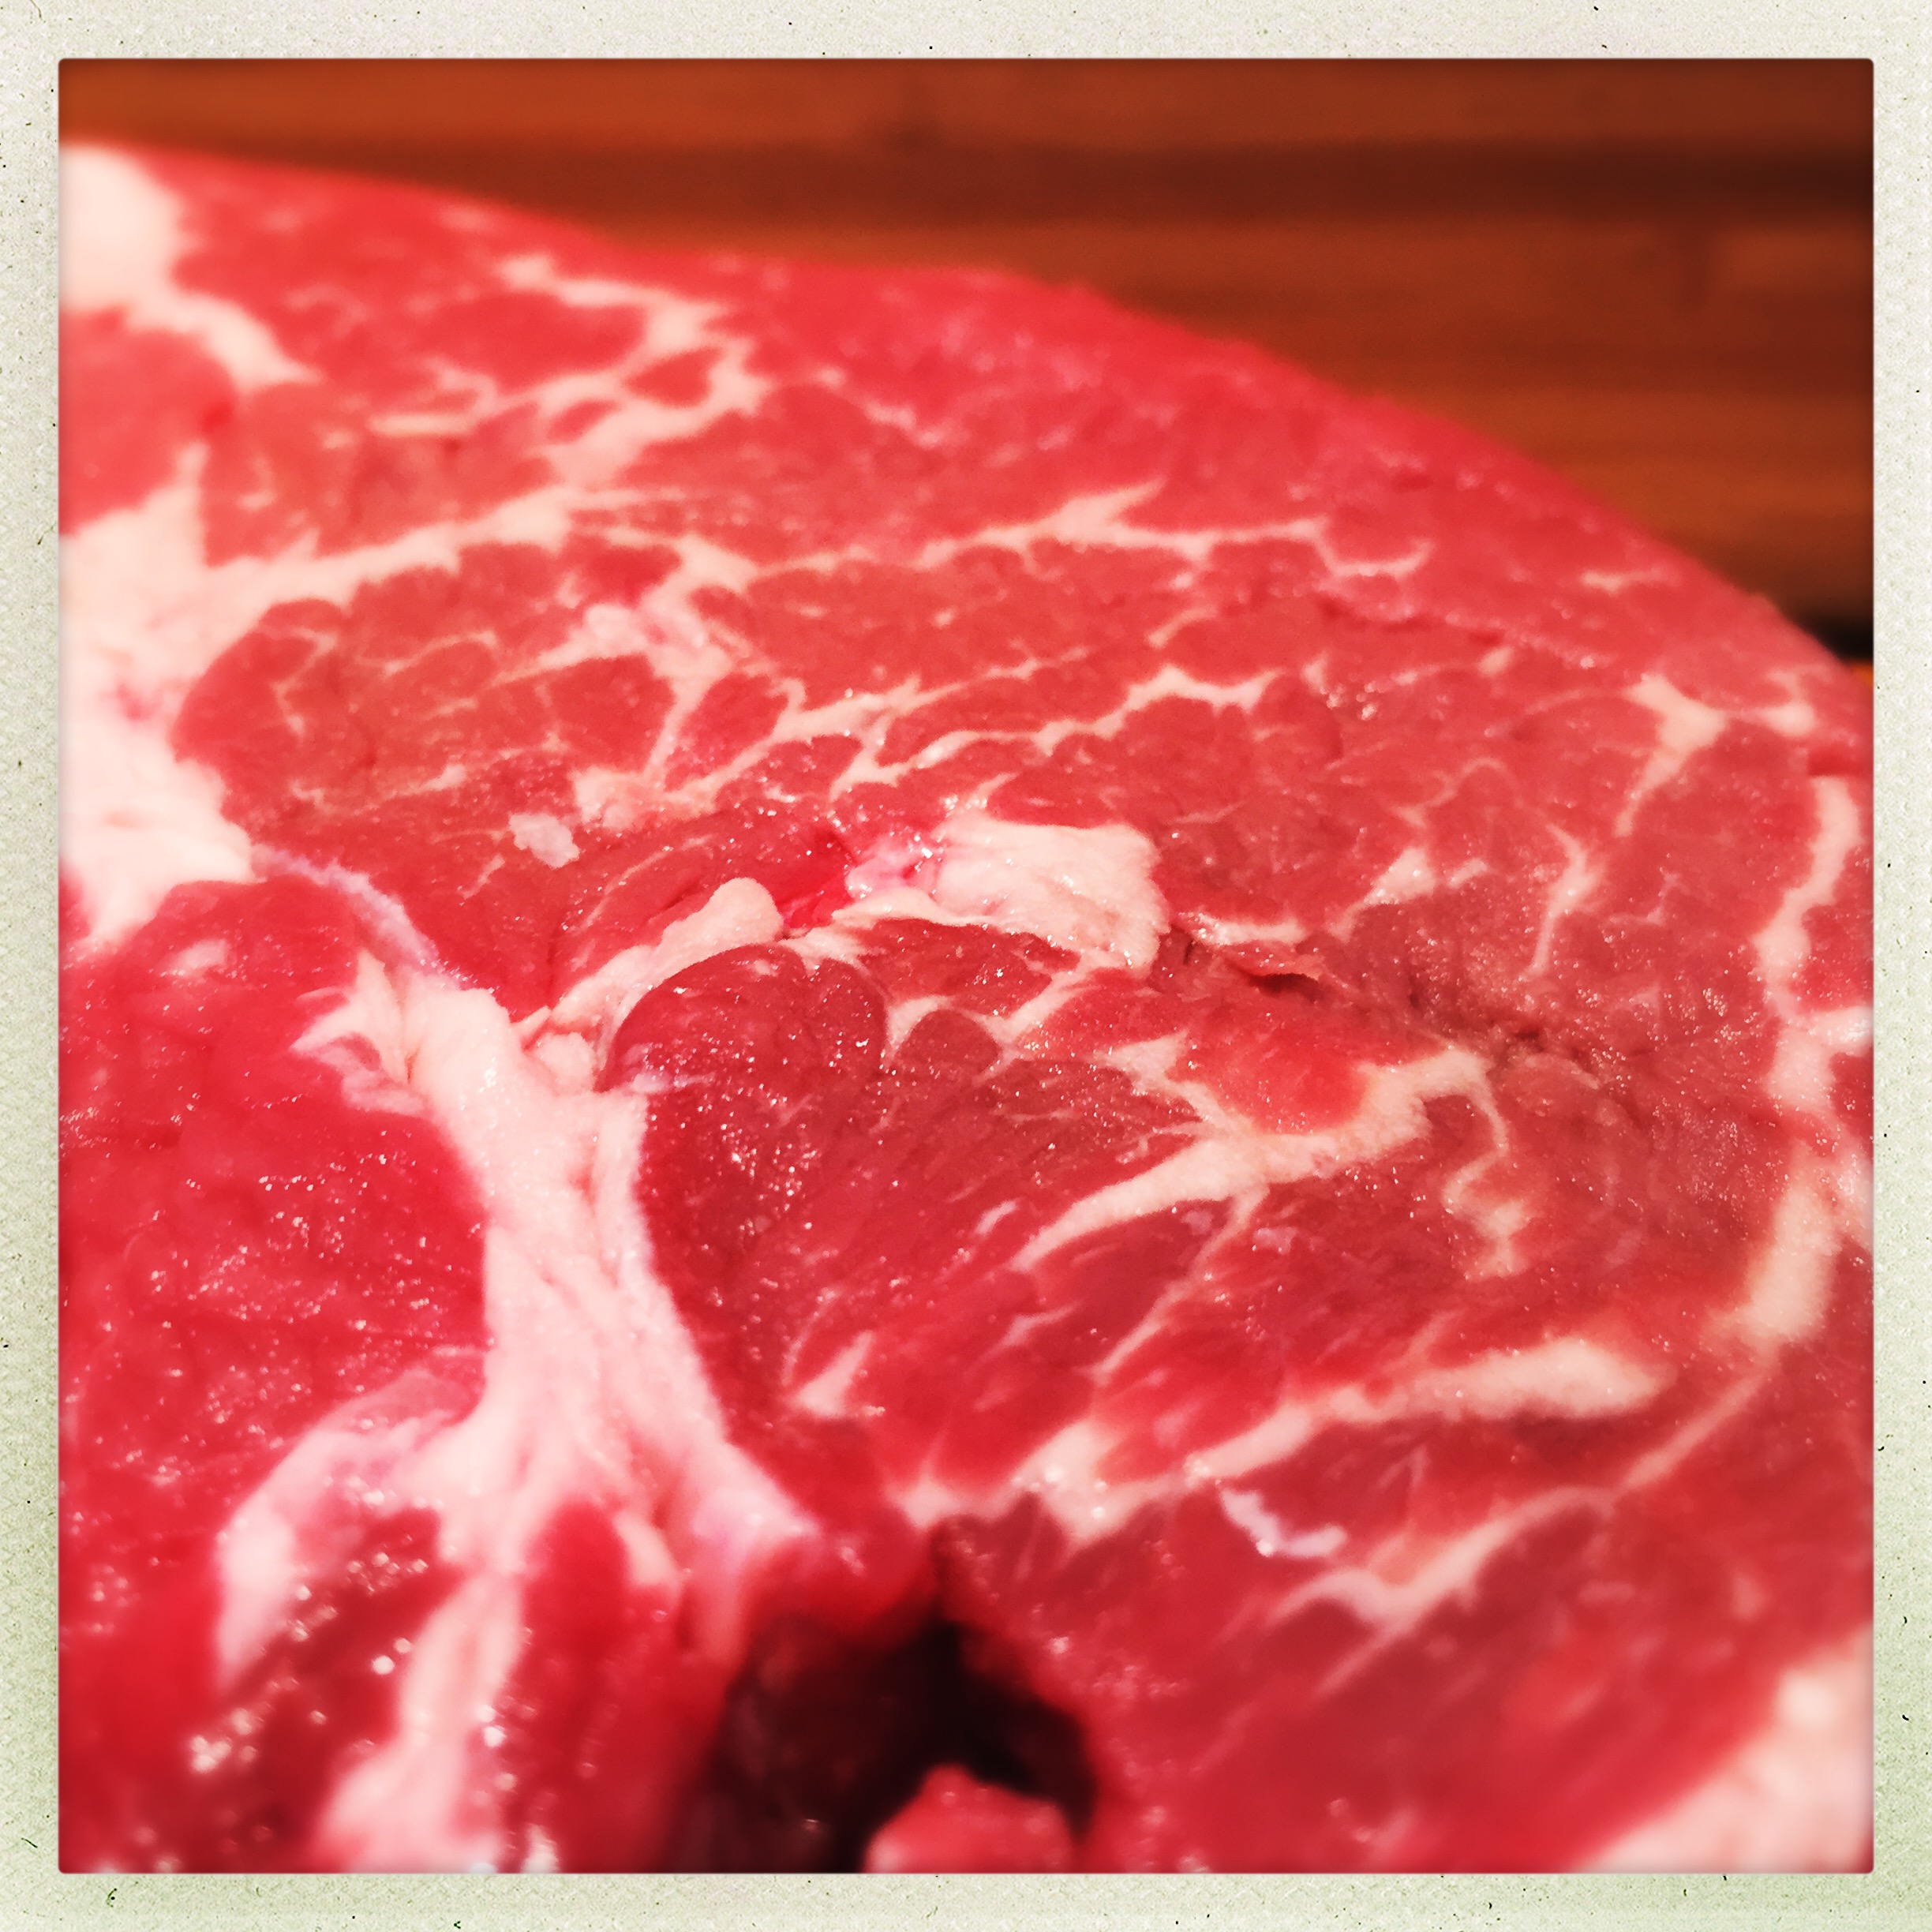
Known in BBQ circles as a chuckie, the chuck roast is the perfect piece of beef for the smoker. It lends itself to slow cooking. It comes from the shoulder of the cow, which makes it very similar to the pork shoulders I’ve smoked in the past. It can easily be pulled like pork. So I set out to use all of my normal pork smoking techniques on this gorgeous chunk of beef.

When I buy pork shoulders, I usually look for something in the eight pound range. Given that beef cooks slower, I went with a four pound chuckie, which I figured would let me start a little later in the day and still have something on the table by dinner.
Chuck is a well-marbled cut. This is what allows this cut to be so forgiving on the smoker, because all that fat melts slowly, keeping the meet juicy.
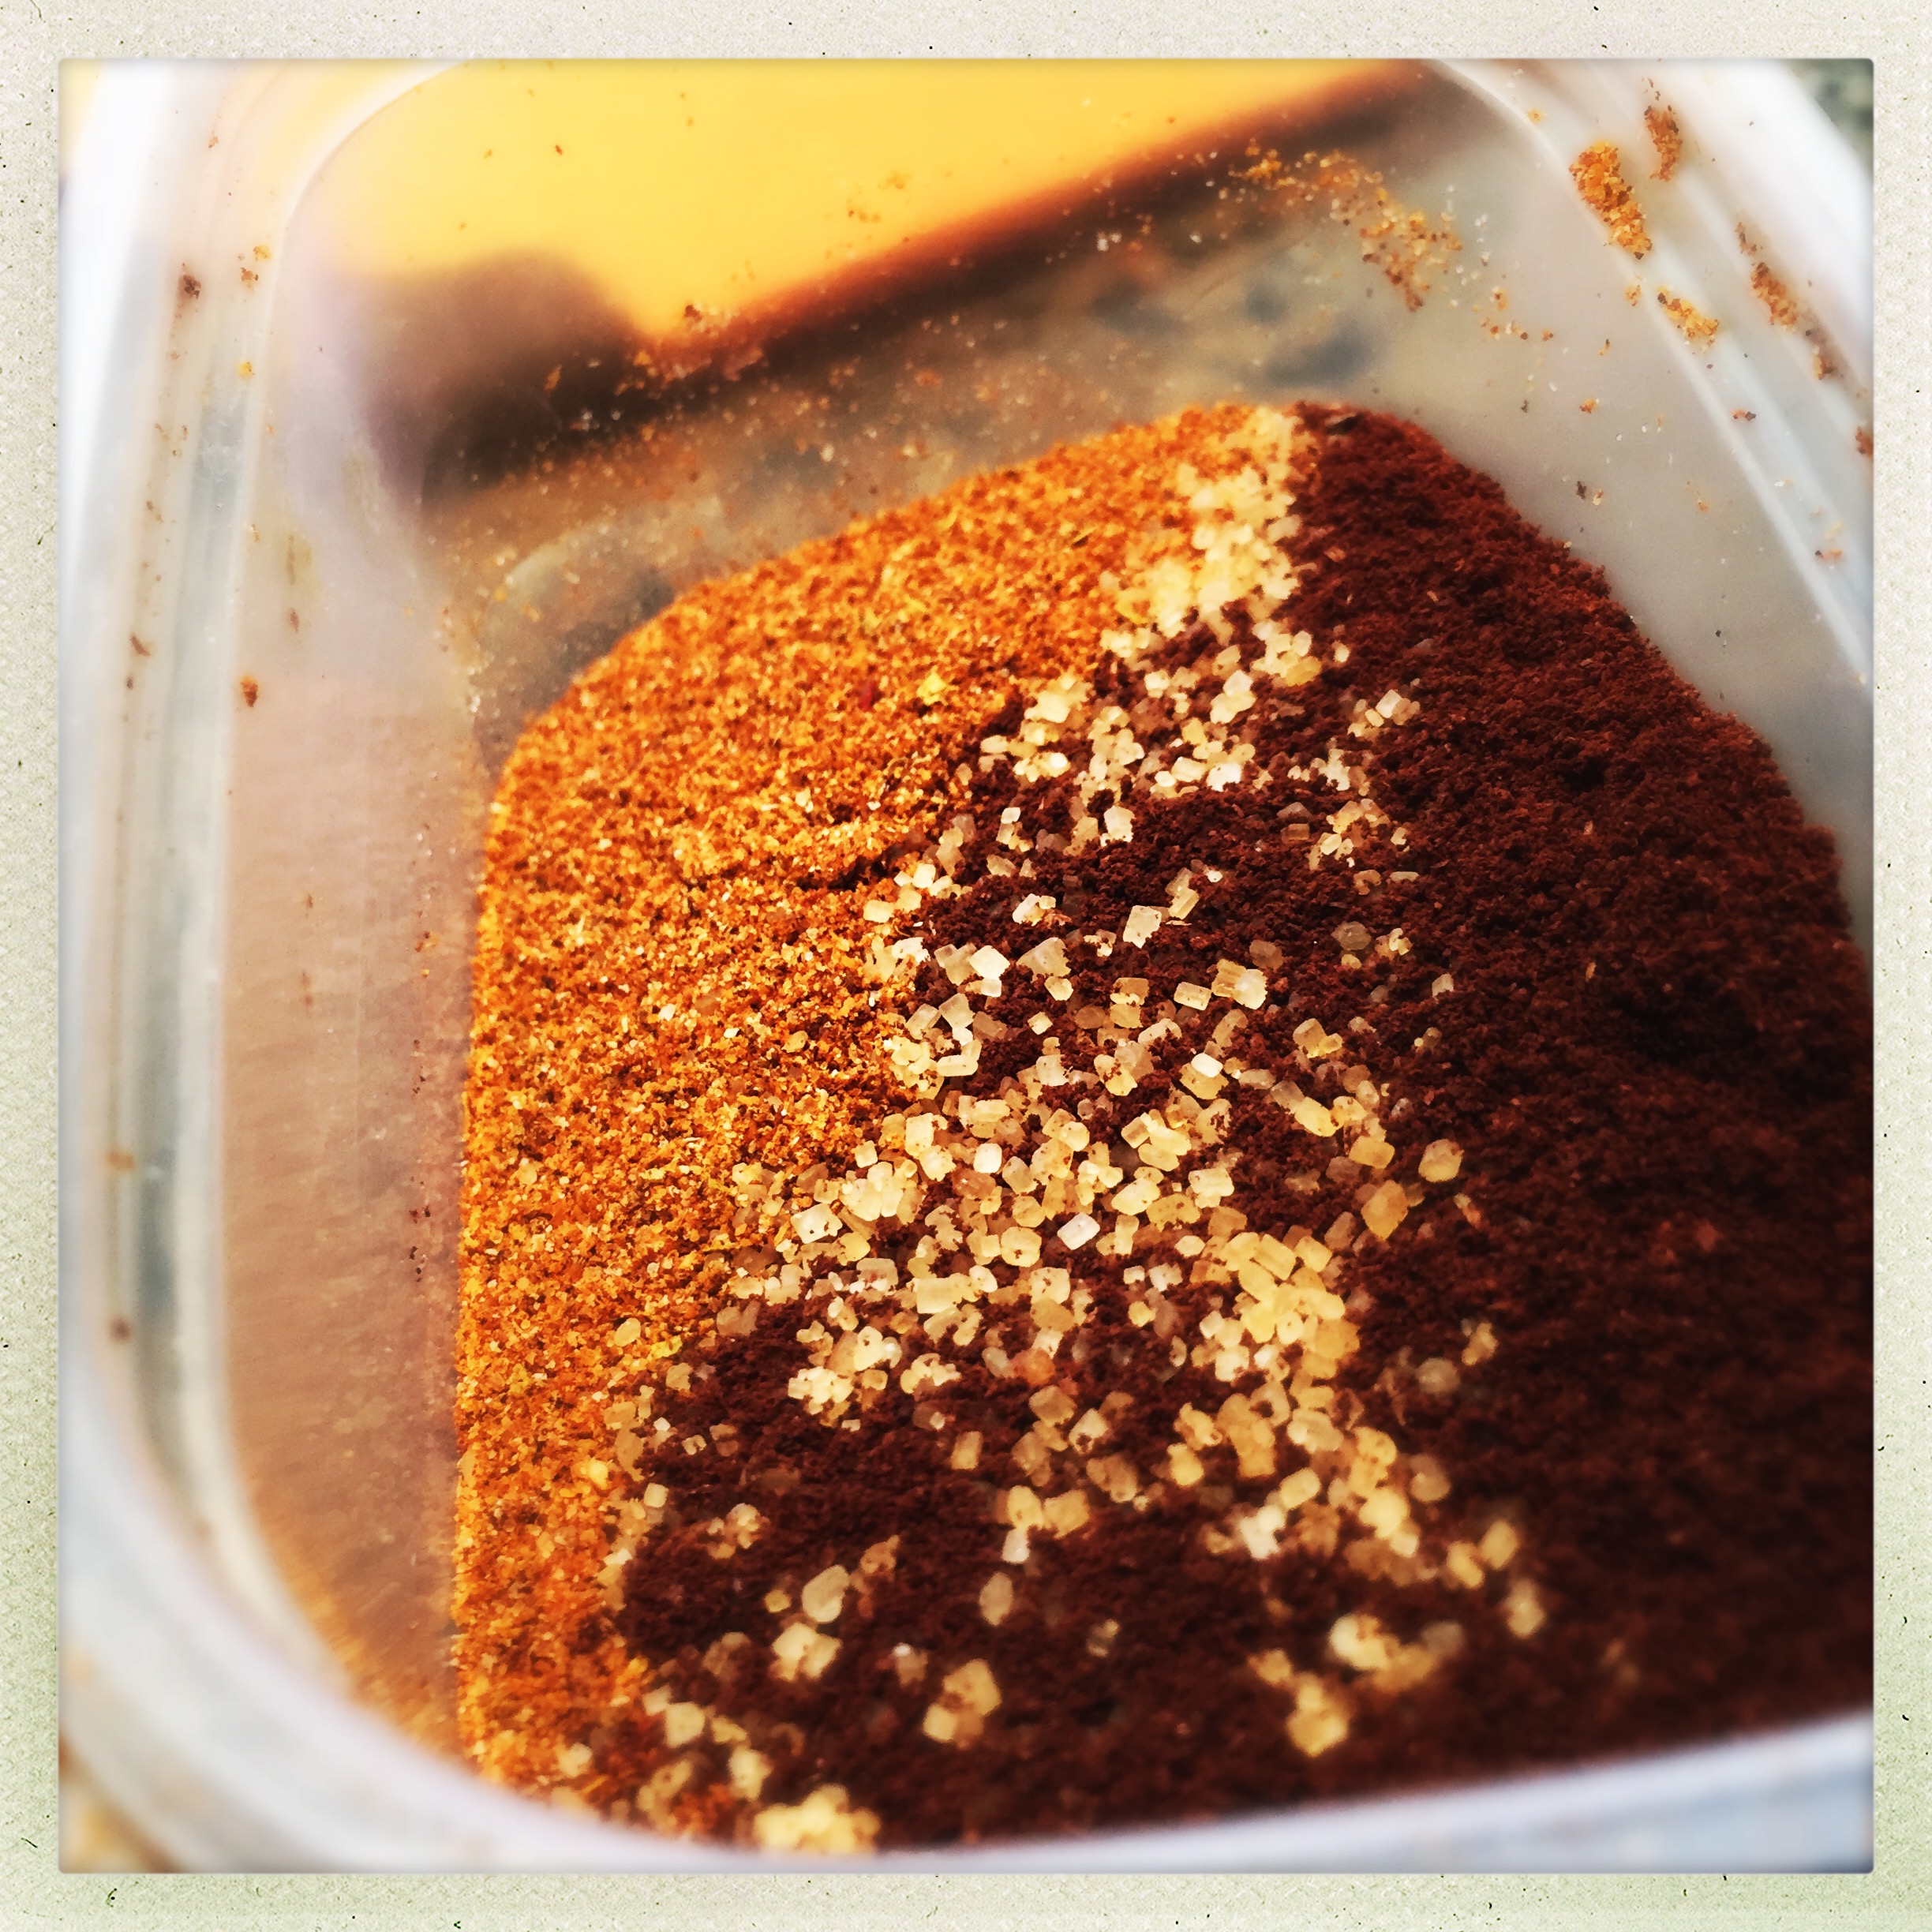
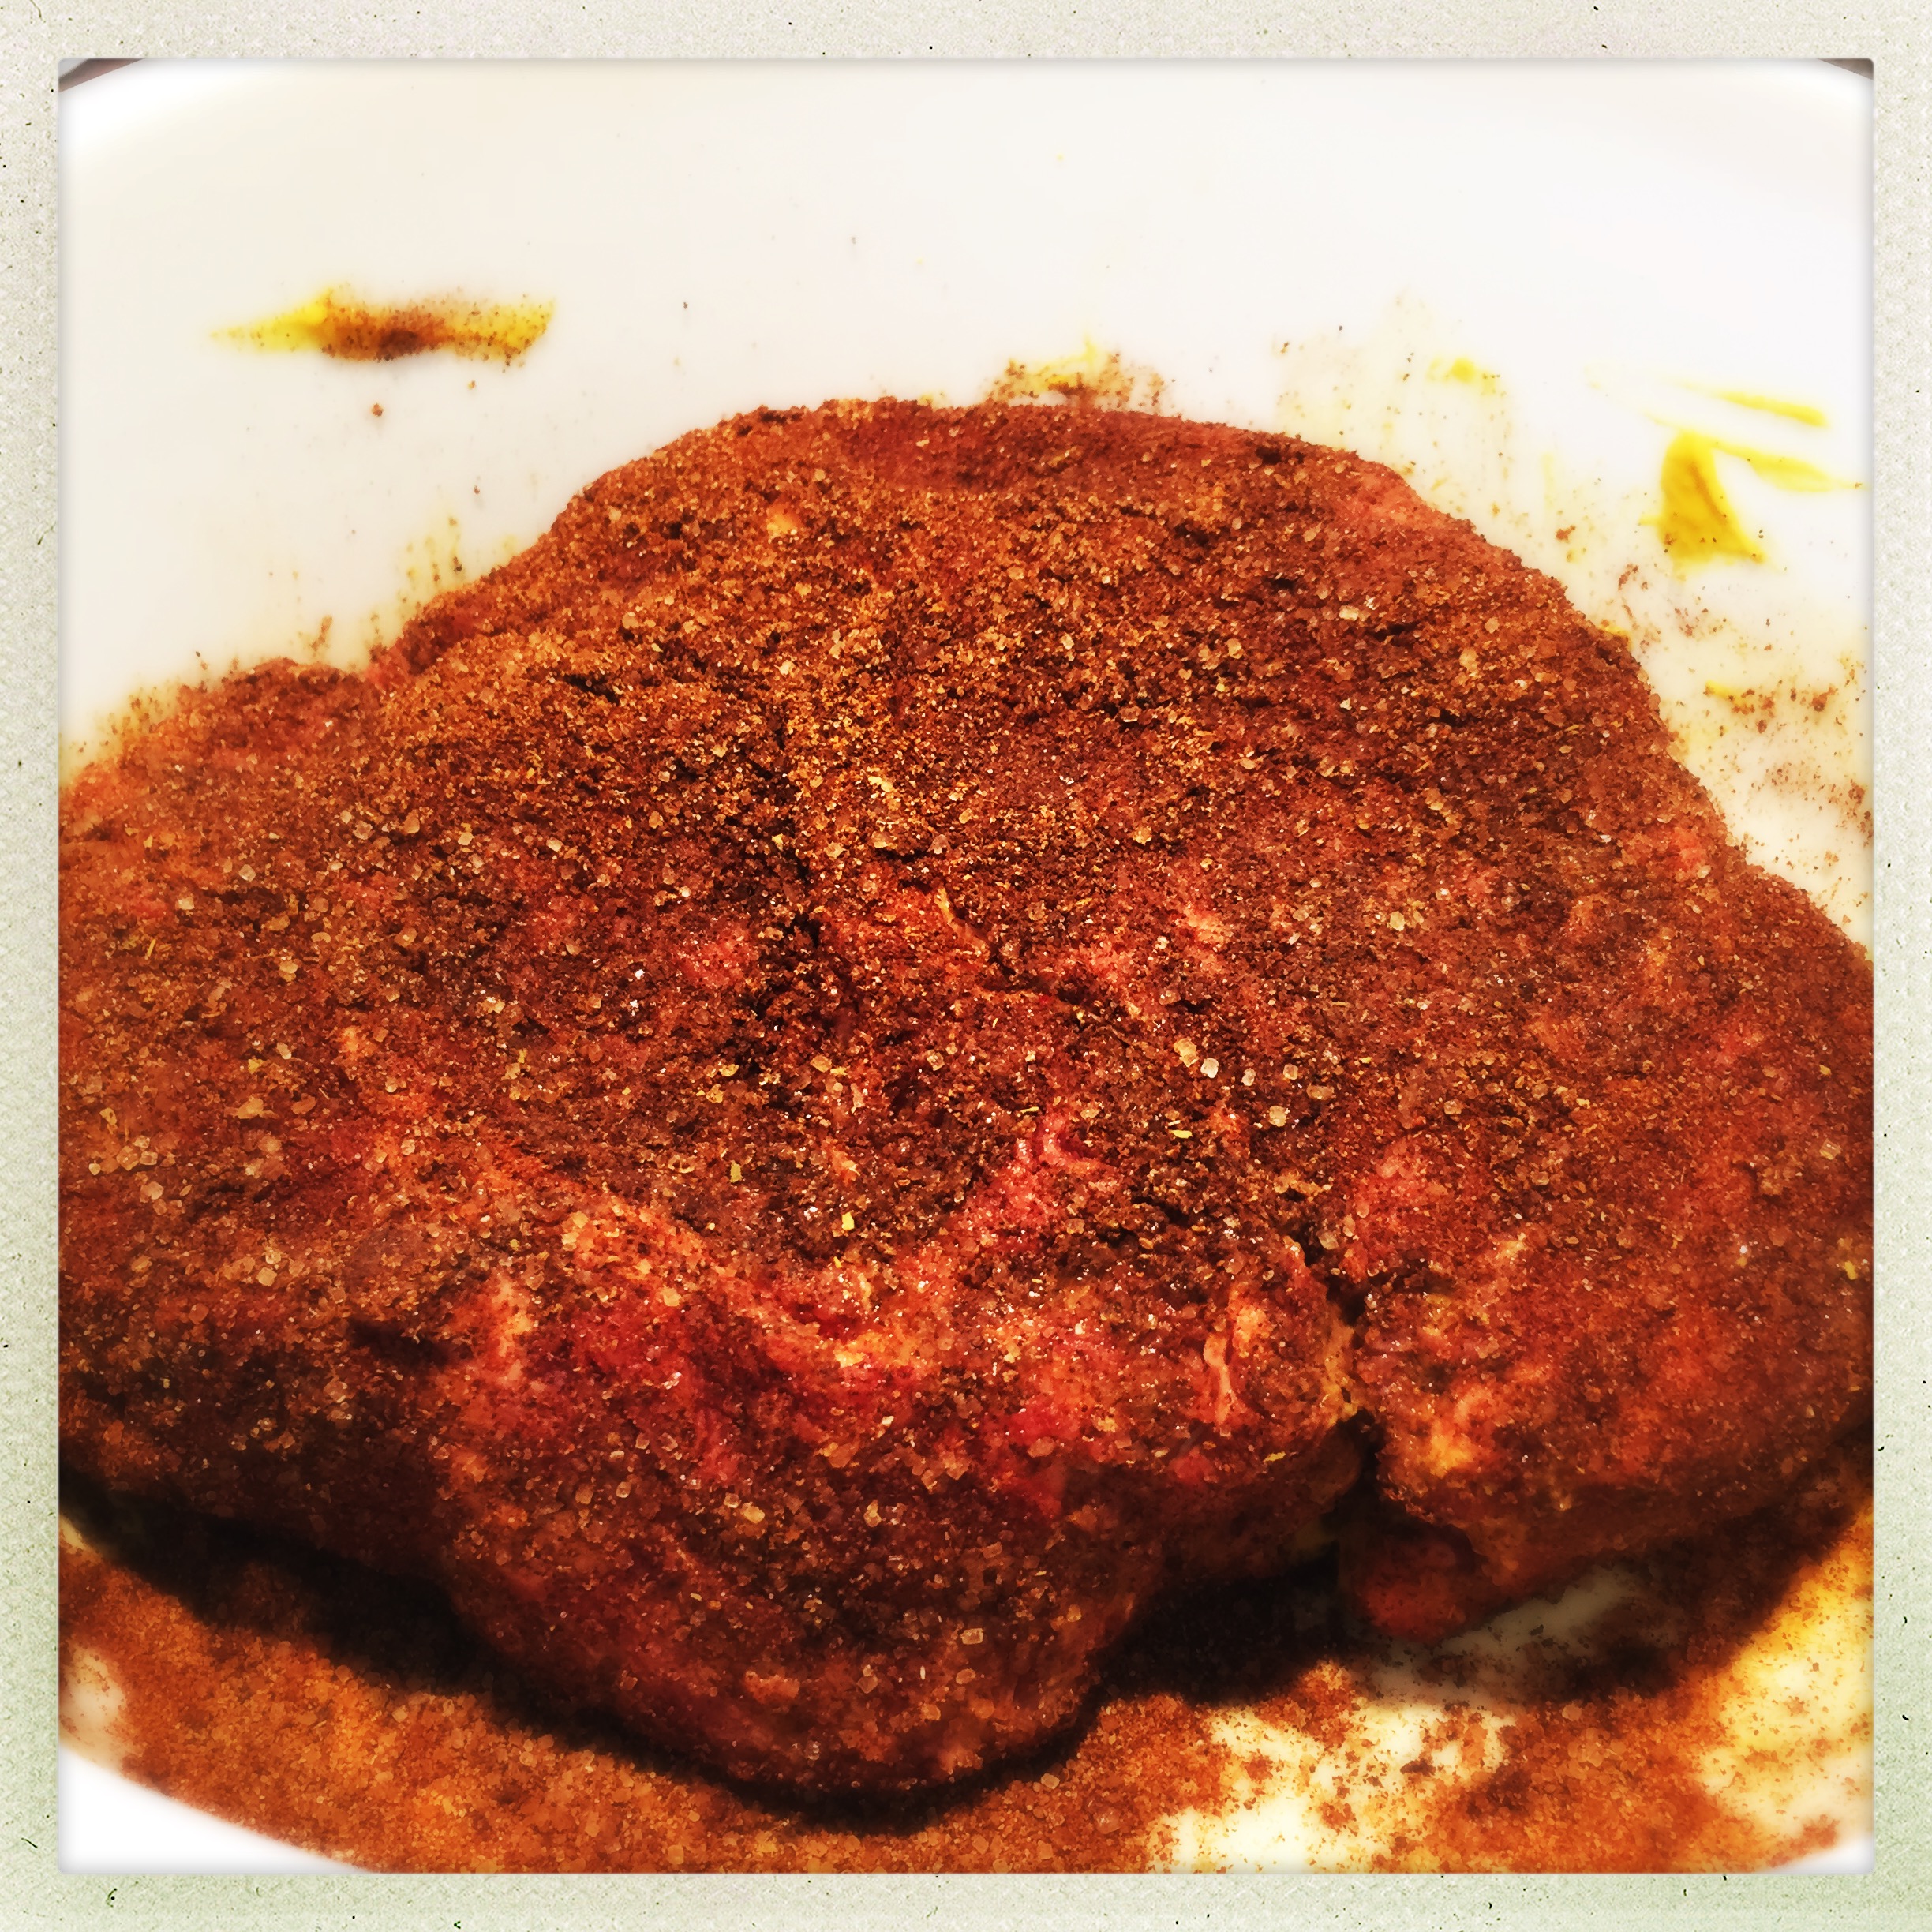
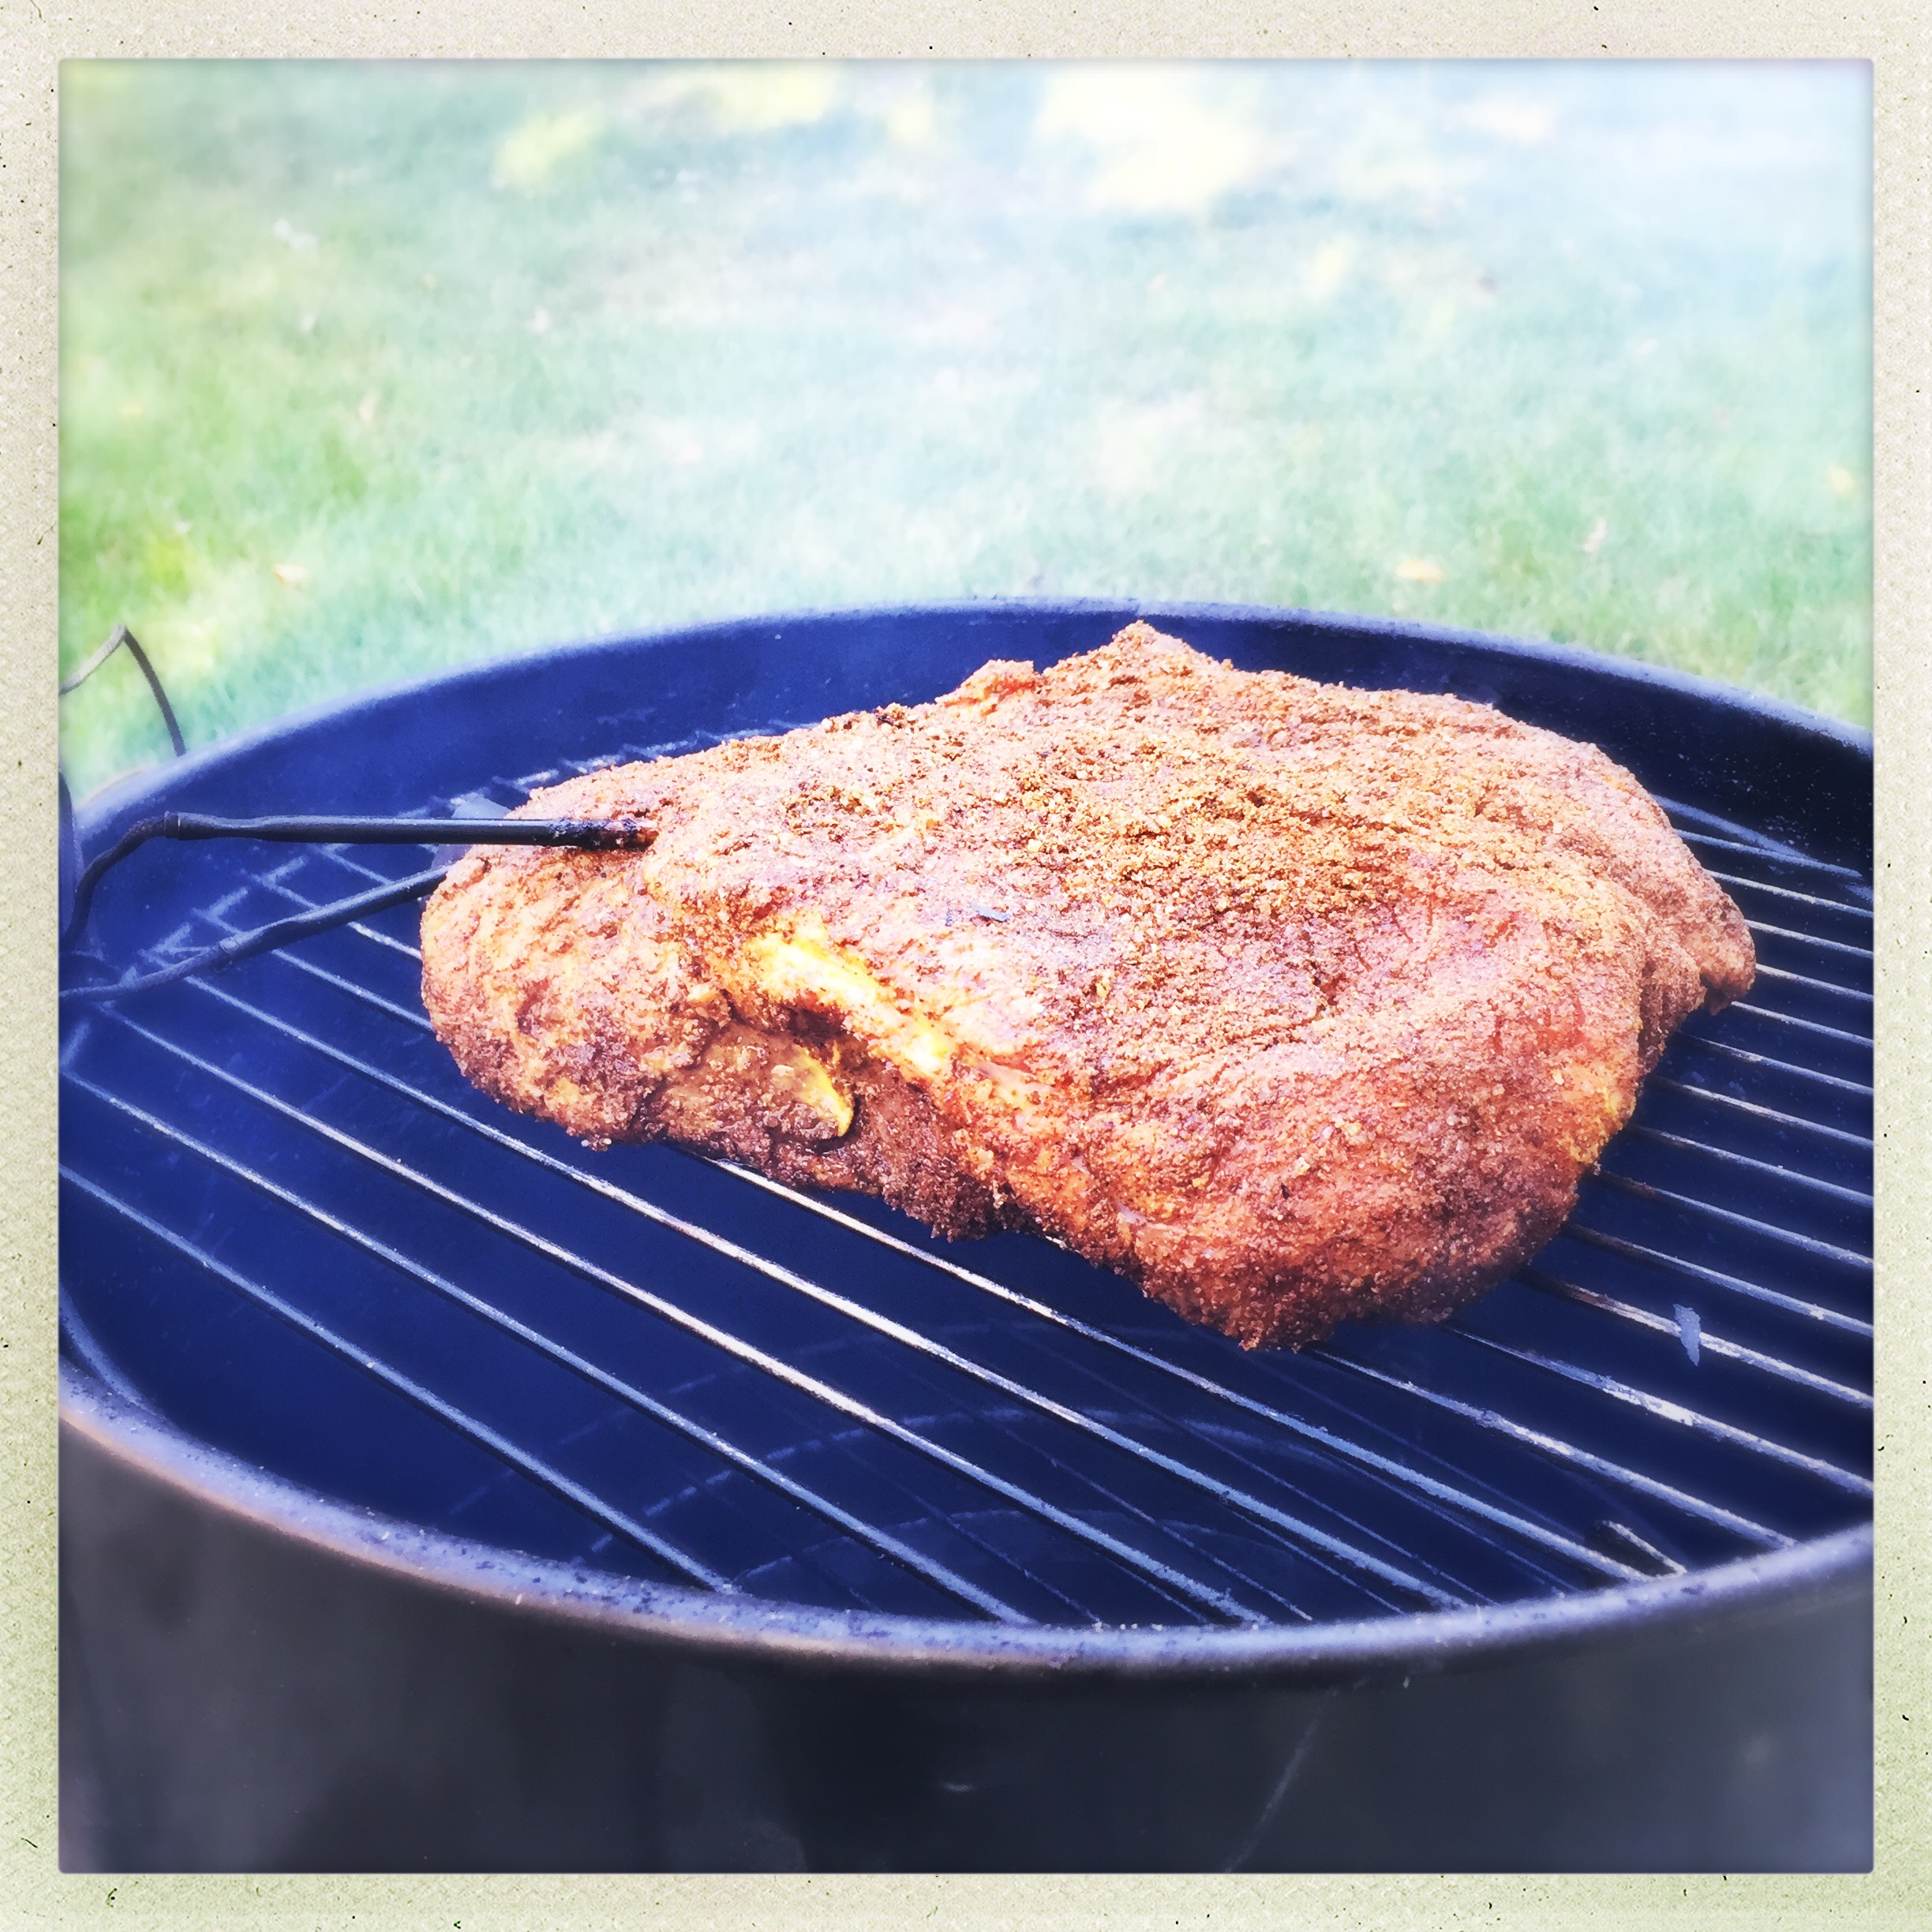
I prepped the meat exactly the same as a pork shoulder, with a few minor adjustments. My basic BBQ rub is 2 parts Old Bay, 1 part raw sugar and 1 part fine ground coffee. For the beef, I wanted a little less sweetness, so I went with about half as much sugar as usual, and bumped up the coffee a bit.
I rubbed down the meat with some plain yellow mustard to help the rub adhere
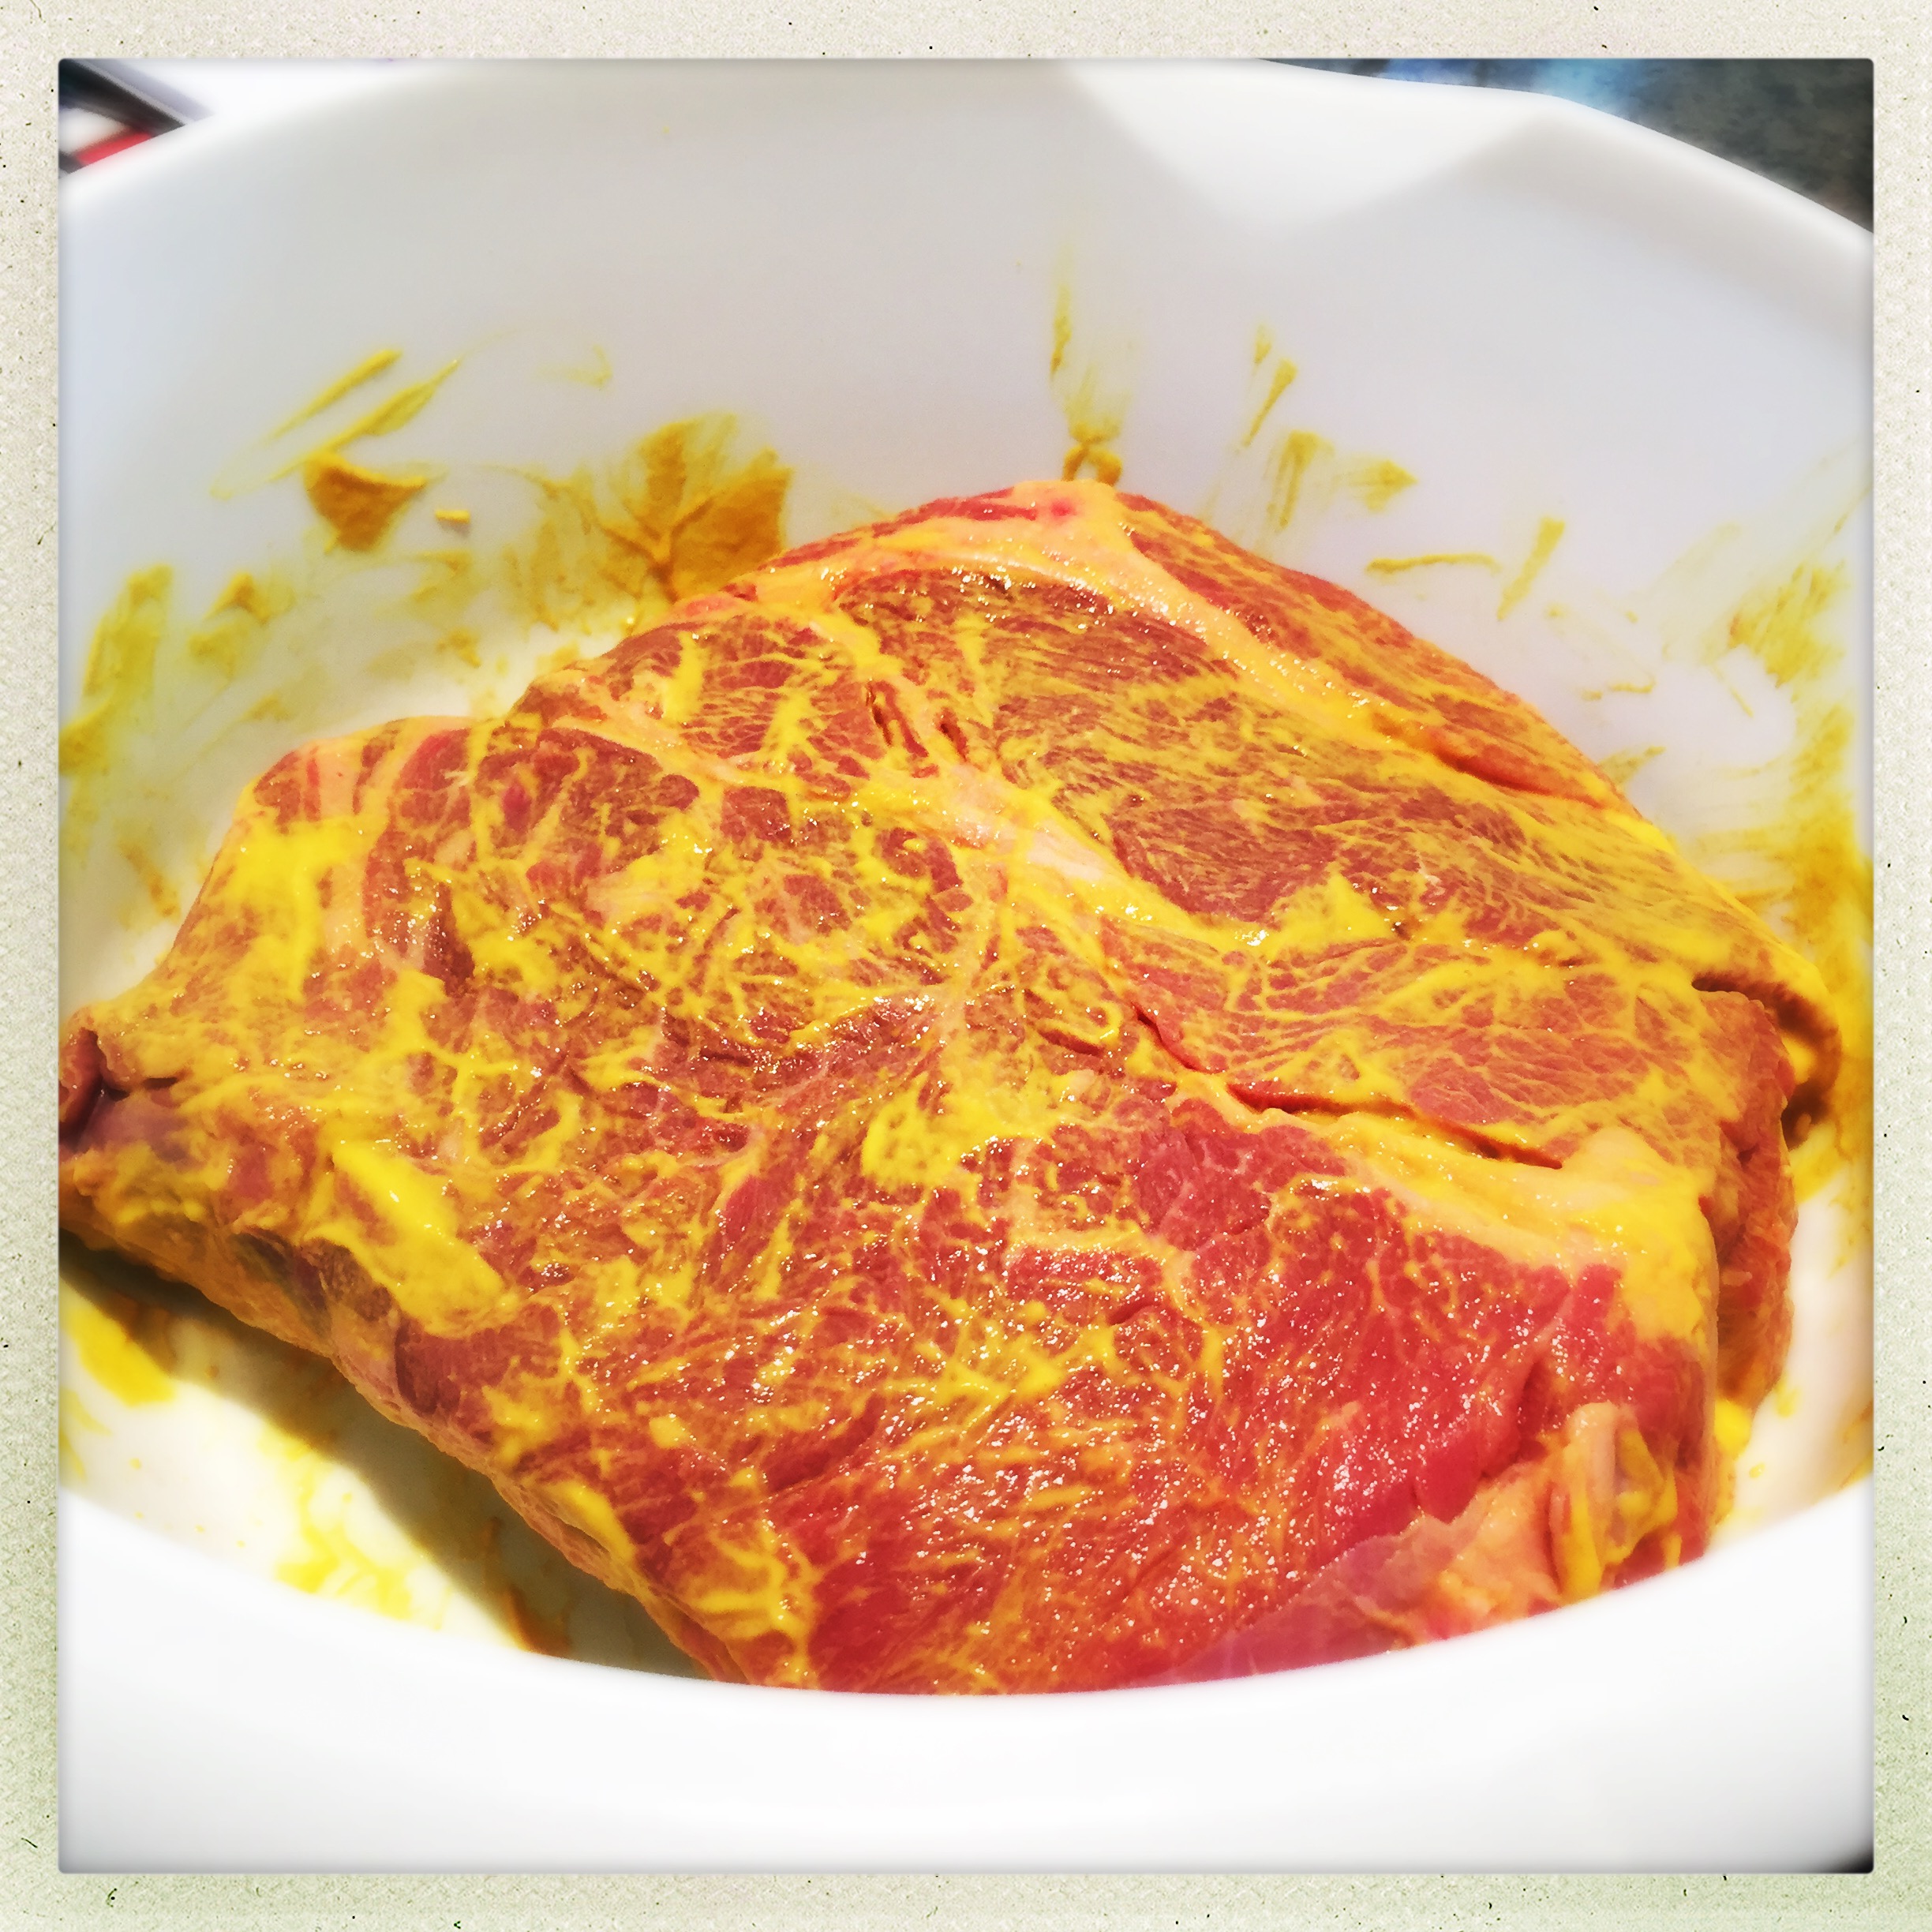
I coated the meat on all sides, including into the crevices, with a moderate amount of rub. Not quite as thick as I do on my pork, but still covering all surfaces with at least some of the spice rub.
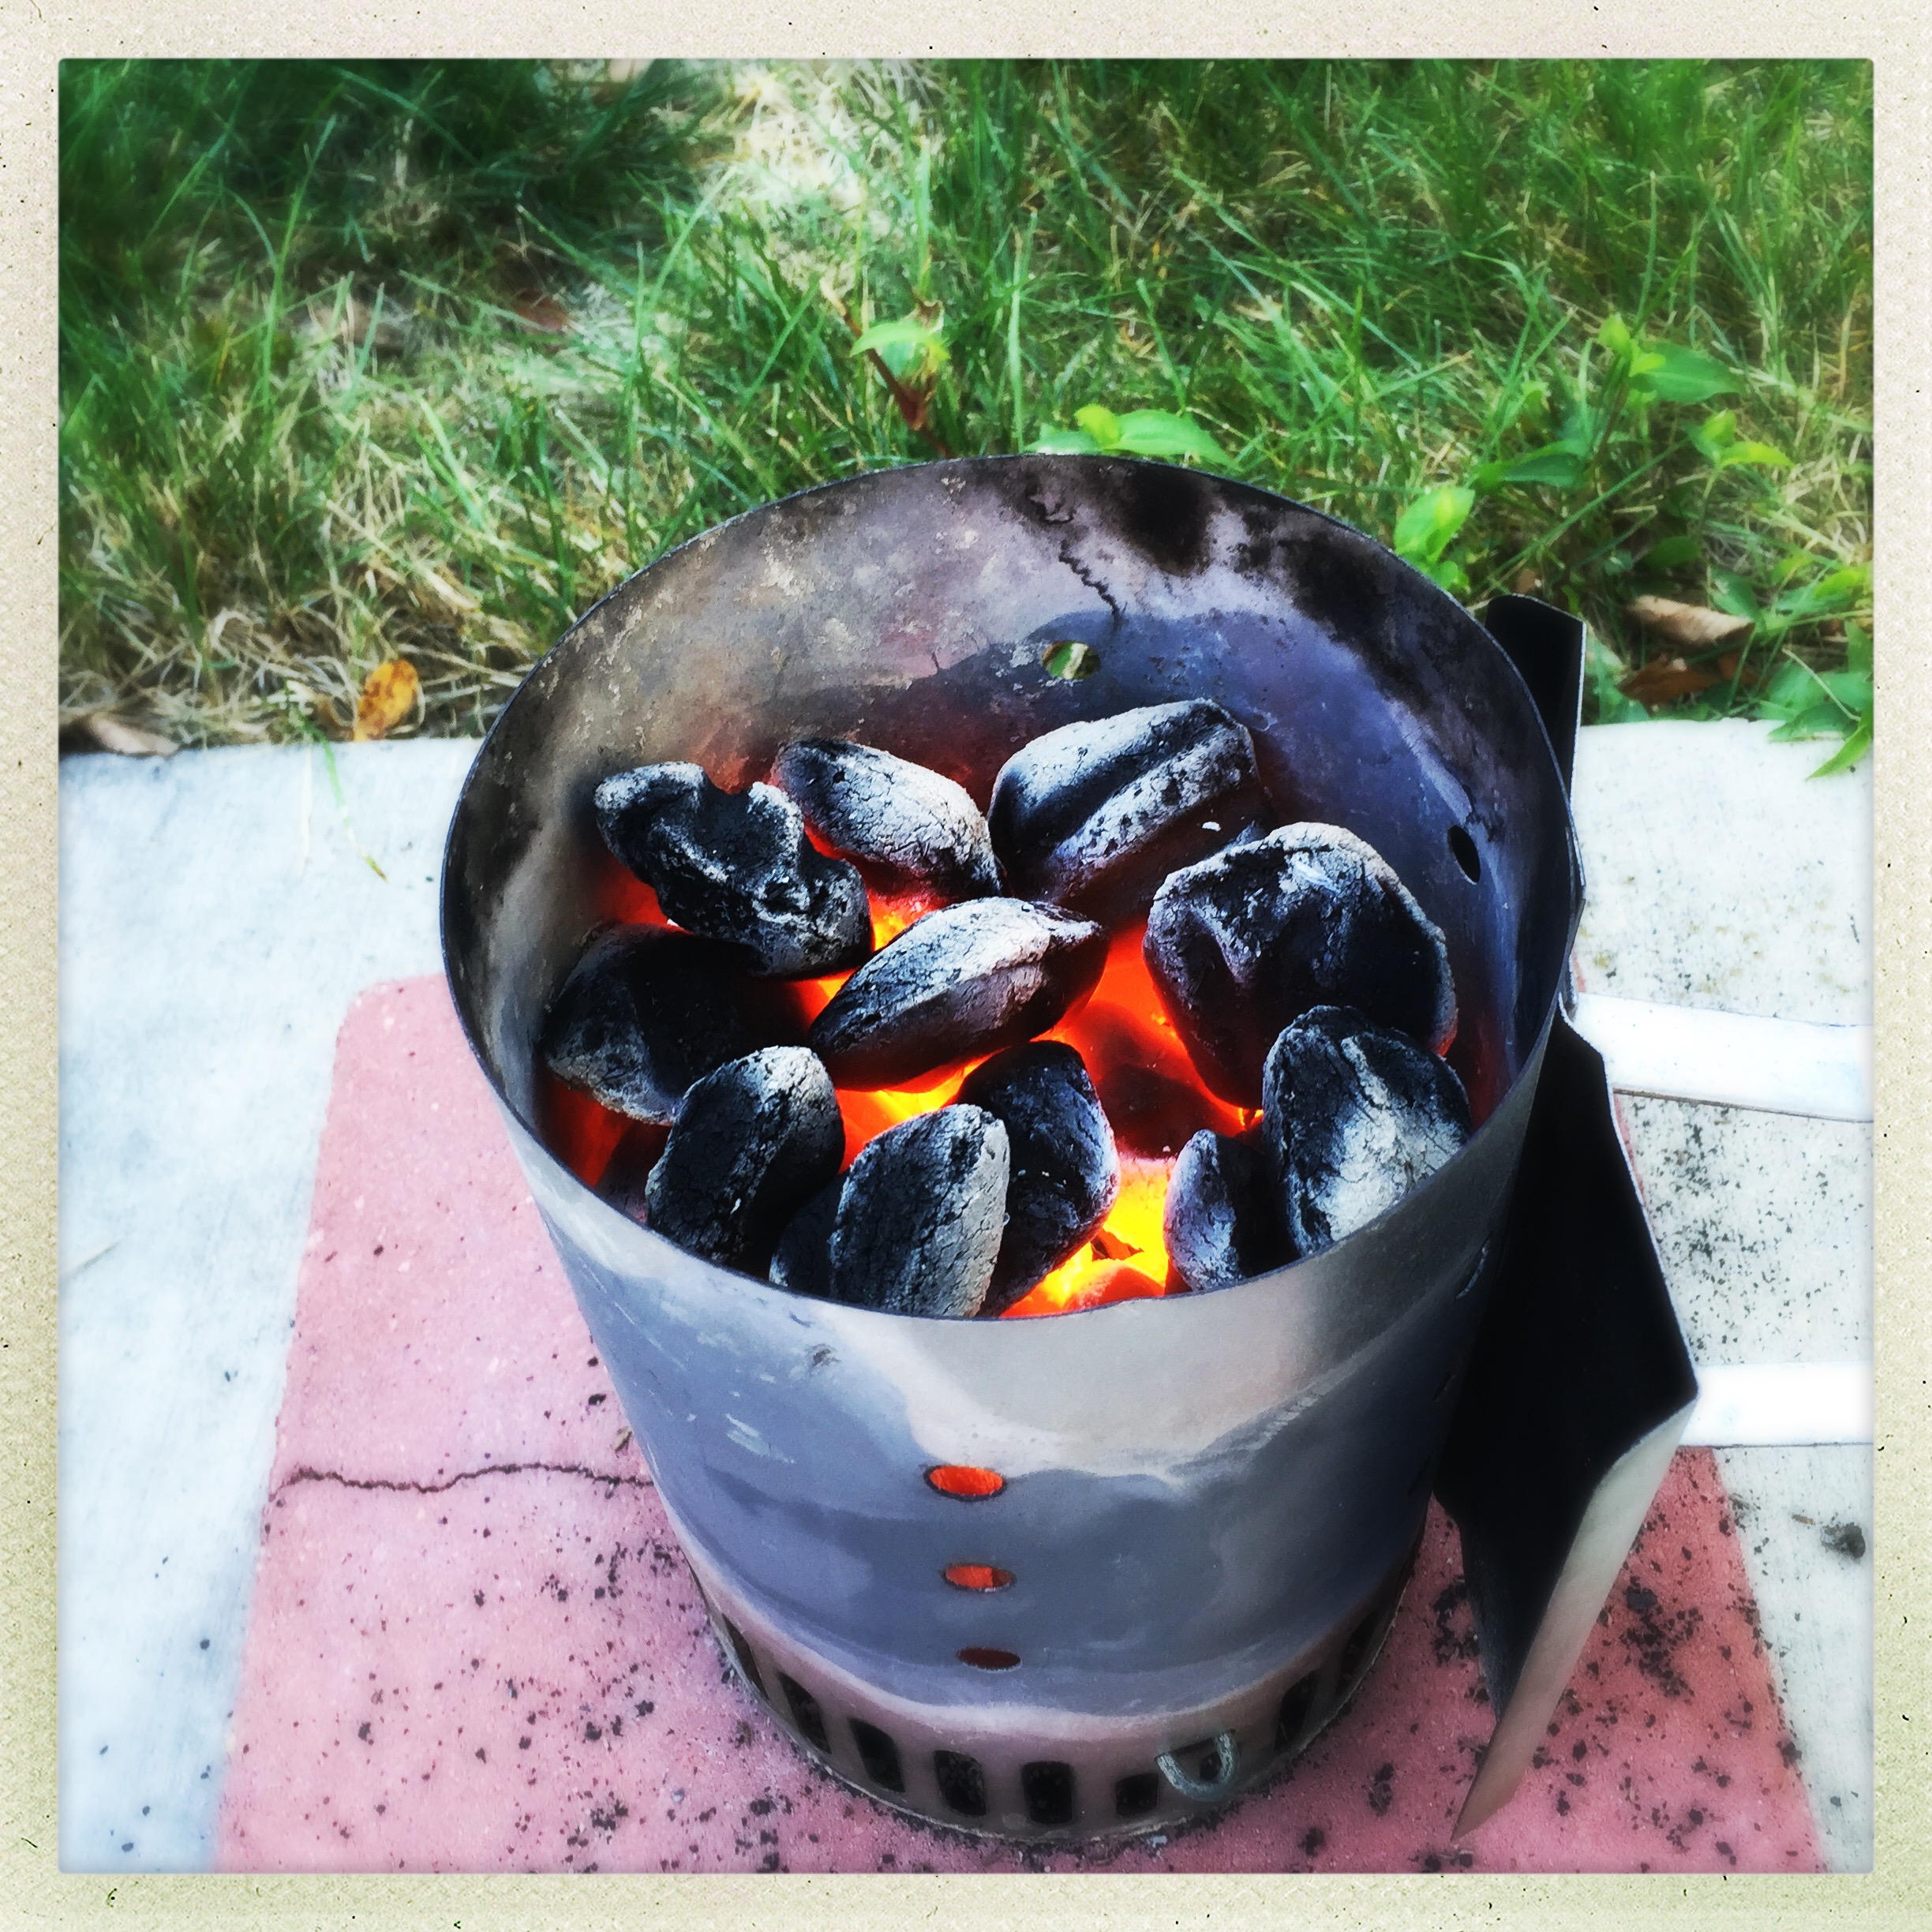
I let the meat rest in the bowl after prepping it, and I headed outside to get the smoker going. I lit a small chimney of charcoal first, to get some coals hot.
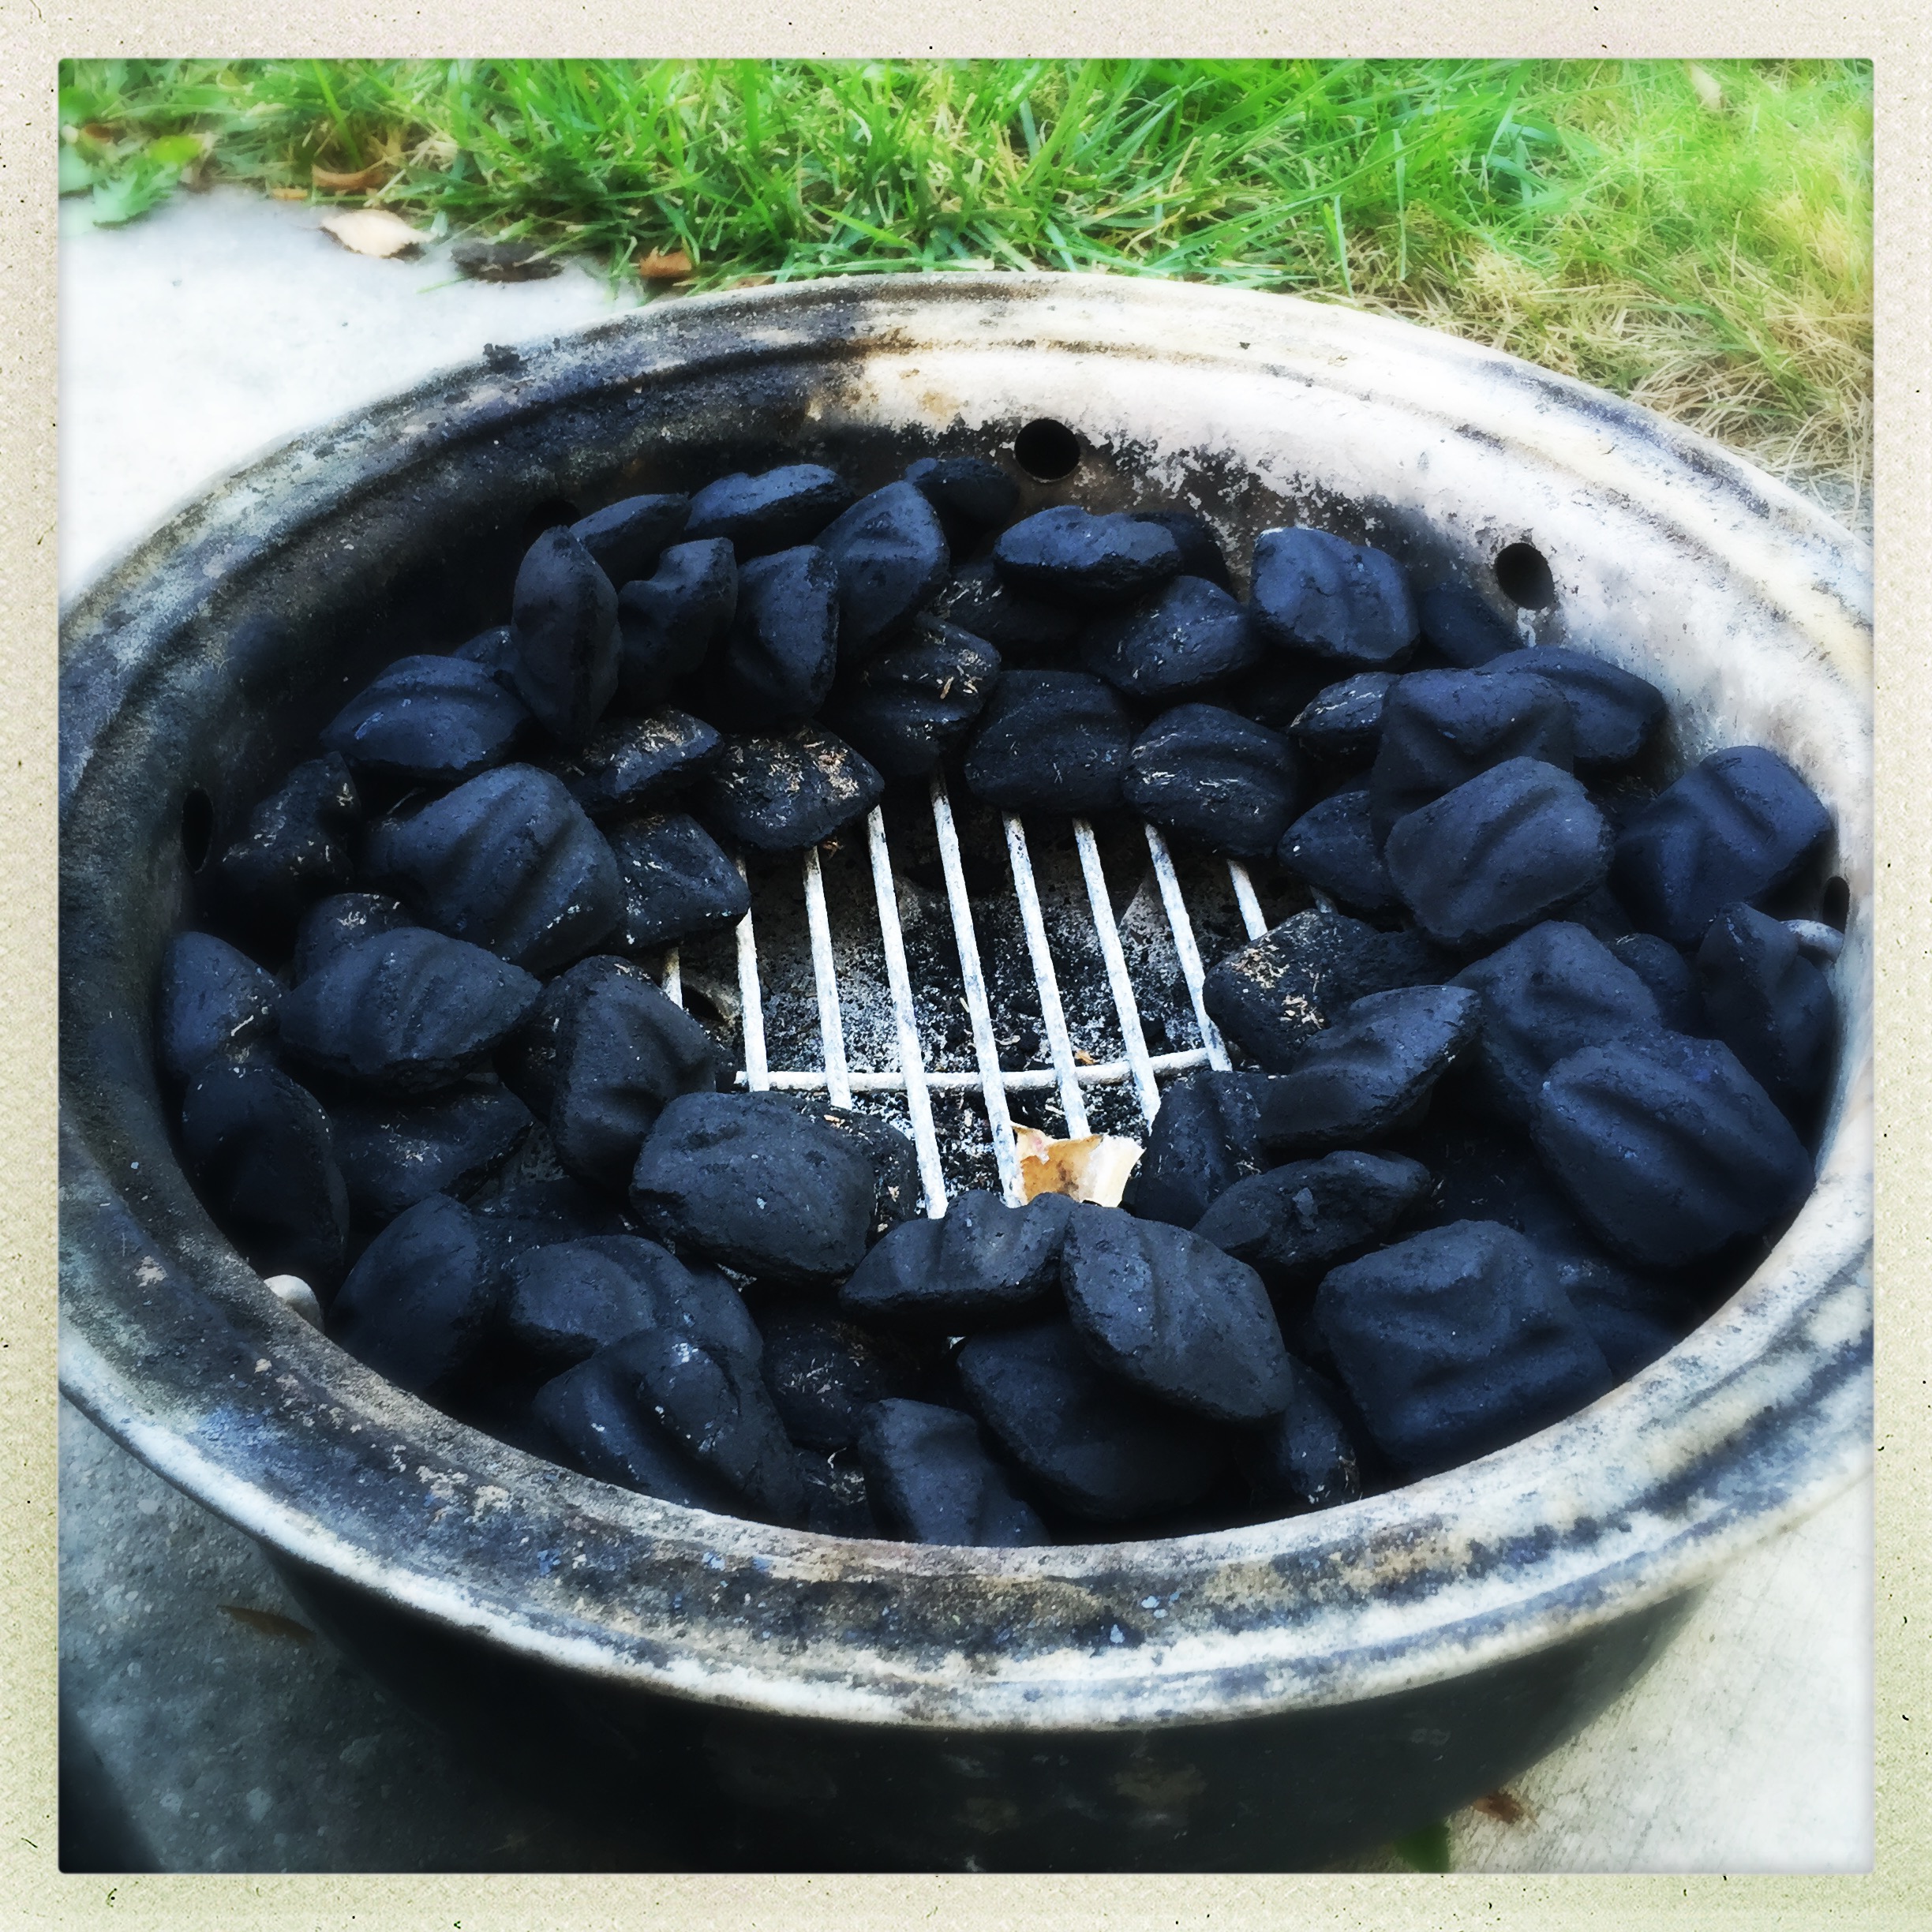
While the coals were getting hot, I loaded a ring of unlit coals into the charcoal basket of the smoker…
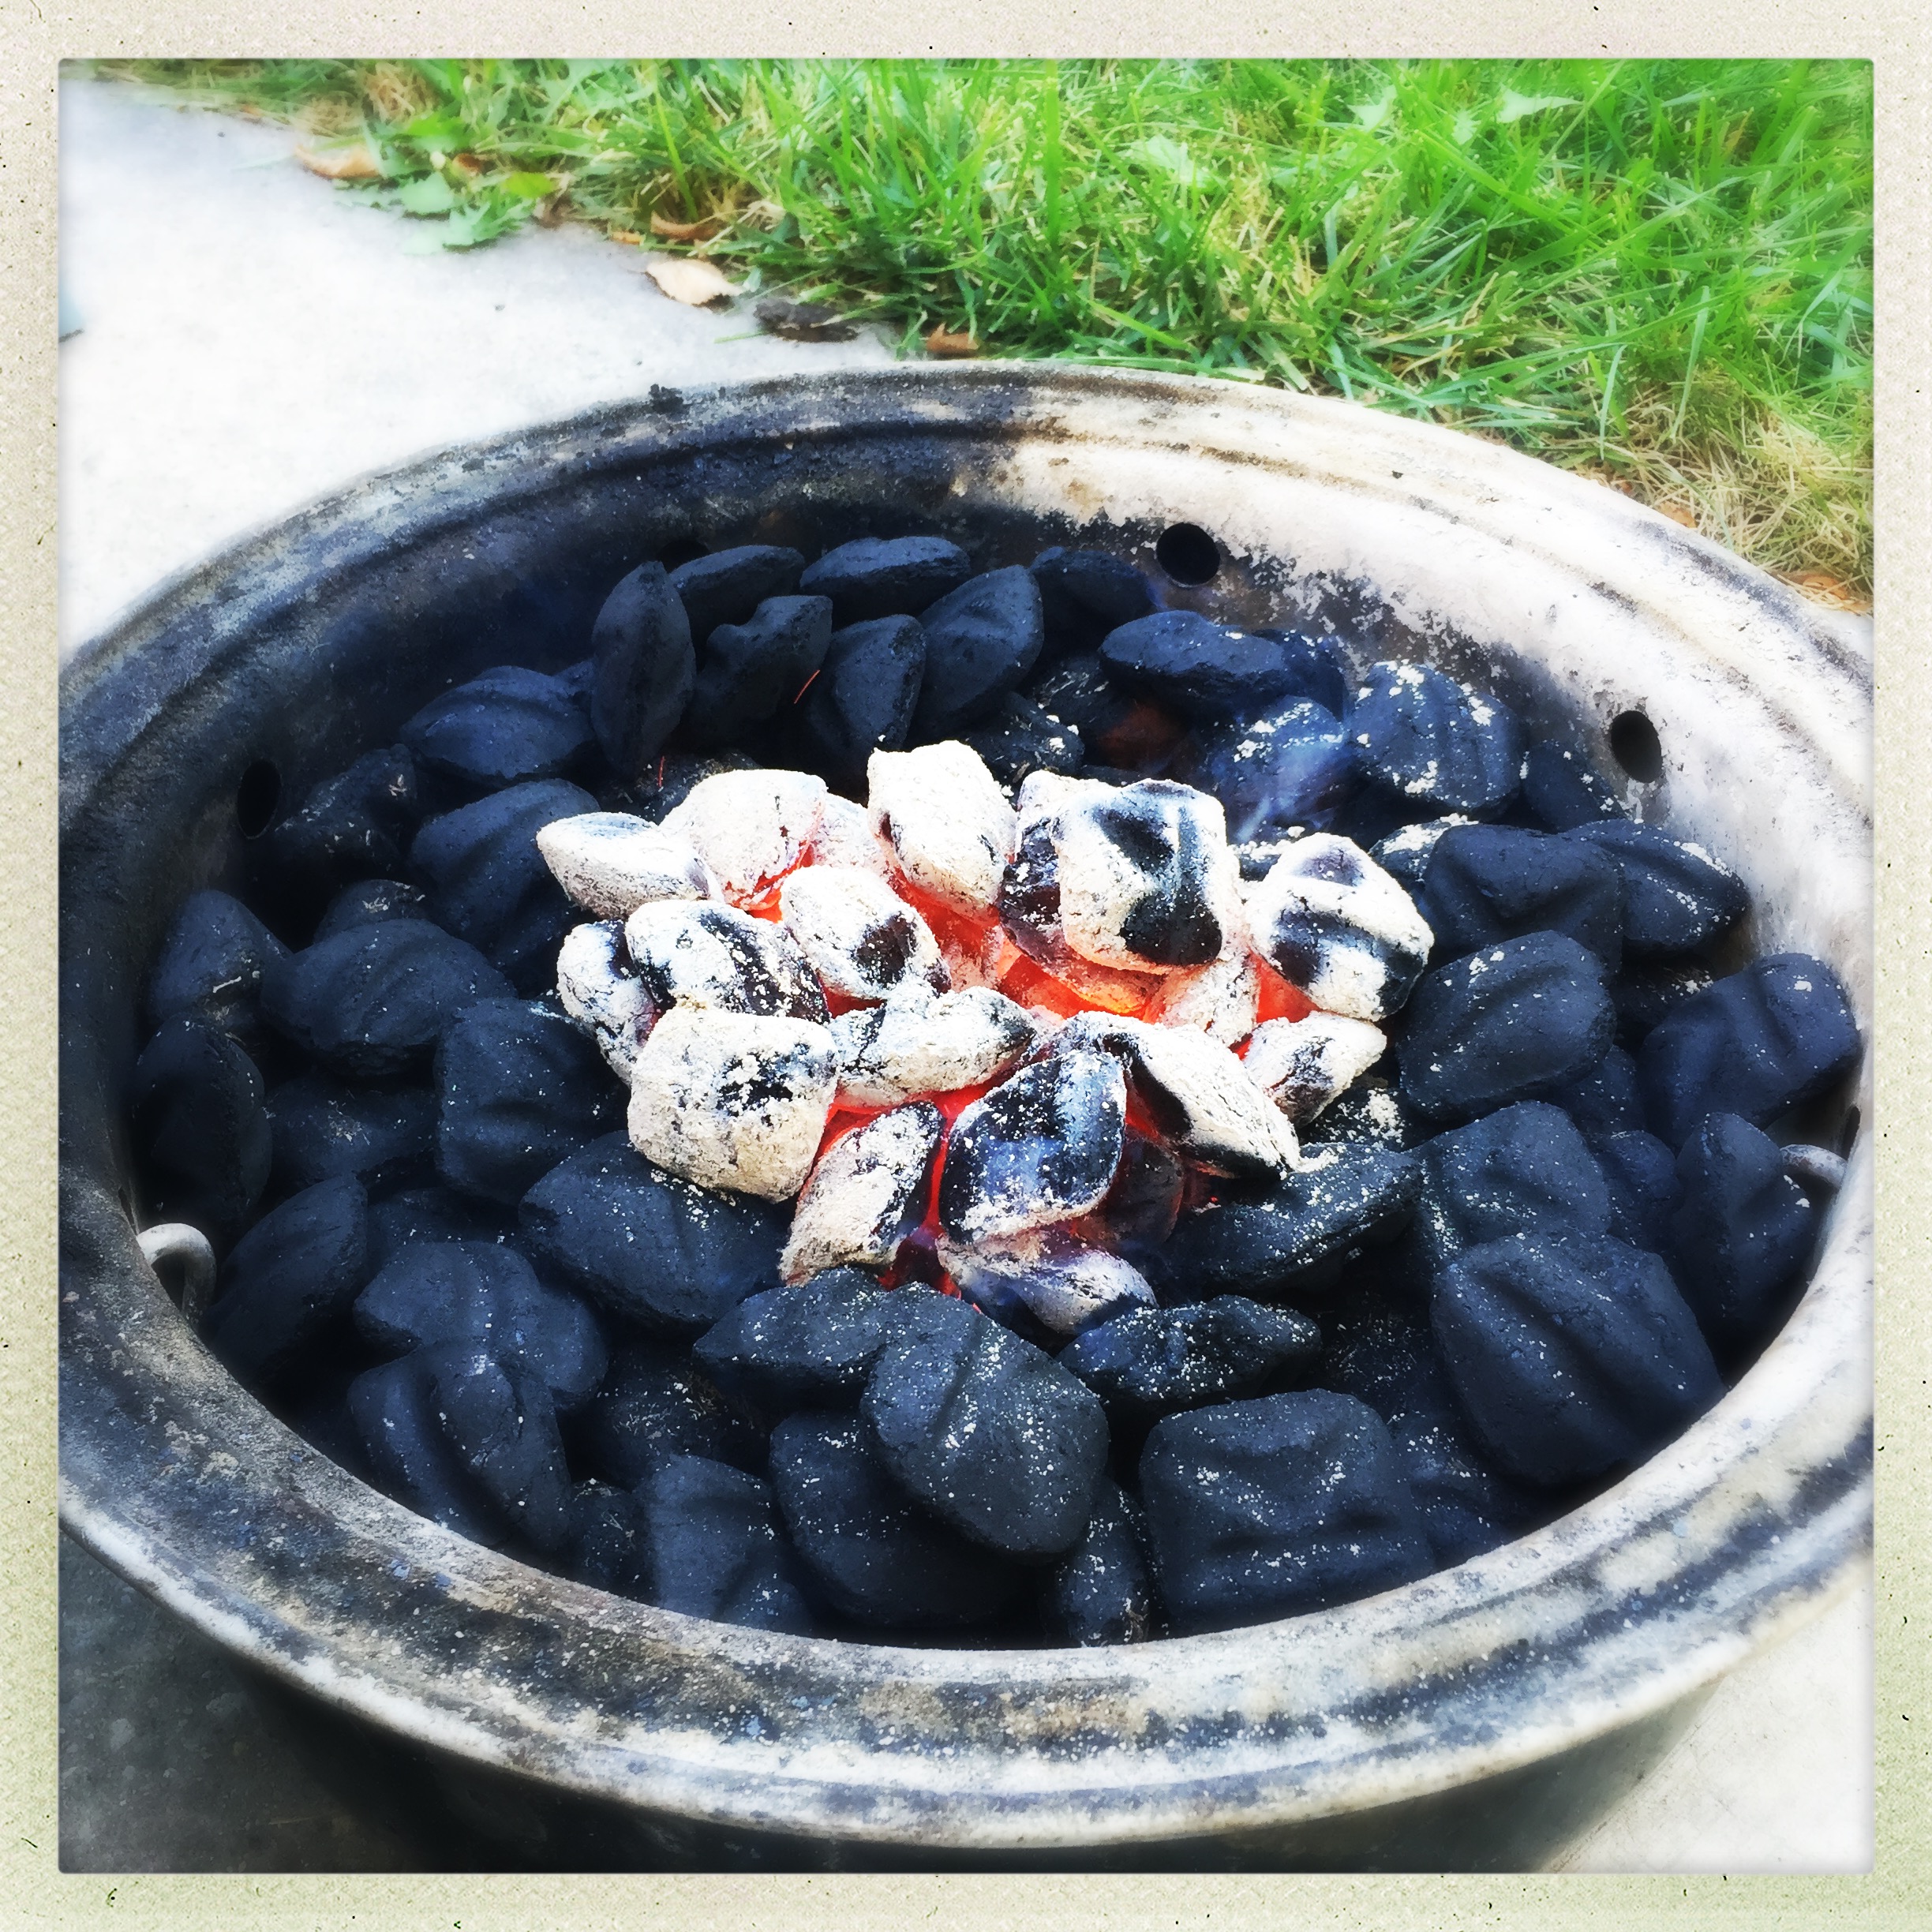
…and placed the hot coals in the center of the ring so that they would slowly ignite the remaining coals, keeping a steady temperature over the long cook time.
Once the smoker reached a steady temperature, it was time to add a little wood and get the meat on. I went with a mix of apple and maple for the wood. The maple was leftover from some tree pruning last year, and the apple chunks were huge, so I wouldn’t have to add wood as often.

I dropped the meat onto the top rack, inserted a probe thermometer, and let the smoker do it’s think.
There’s a lot of debate about temperature when it comes to BBQ. My smoker likes to sit around 300, which many think is too hot. It’s much easier to work with the temp you have than to fight it, though, and the results have always been delicious.

As long as I have my dual probe thermometer running, I can keep track of the temp in the smoker and the temp of the meat. For this cook, I planned to wrap the meat in foil at about 160 degrees and pull it out around 205.
It took 4 hours to get up to 160, which gave me plenty of time to watch the birds in the yard, and try to figure out why no cardinals were out and about today…
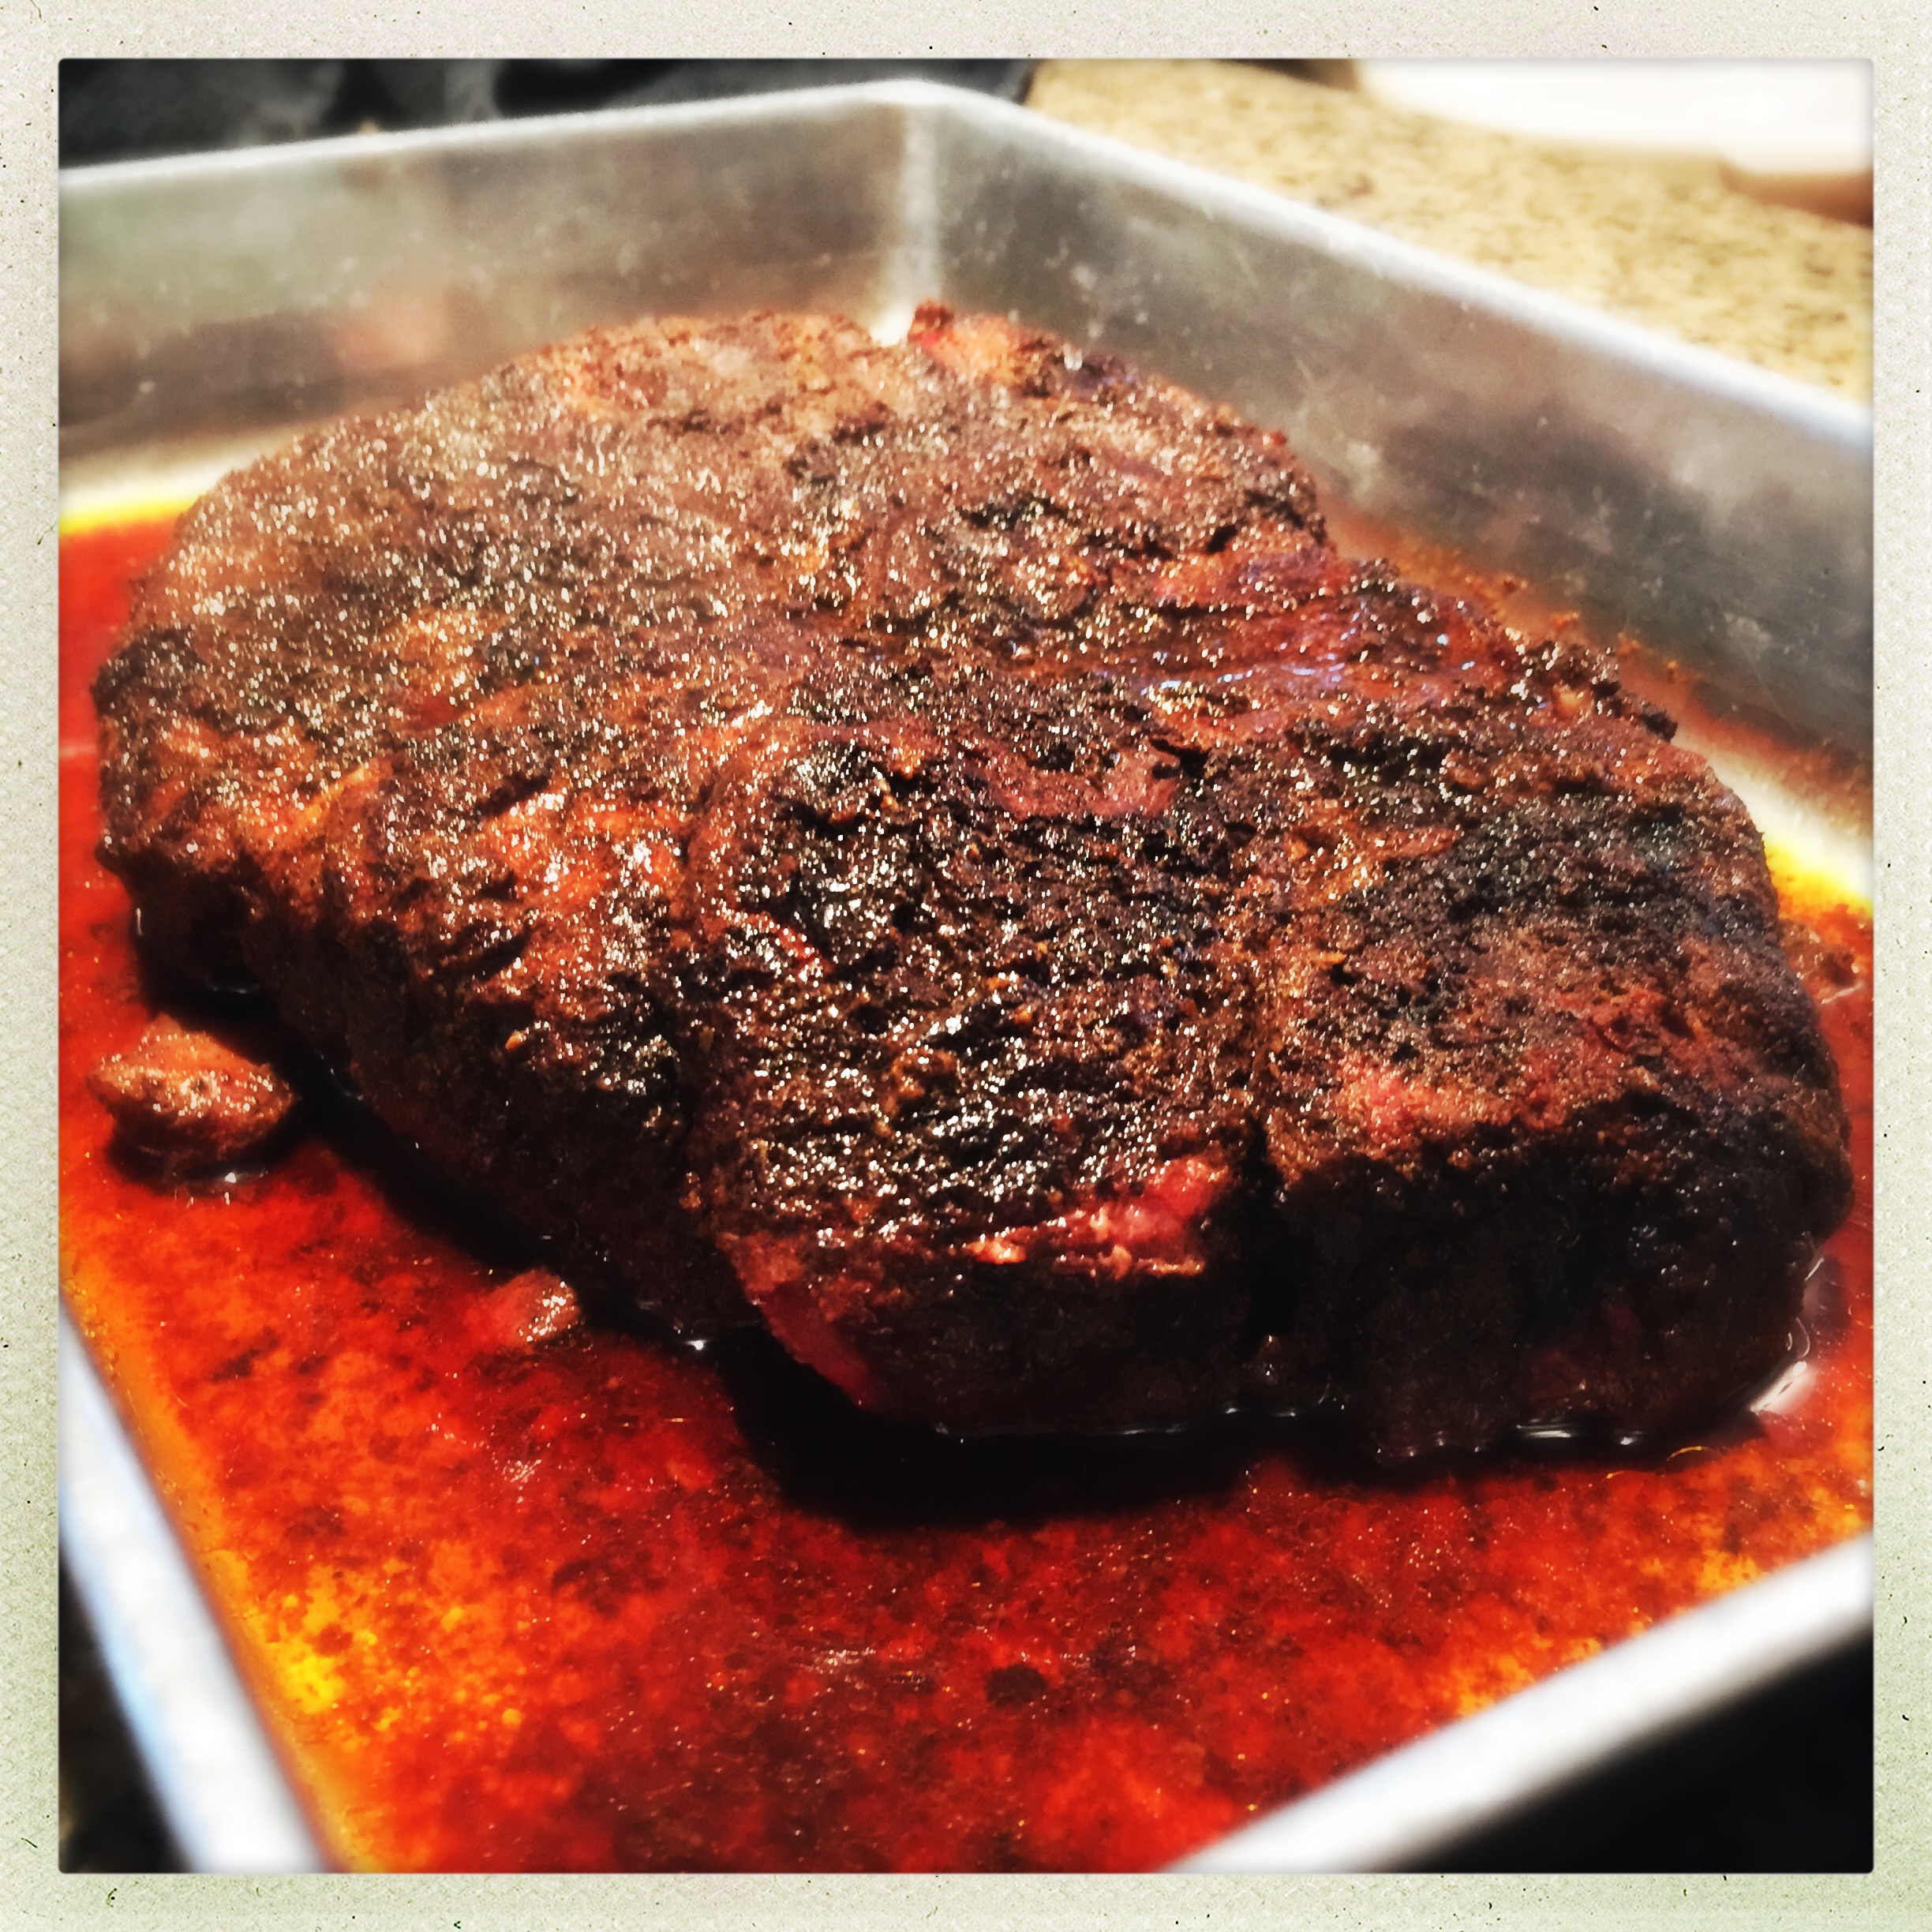
When the meat hit 160, I pulled it off and laid it on two sheets of heavy duty foil.
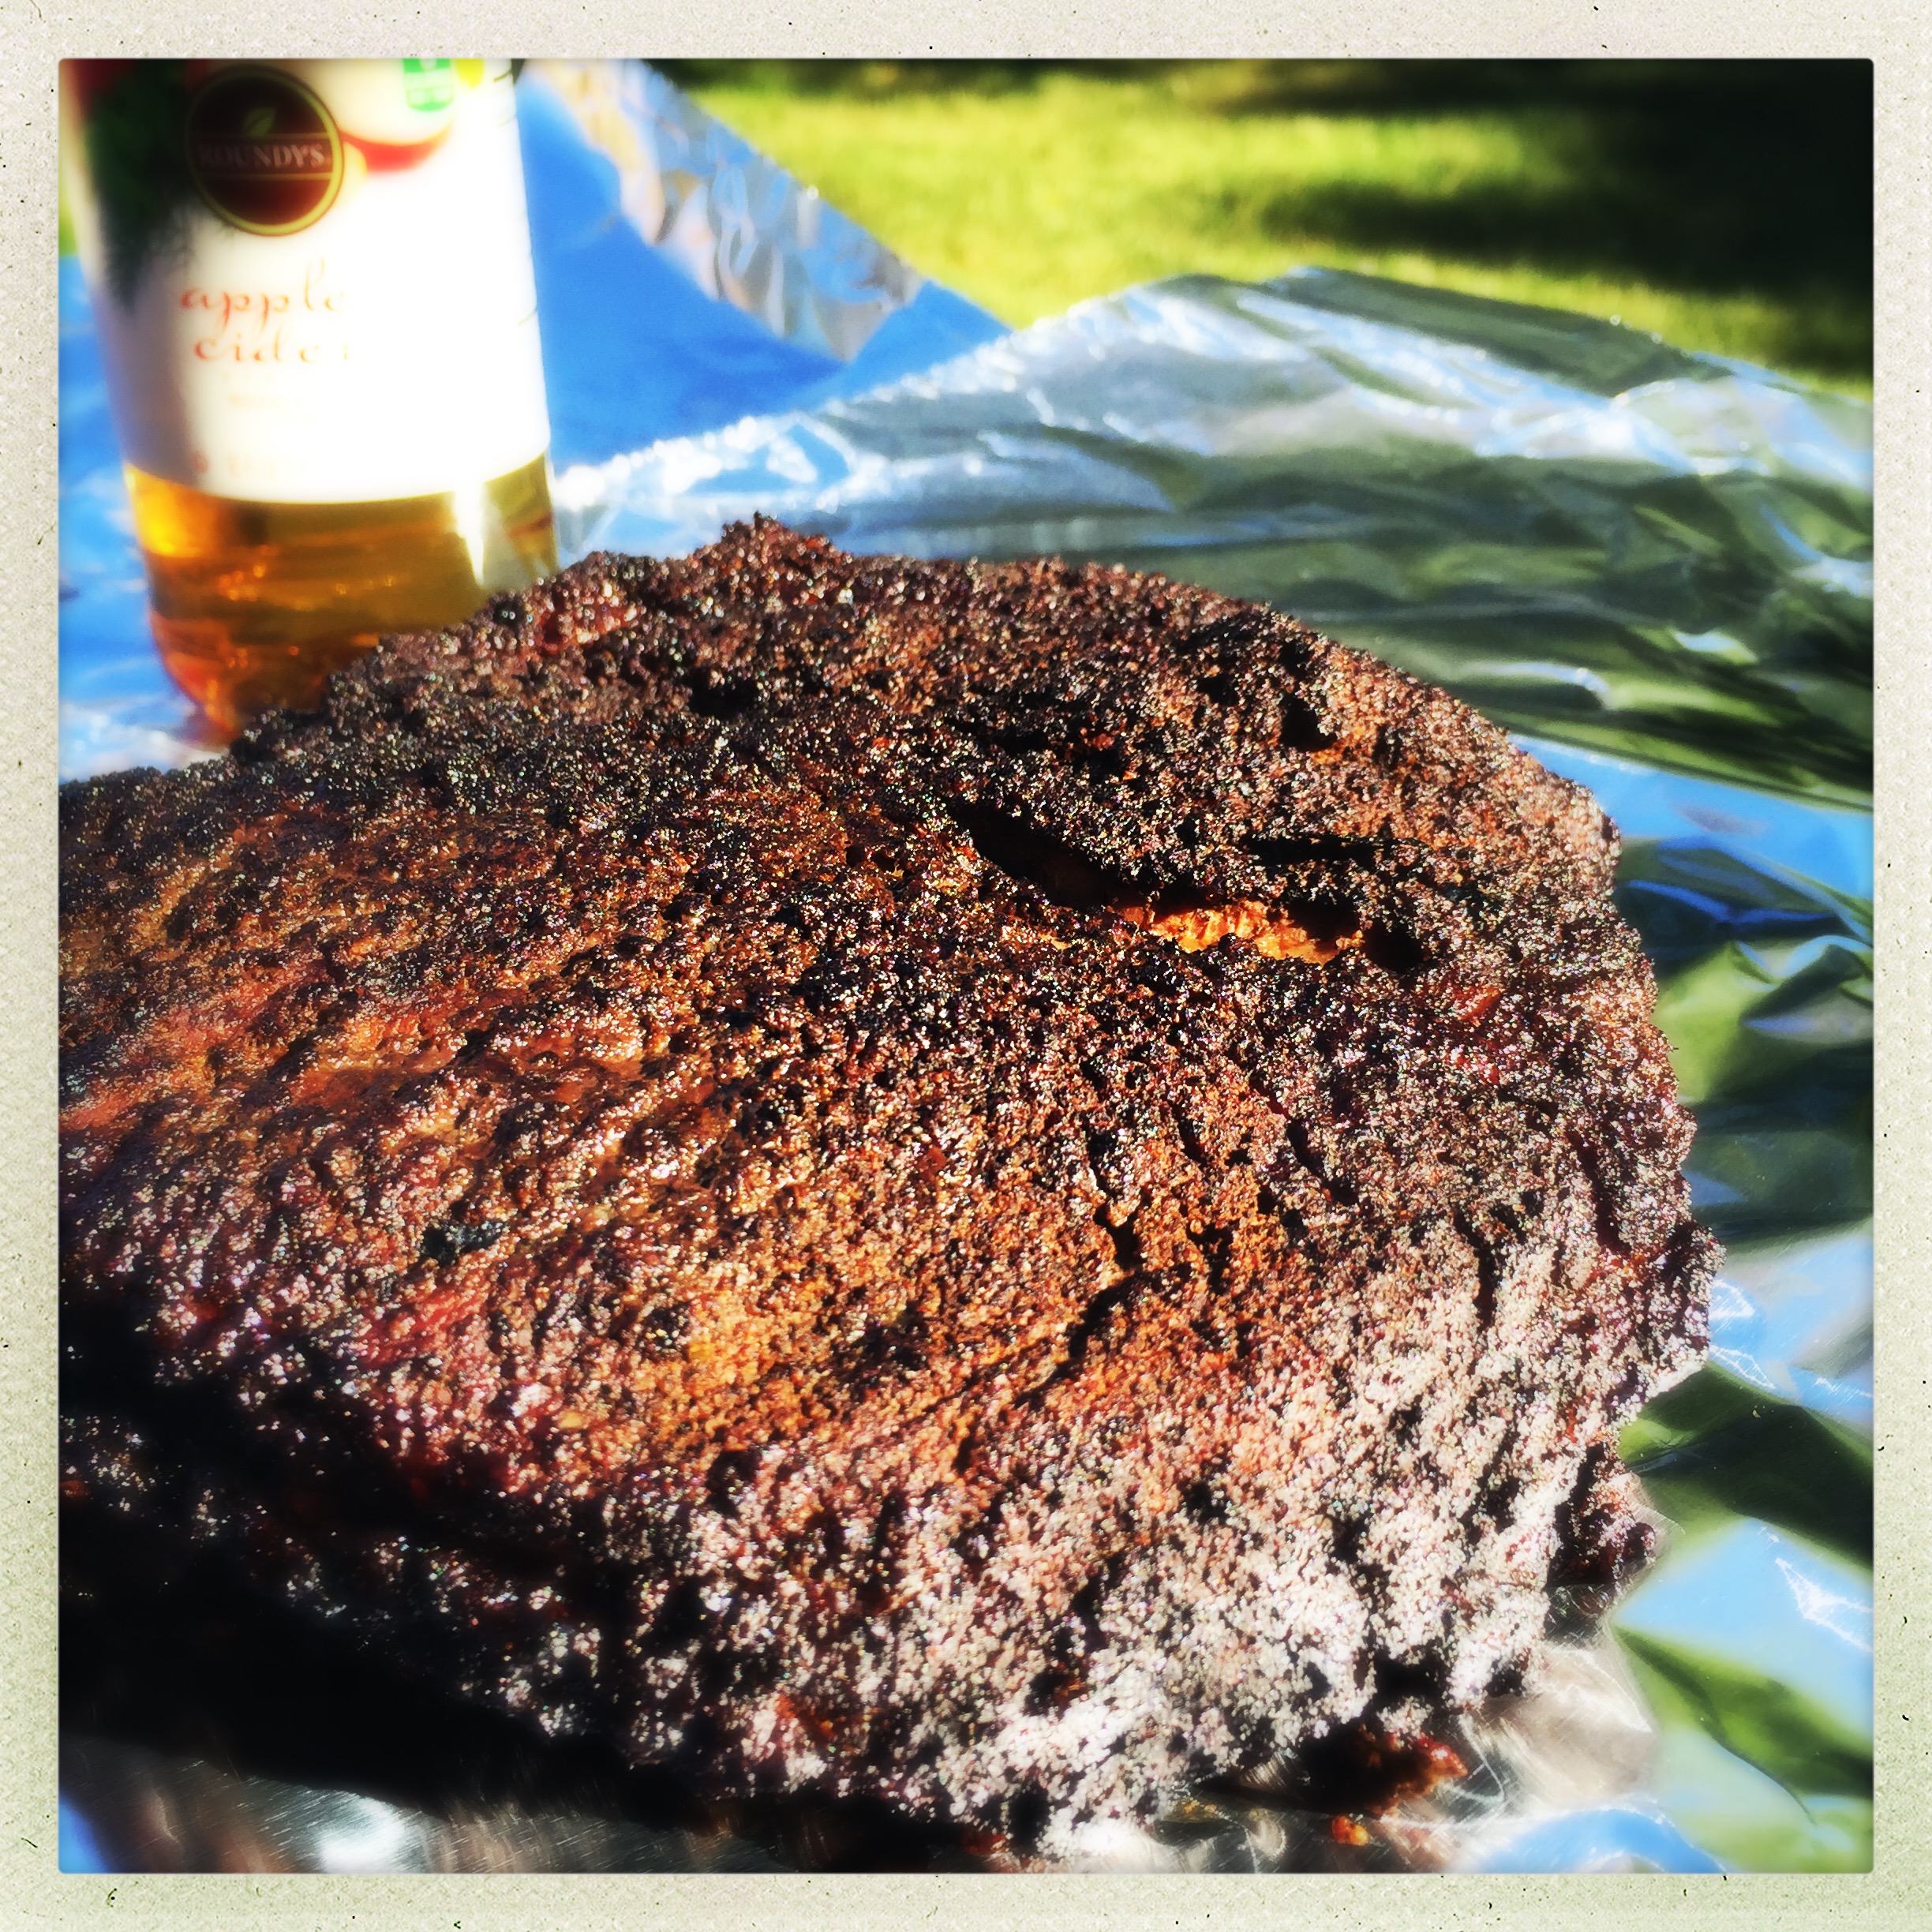
A nice layer of bark had already formed on the meat. I added a splash of cider vinegar and a bigger splash of cherry juice, wrapped it up tight, and got it back in the smoker. I added a few more coals to keep the temp up, and no more wood chunks as the smoke doesn’t penetrate the foil pack. The benefit of foiling is that it prevents the meat from blackening too much, and the liquid braises the meat for the final portion of the cook, helping keep it tender and juicy.
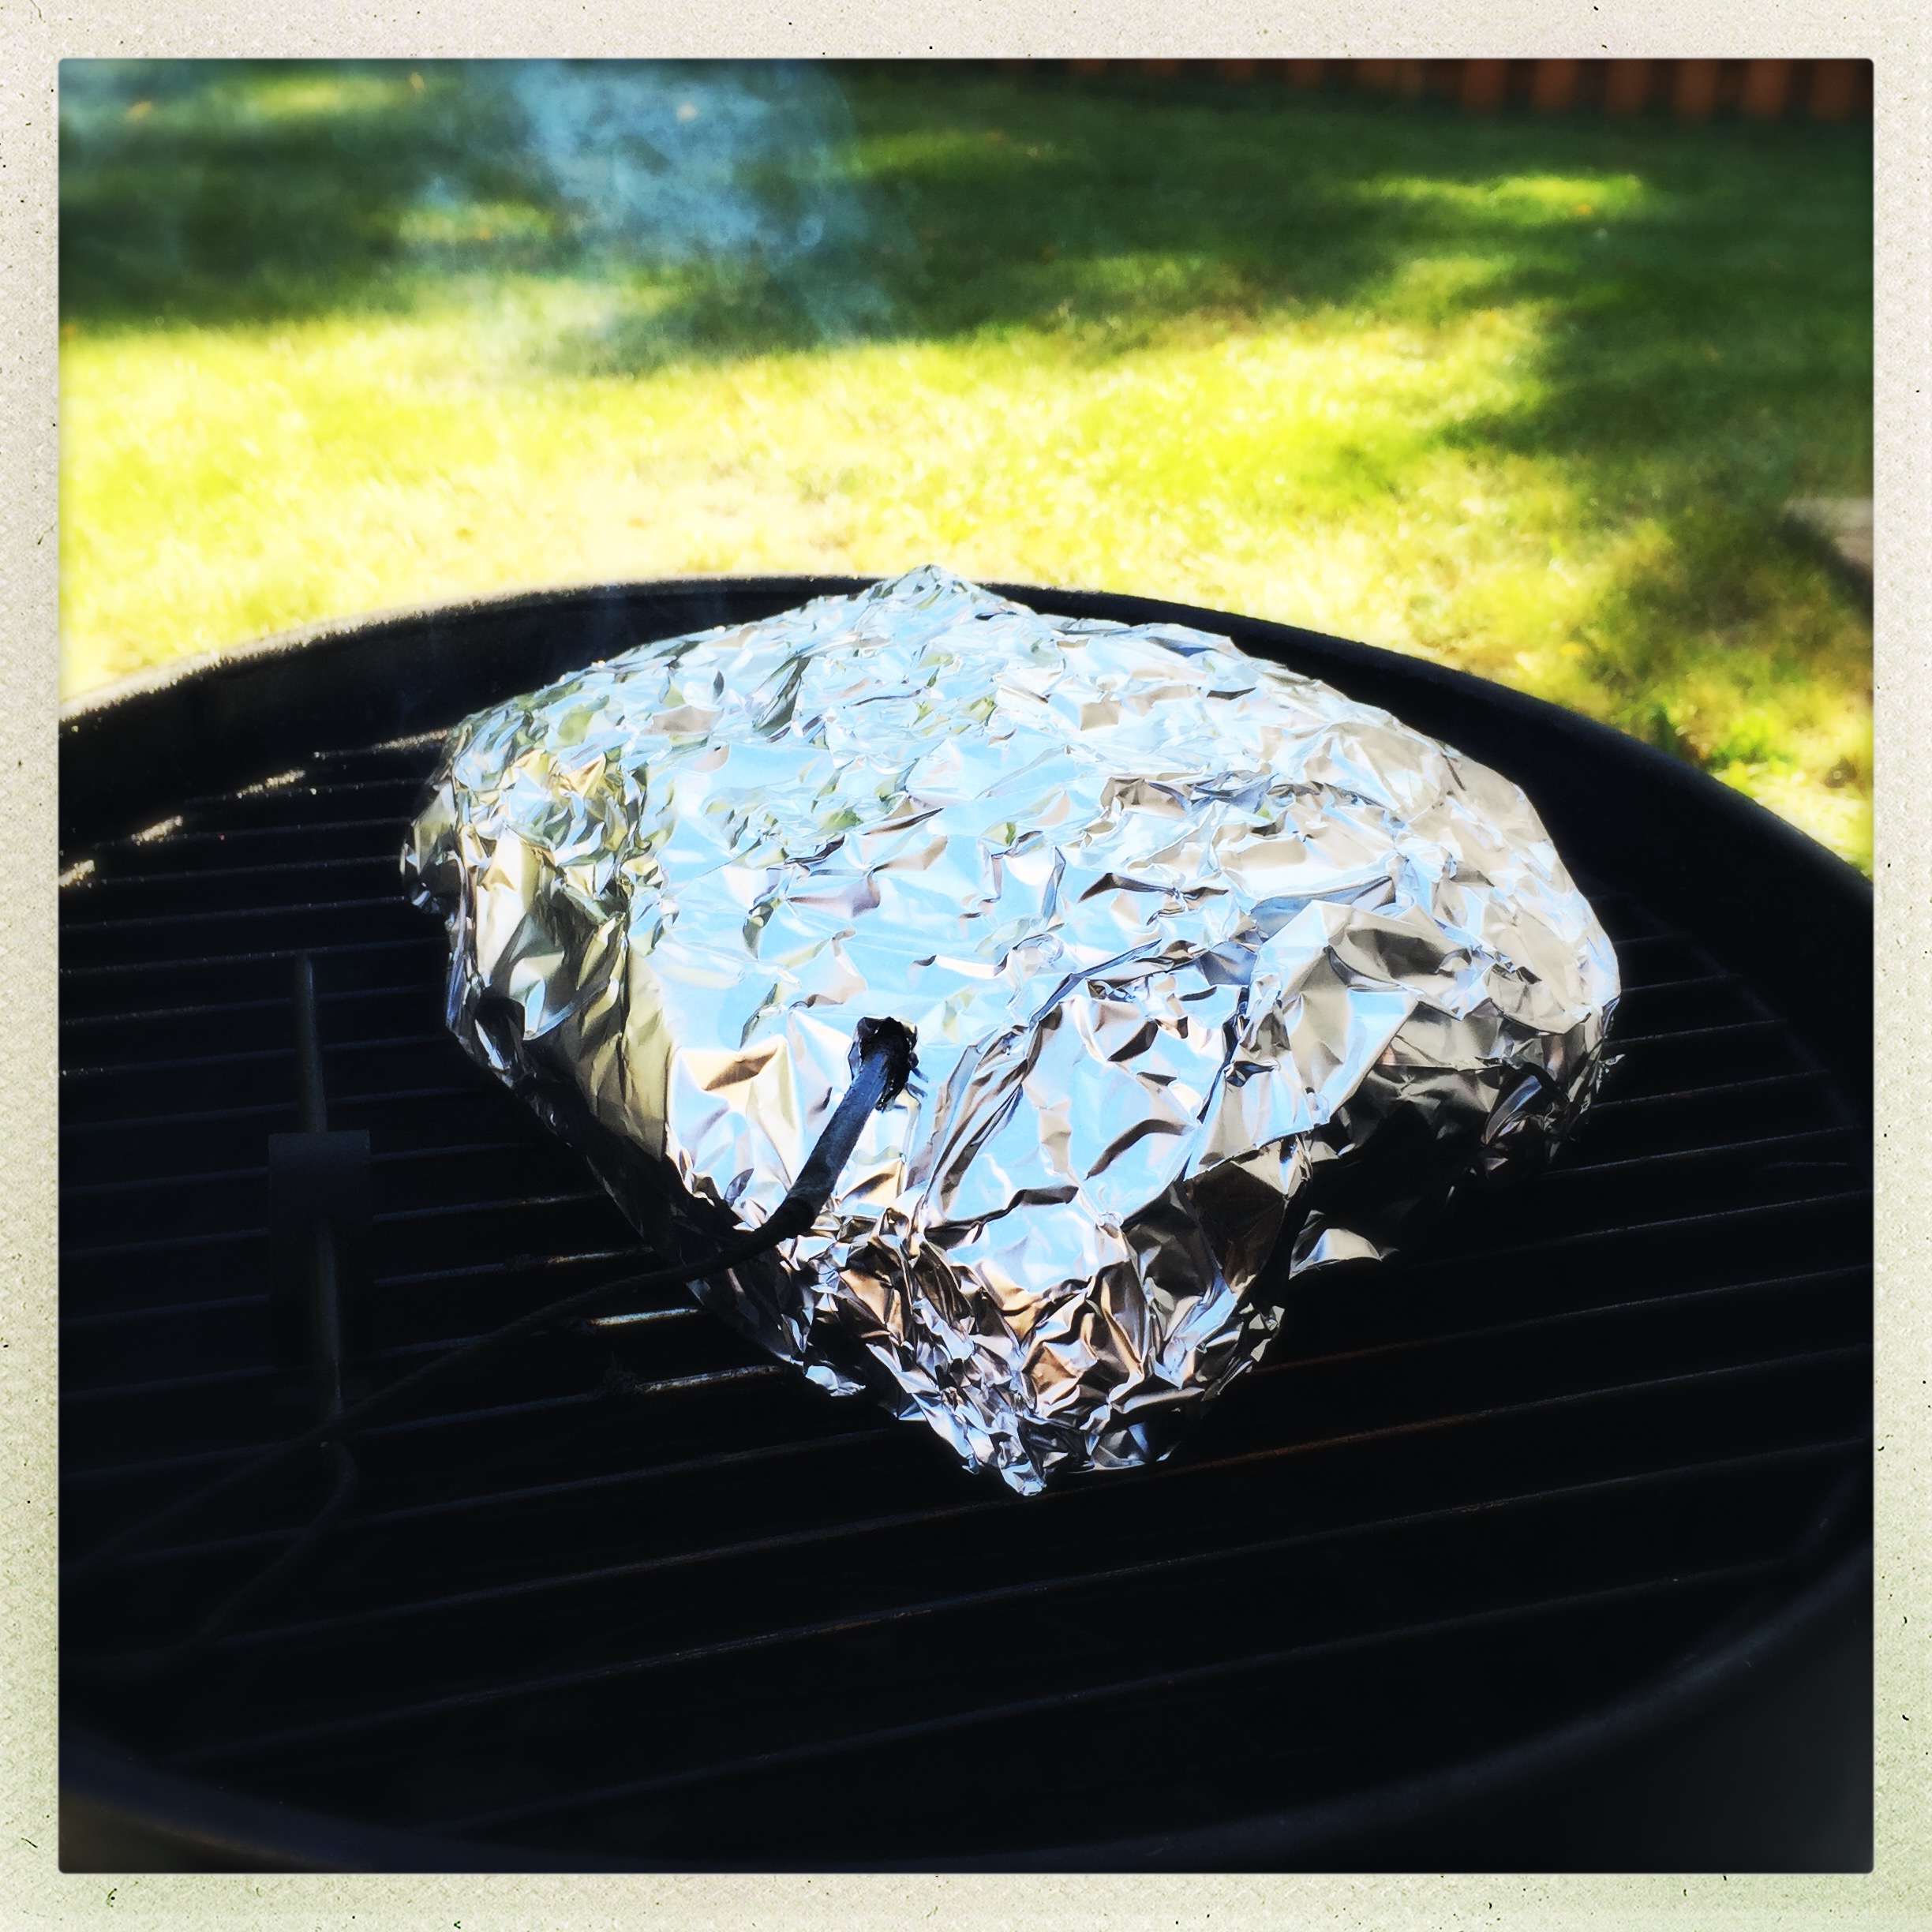
Sealed up inside the foil, the internal temperature of the meat climbs much more quickly. The roast got up to 205 degrees in just under 90 minutes after wrapping. Resting a piece of meat this size is critical. I took the foiled meat off the smoker, wrapped it in two bath towels, and placed it in a cooler. I let it sit there for another 90 minutes. The towels and the cooler keep the meat warm and safe for at least 4 hours, so no worries about food borne illnesses with this step.
After resting the meat, I moved it to a metal baking pan. The foil pack needs to be opened carefully, because there’s a lot of liquid inside, and you don’t want to lose it. It has a ton of flavor, and you’ll want to mix it back into the meat after it’s been pulled.
There will be a nice smoke ring when you first crack into it – the bright pink portion just under the outer bark.
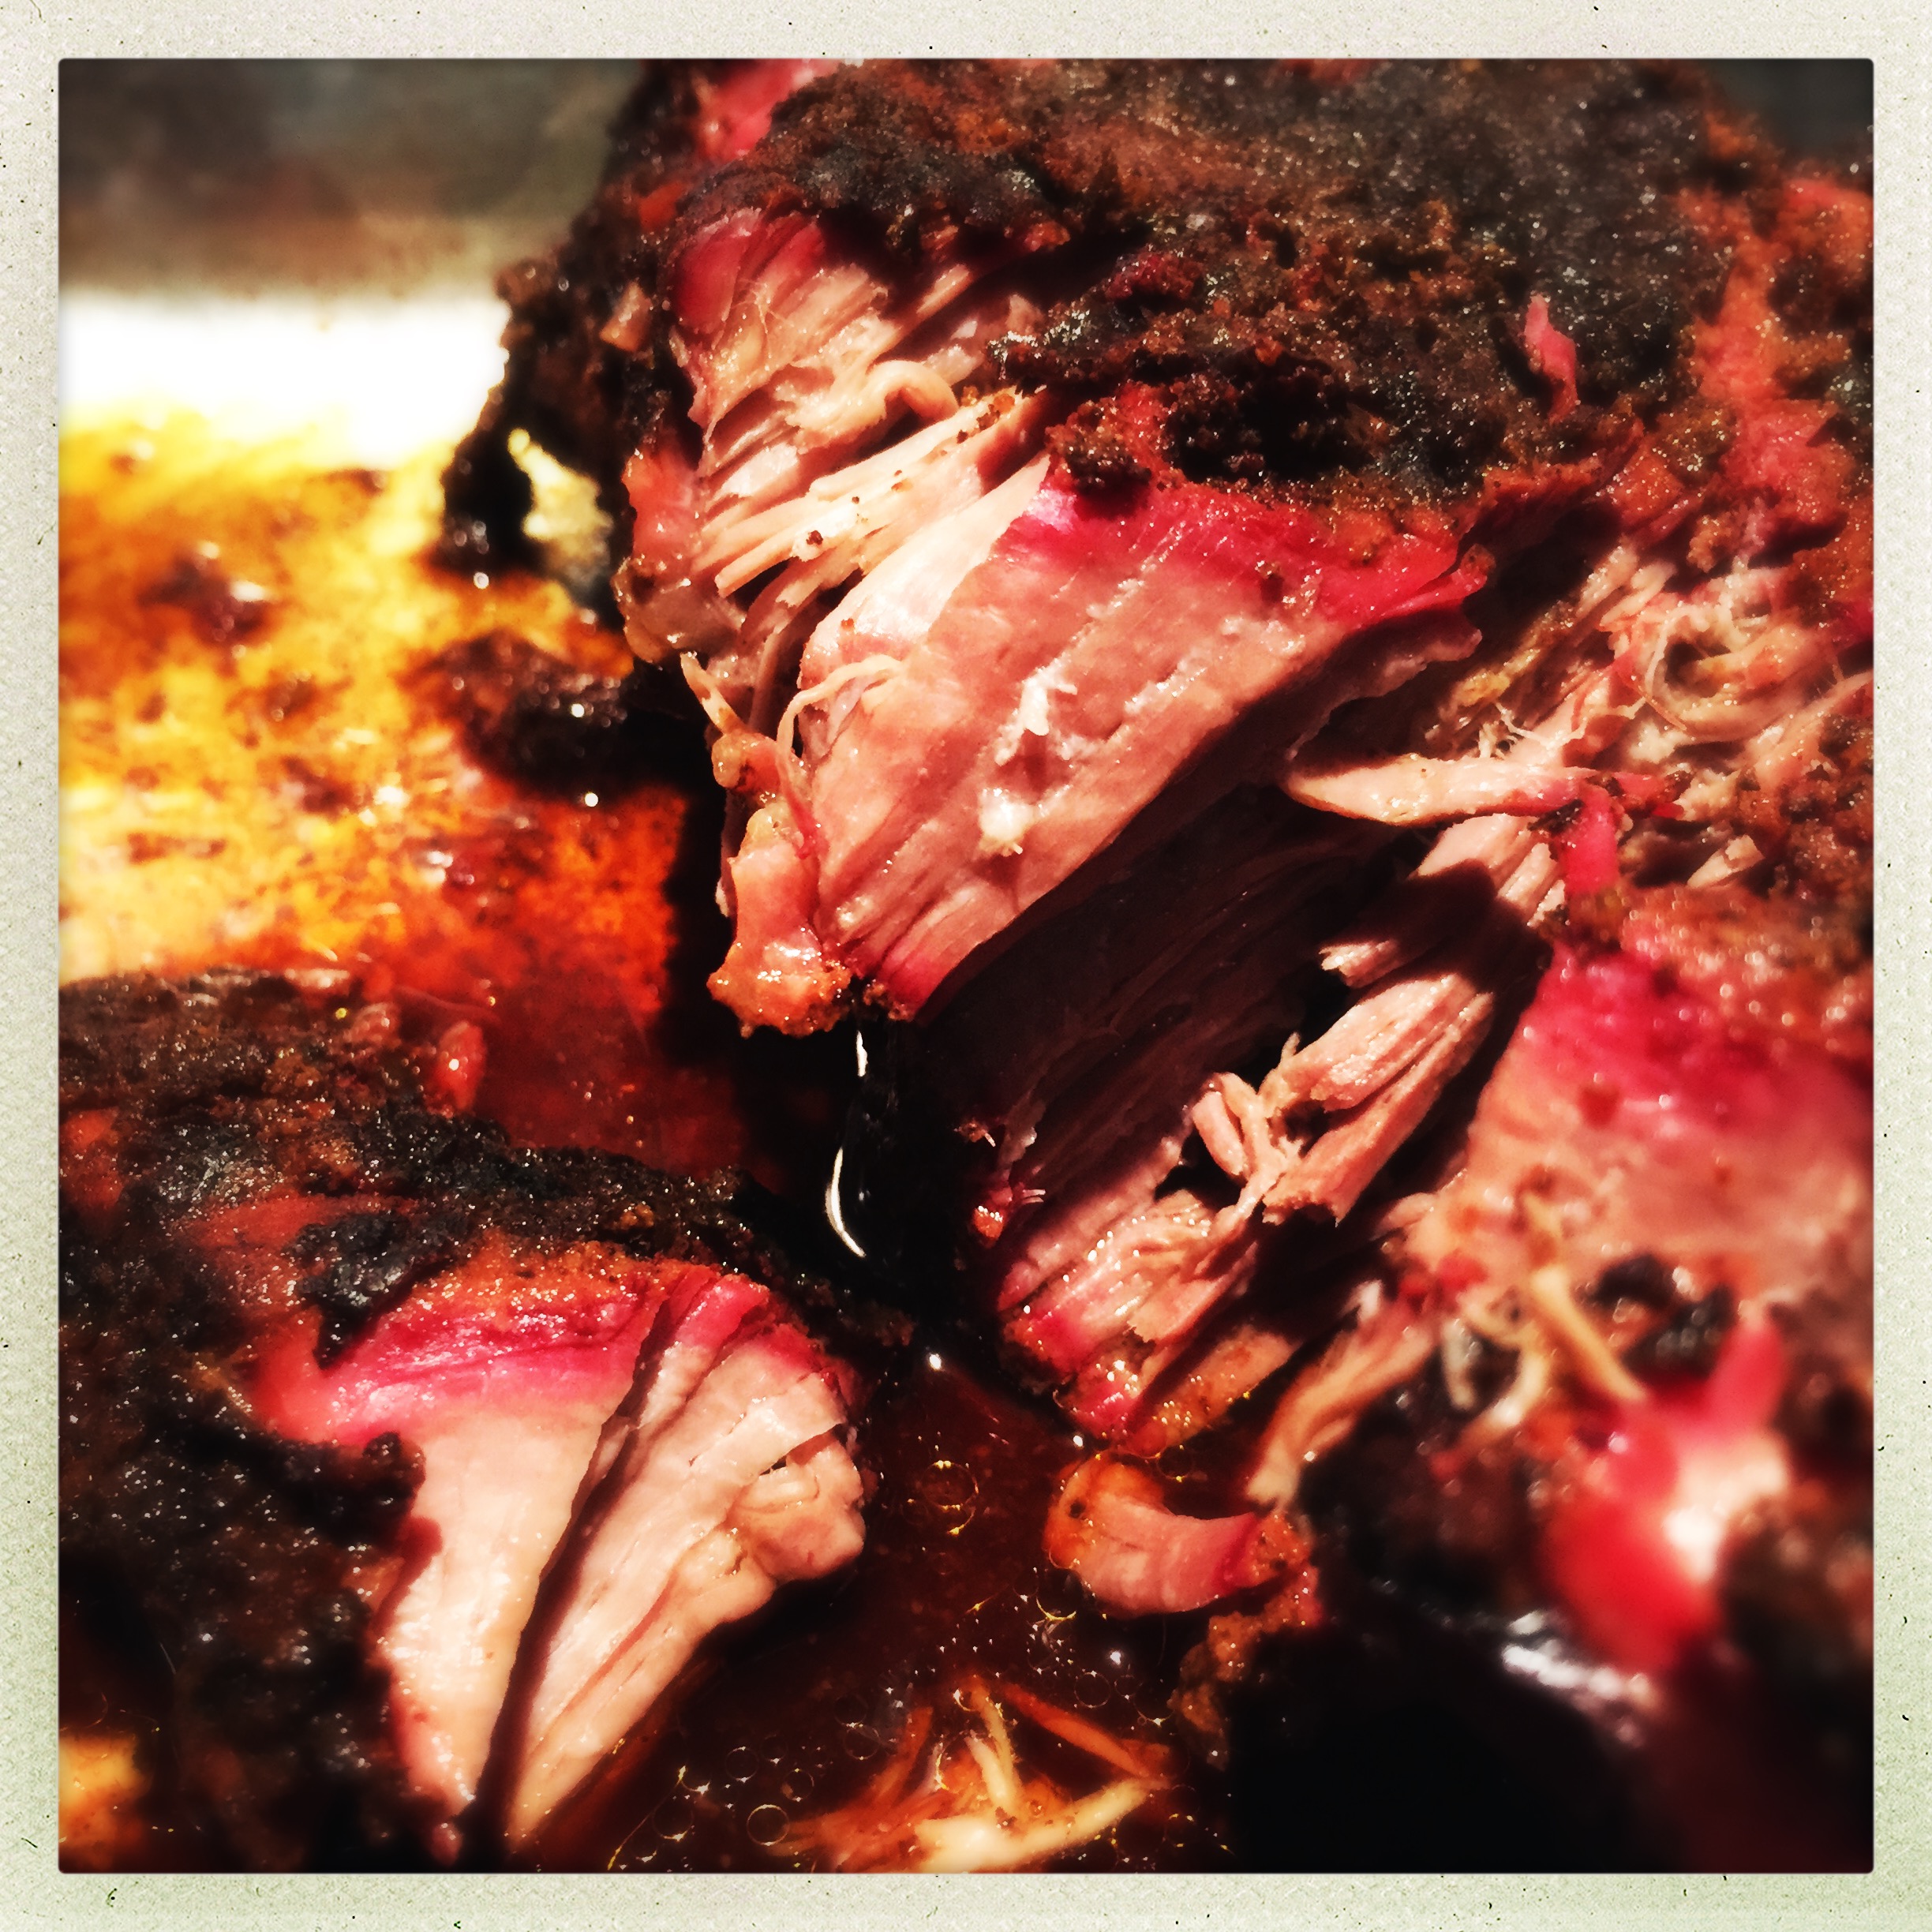
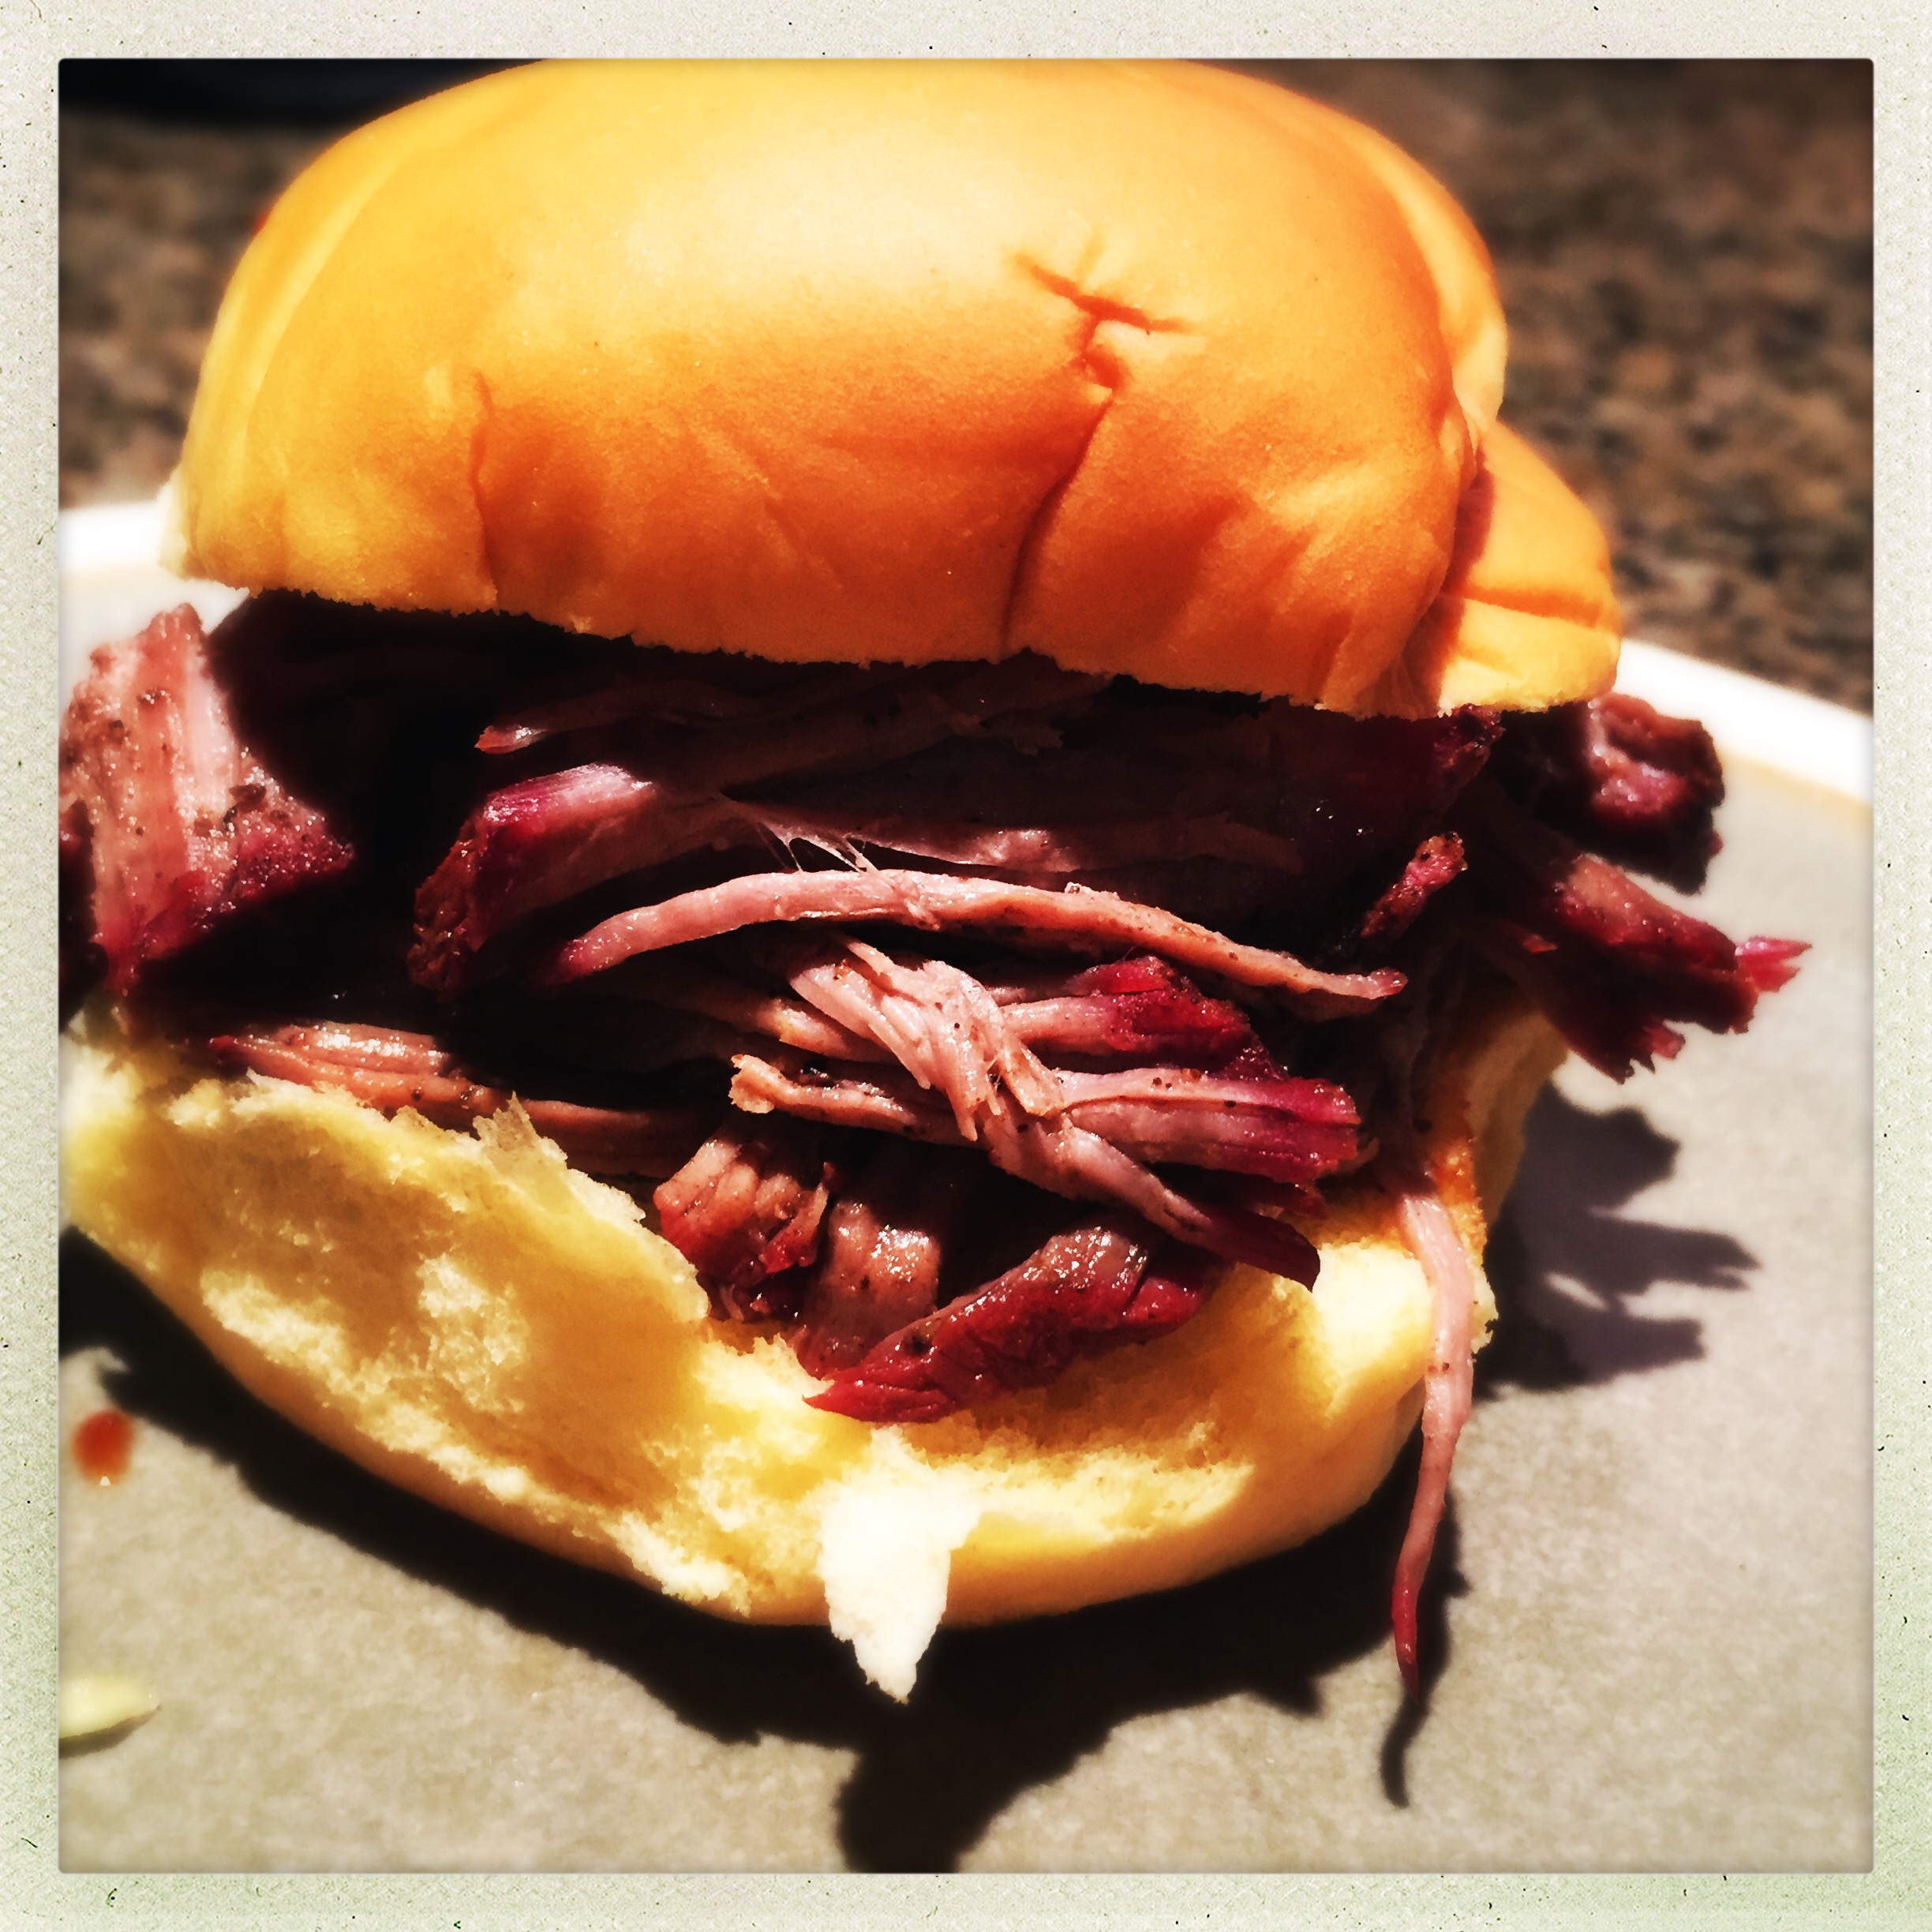
Using meat claws, forks or even your hands, shred the meat to your desired consistency.

The end product had a lot of similarities to my usual pulled pork, but also a lot of differences. I can’t say one is better than the other, but this was an experiment I definitely plan to repeat. It made for a fantastic sandwich, with and without additional sauce.
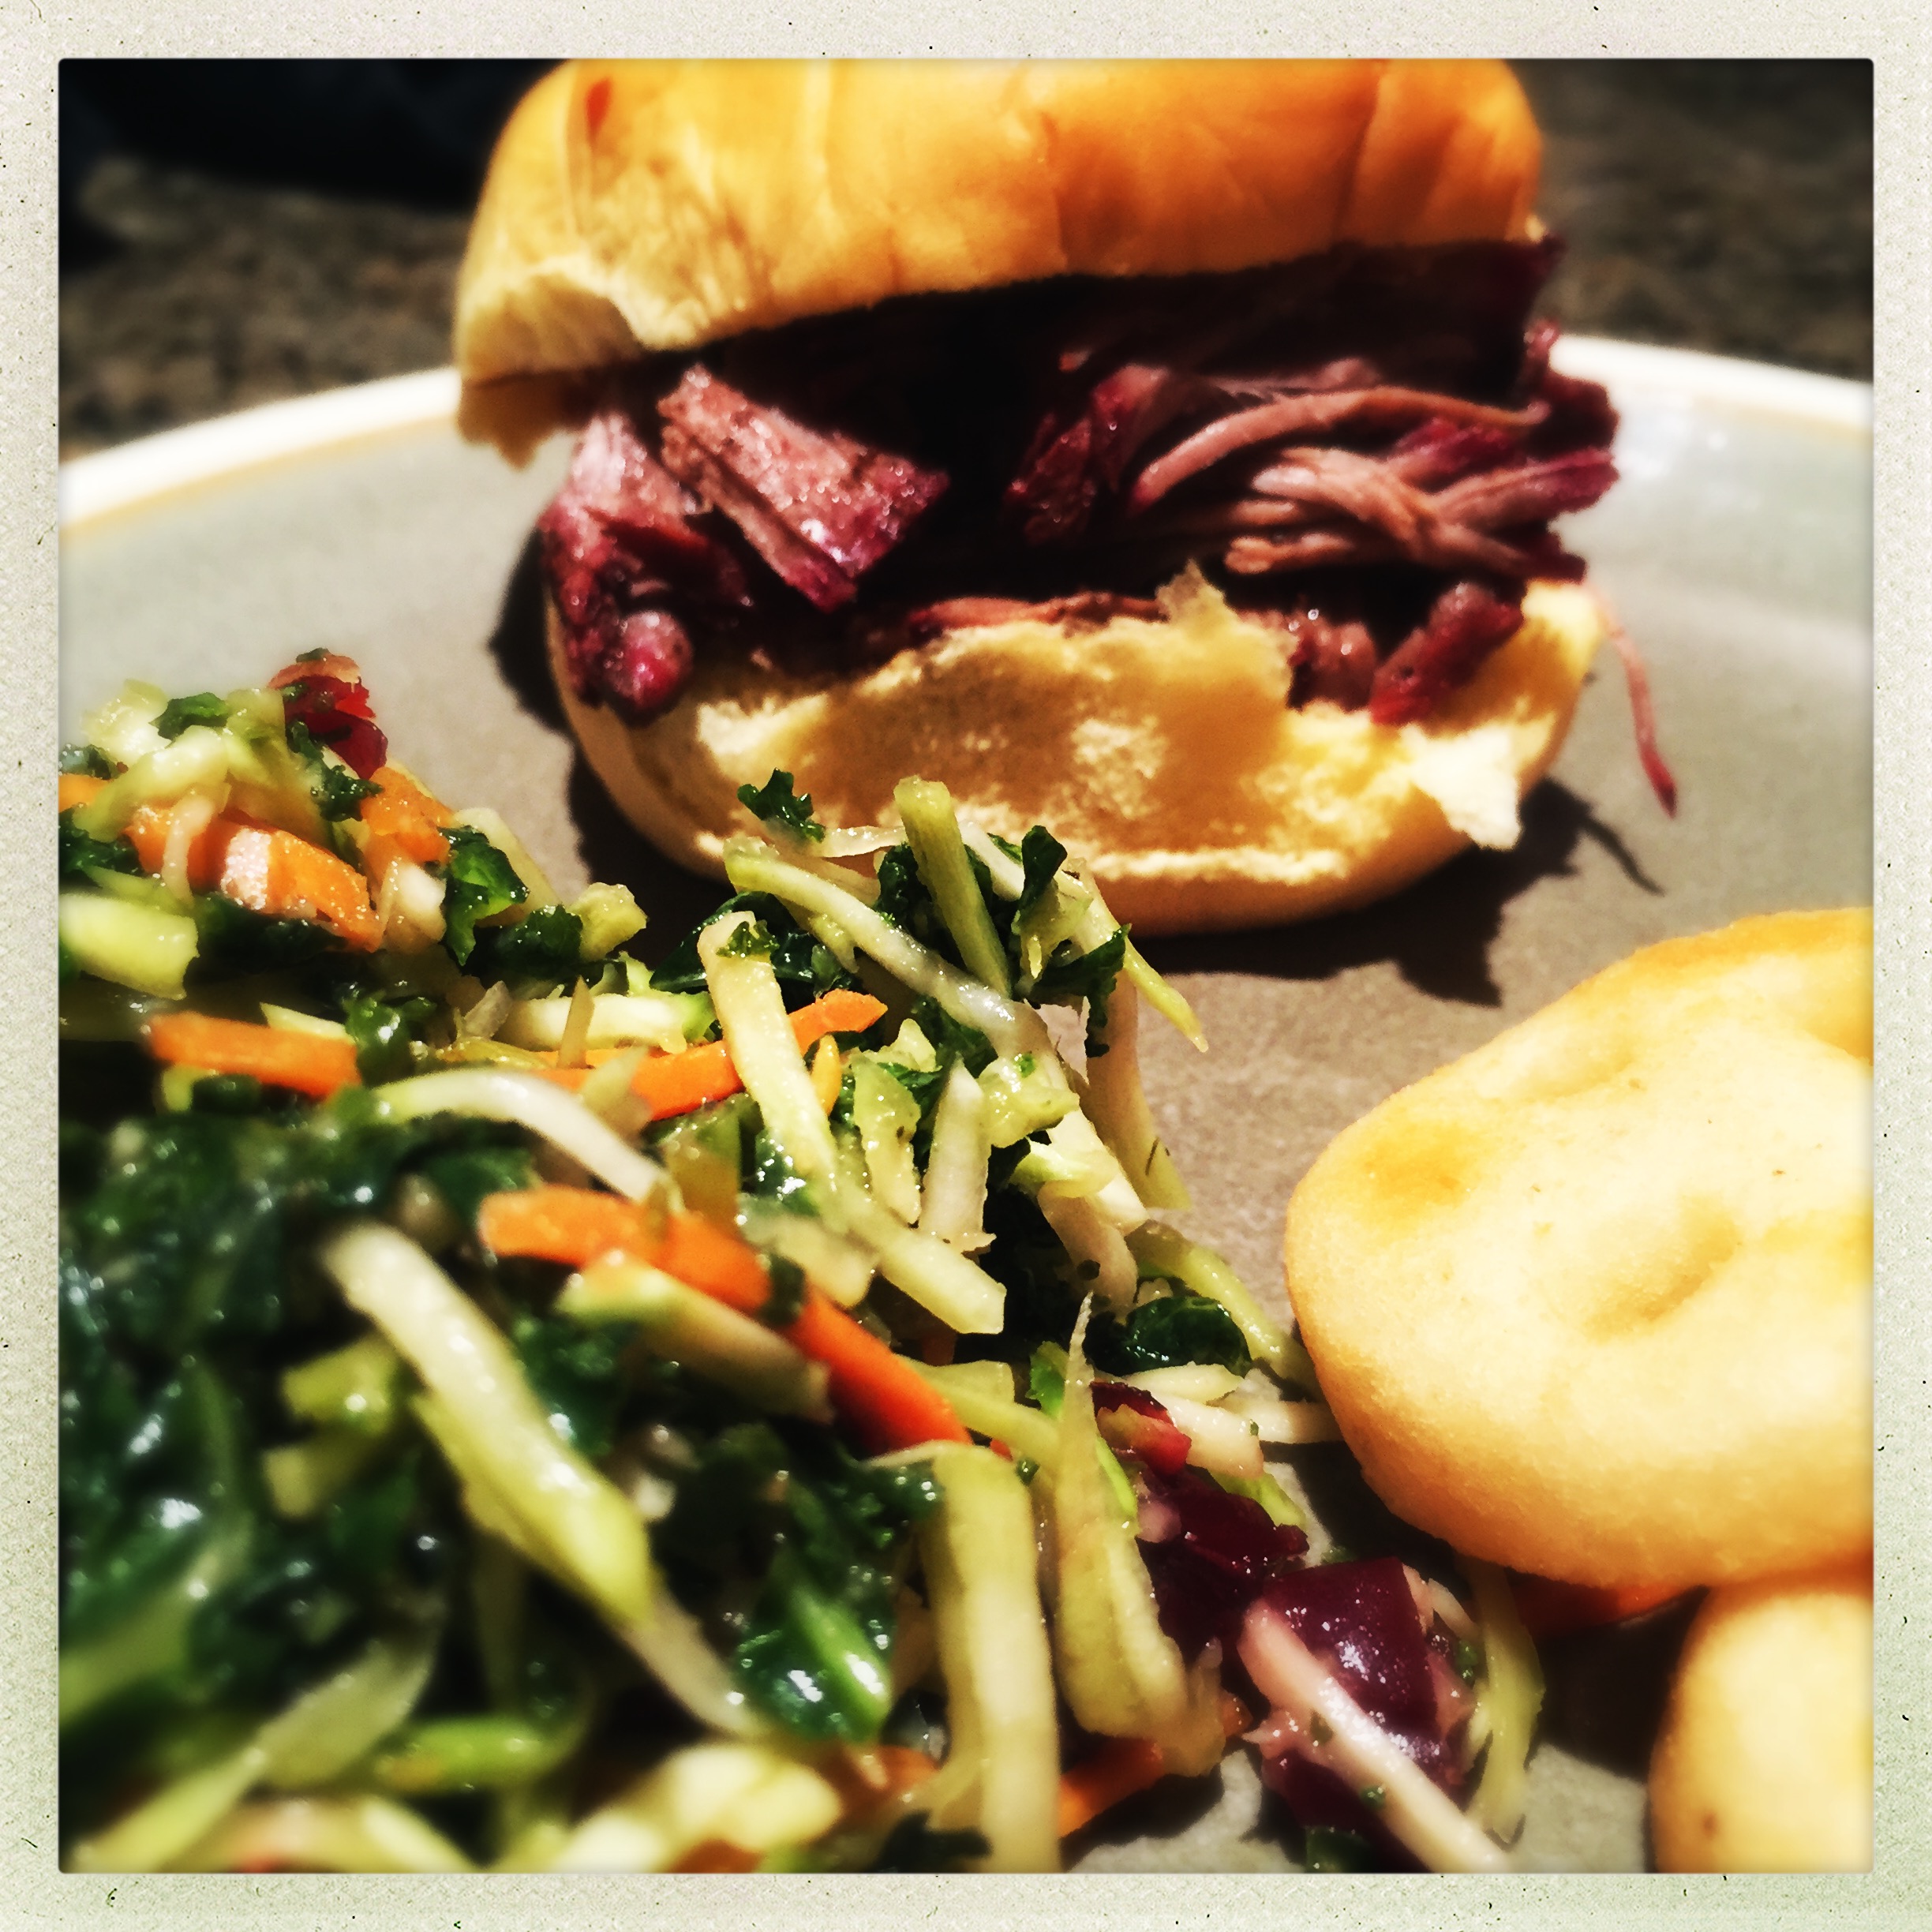
I had my sandwich with some mashed potato “smiles” (which are incredible) and a kale/broccoli slaw. I’m already looking forward to the leftovers and all the things I can do with them. One of my favorite leftover BBQ pork meals is making tacos, and this pulled beef would work perfectly in taco.
On that note, gotta go – time to buy tortillas!


Hmm… Maybe I should wrap mine in foil near midway. We do that for rubs and they come out juicy as hell.
I foil wrap any big chunk of meat I have on the smoker around 160 degrees if I’m planning to pull it rather than slice it. It lets me add some braising liquid, which really helps the meat pull easily and stay moist.