Smoked Spare Ribs
1January 21, 2014 by Jason Rice MD
While pulled pork may be my favorite type of BBQ, it’s hard to deny the allure of ribs. They are absolutely one of the first things many people think of when they hear the word BBQ, and they take to low and slow smoking very well. And, for a blog dedicated to eaters of all ages, food that’s meant to be enjoyed with the hands is always a winner!
There are two common types of ribs you’re likely to come across at your local grocery store or butcher:
- Baby Back Ribs
- Spare Ribs
While the baby backs have gotten a lot of love over the years (admit it, you’re probably singing that Chili’s commercial right now…), the spares are where it’s at when it comes time to smoke. The spare ribs have a higher fat content and are meatier overall. They also come from closer to the belly, you know, where bacon comes from. I probably don’t have to elaborate any further as we can assume the closer we get to bacon, the better.
To further confuse the issue, there are two types of spare ribs in most grocer’s cases. They are labeled spare ribs and St Louis style spare ribs. These are not different cuts of meat, but different preparations of the same ribs. The St Louis style have been trimmed into uniform racks. The tips have been removed as well as some of the excess fat.
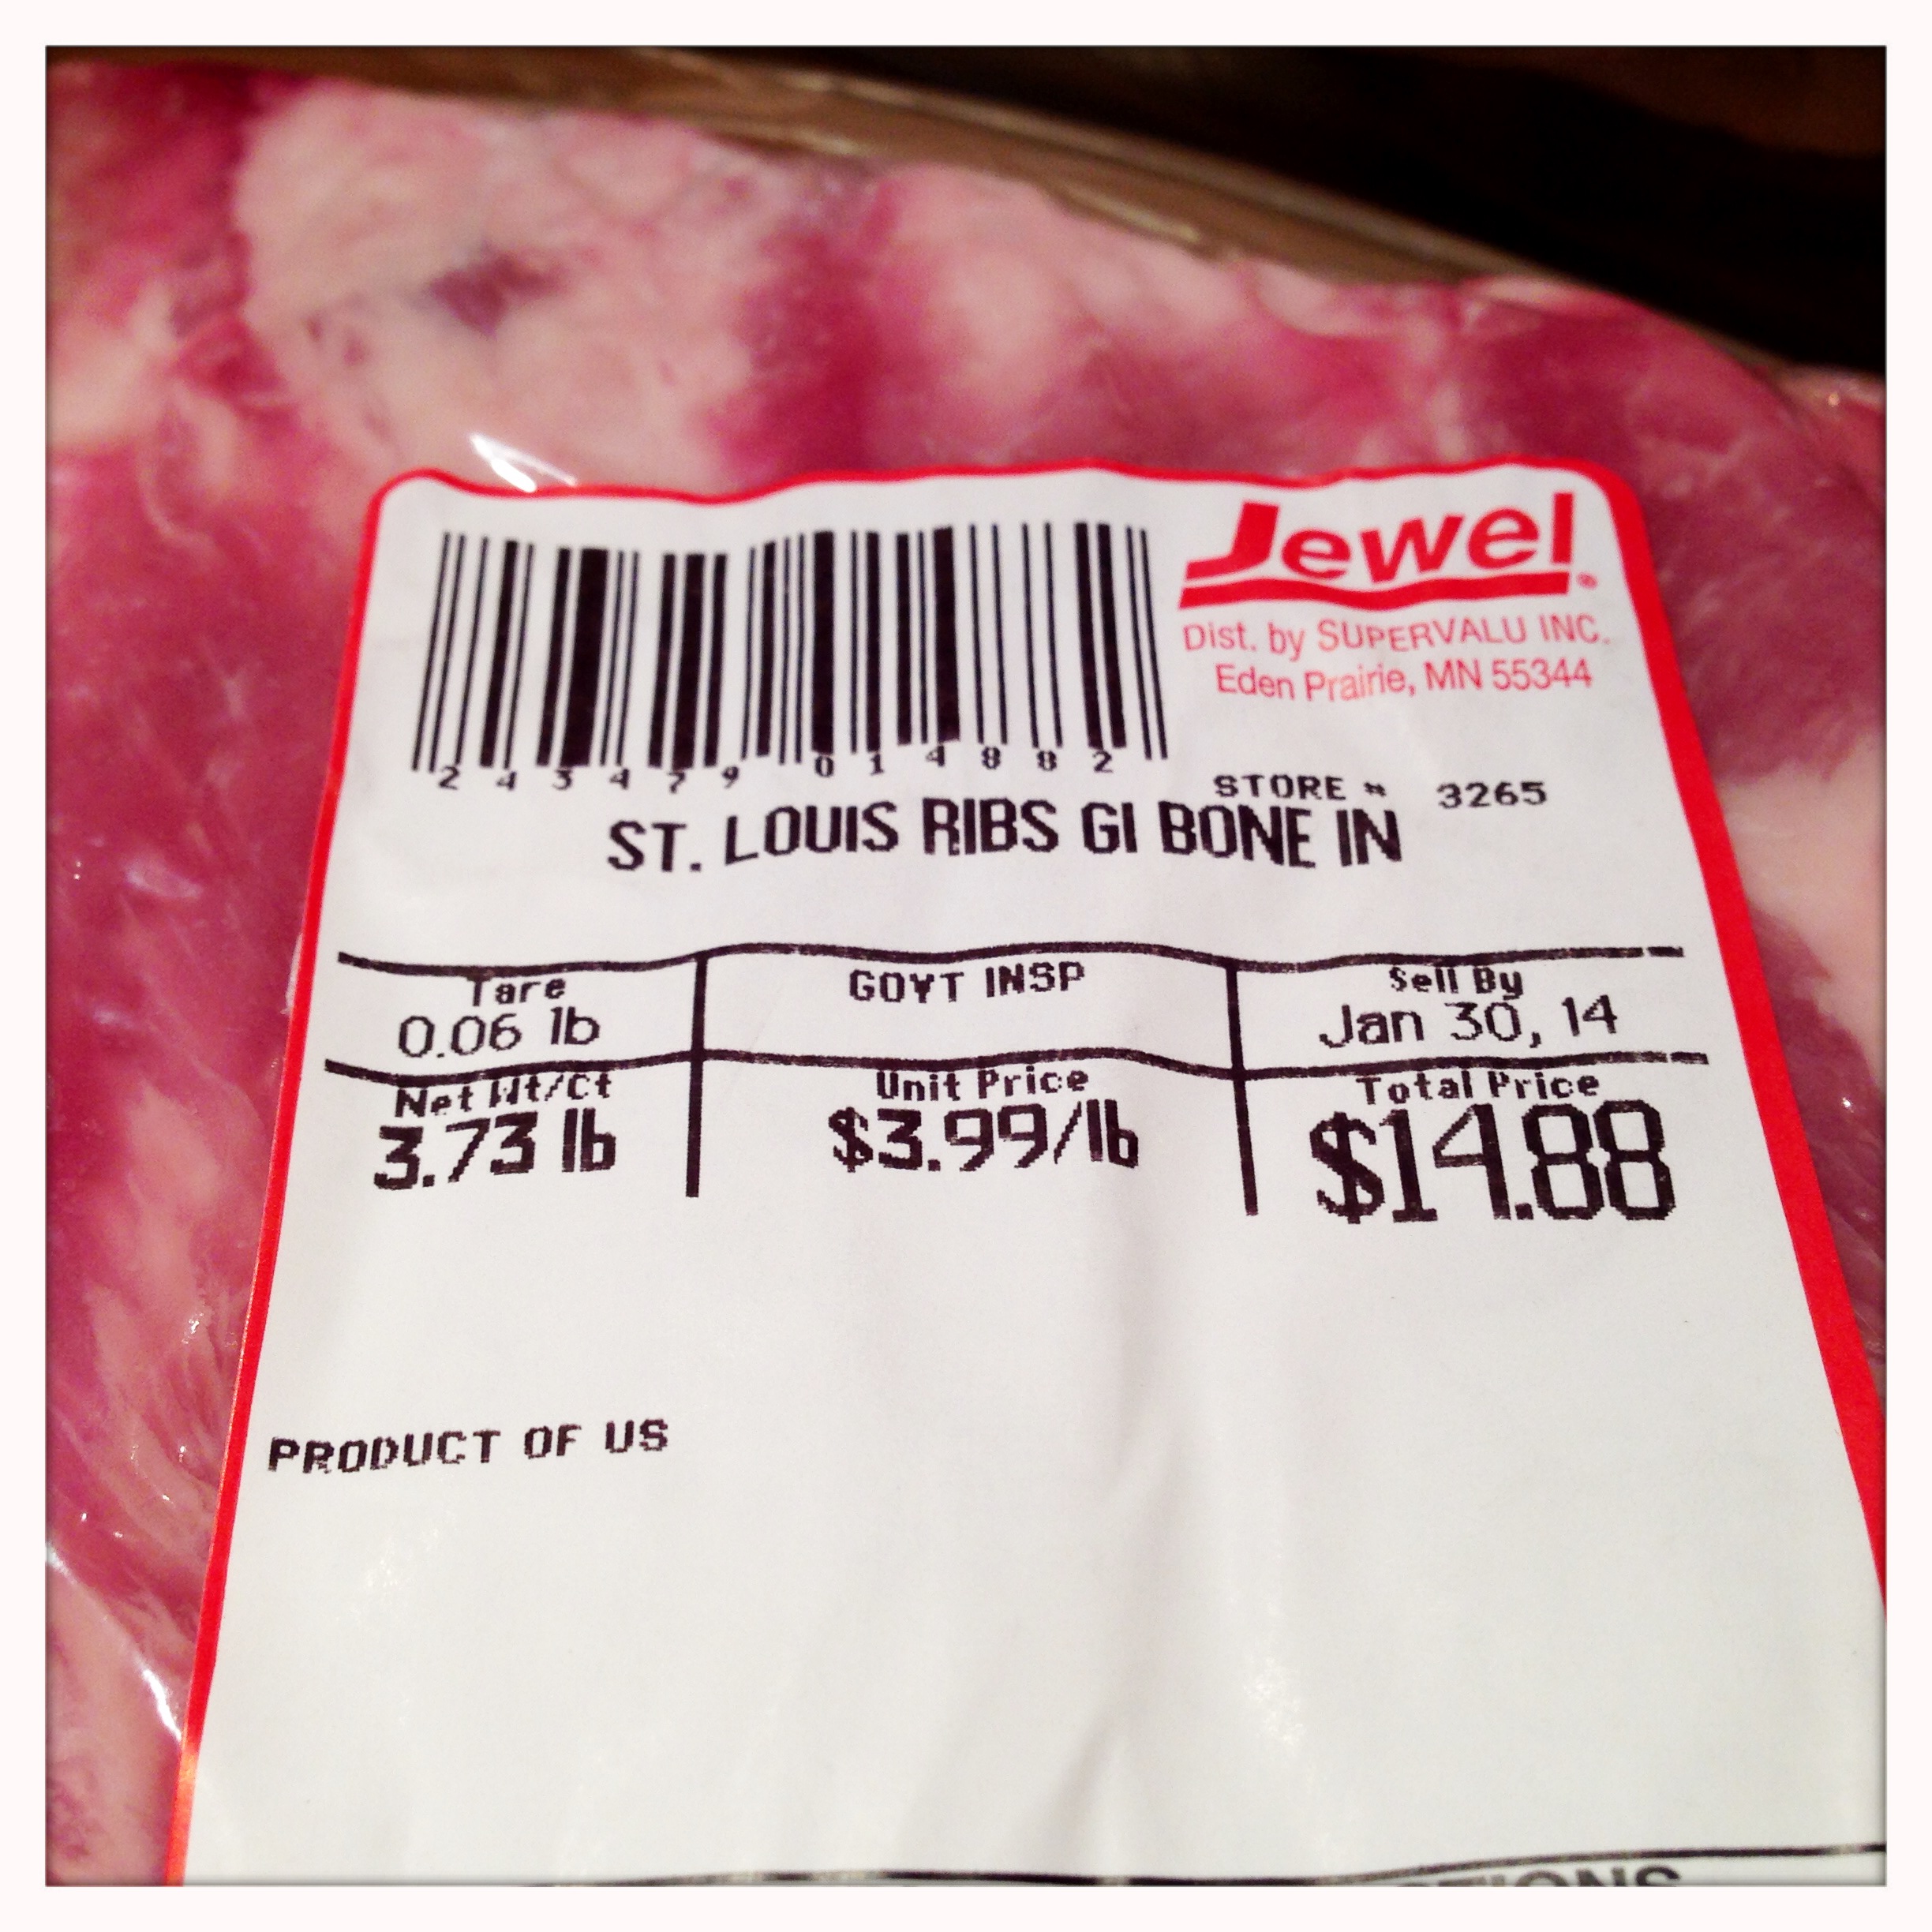
The St Louis ribs sold for $3.99/lb while the full spares sold for $2.99/lb. The trimmings can be used in stews, smoked on their own or used in other applications. But, since this was my first crack at ribs, I decided to take the easy route and let the butcher do most of the trimming for me to the tune of an extra $3.73 for this particular rack.
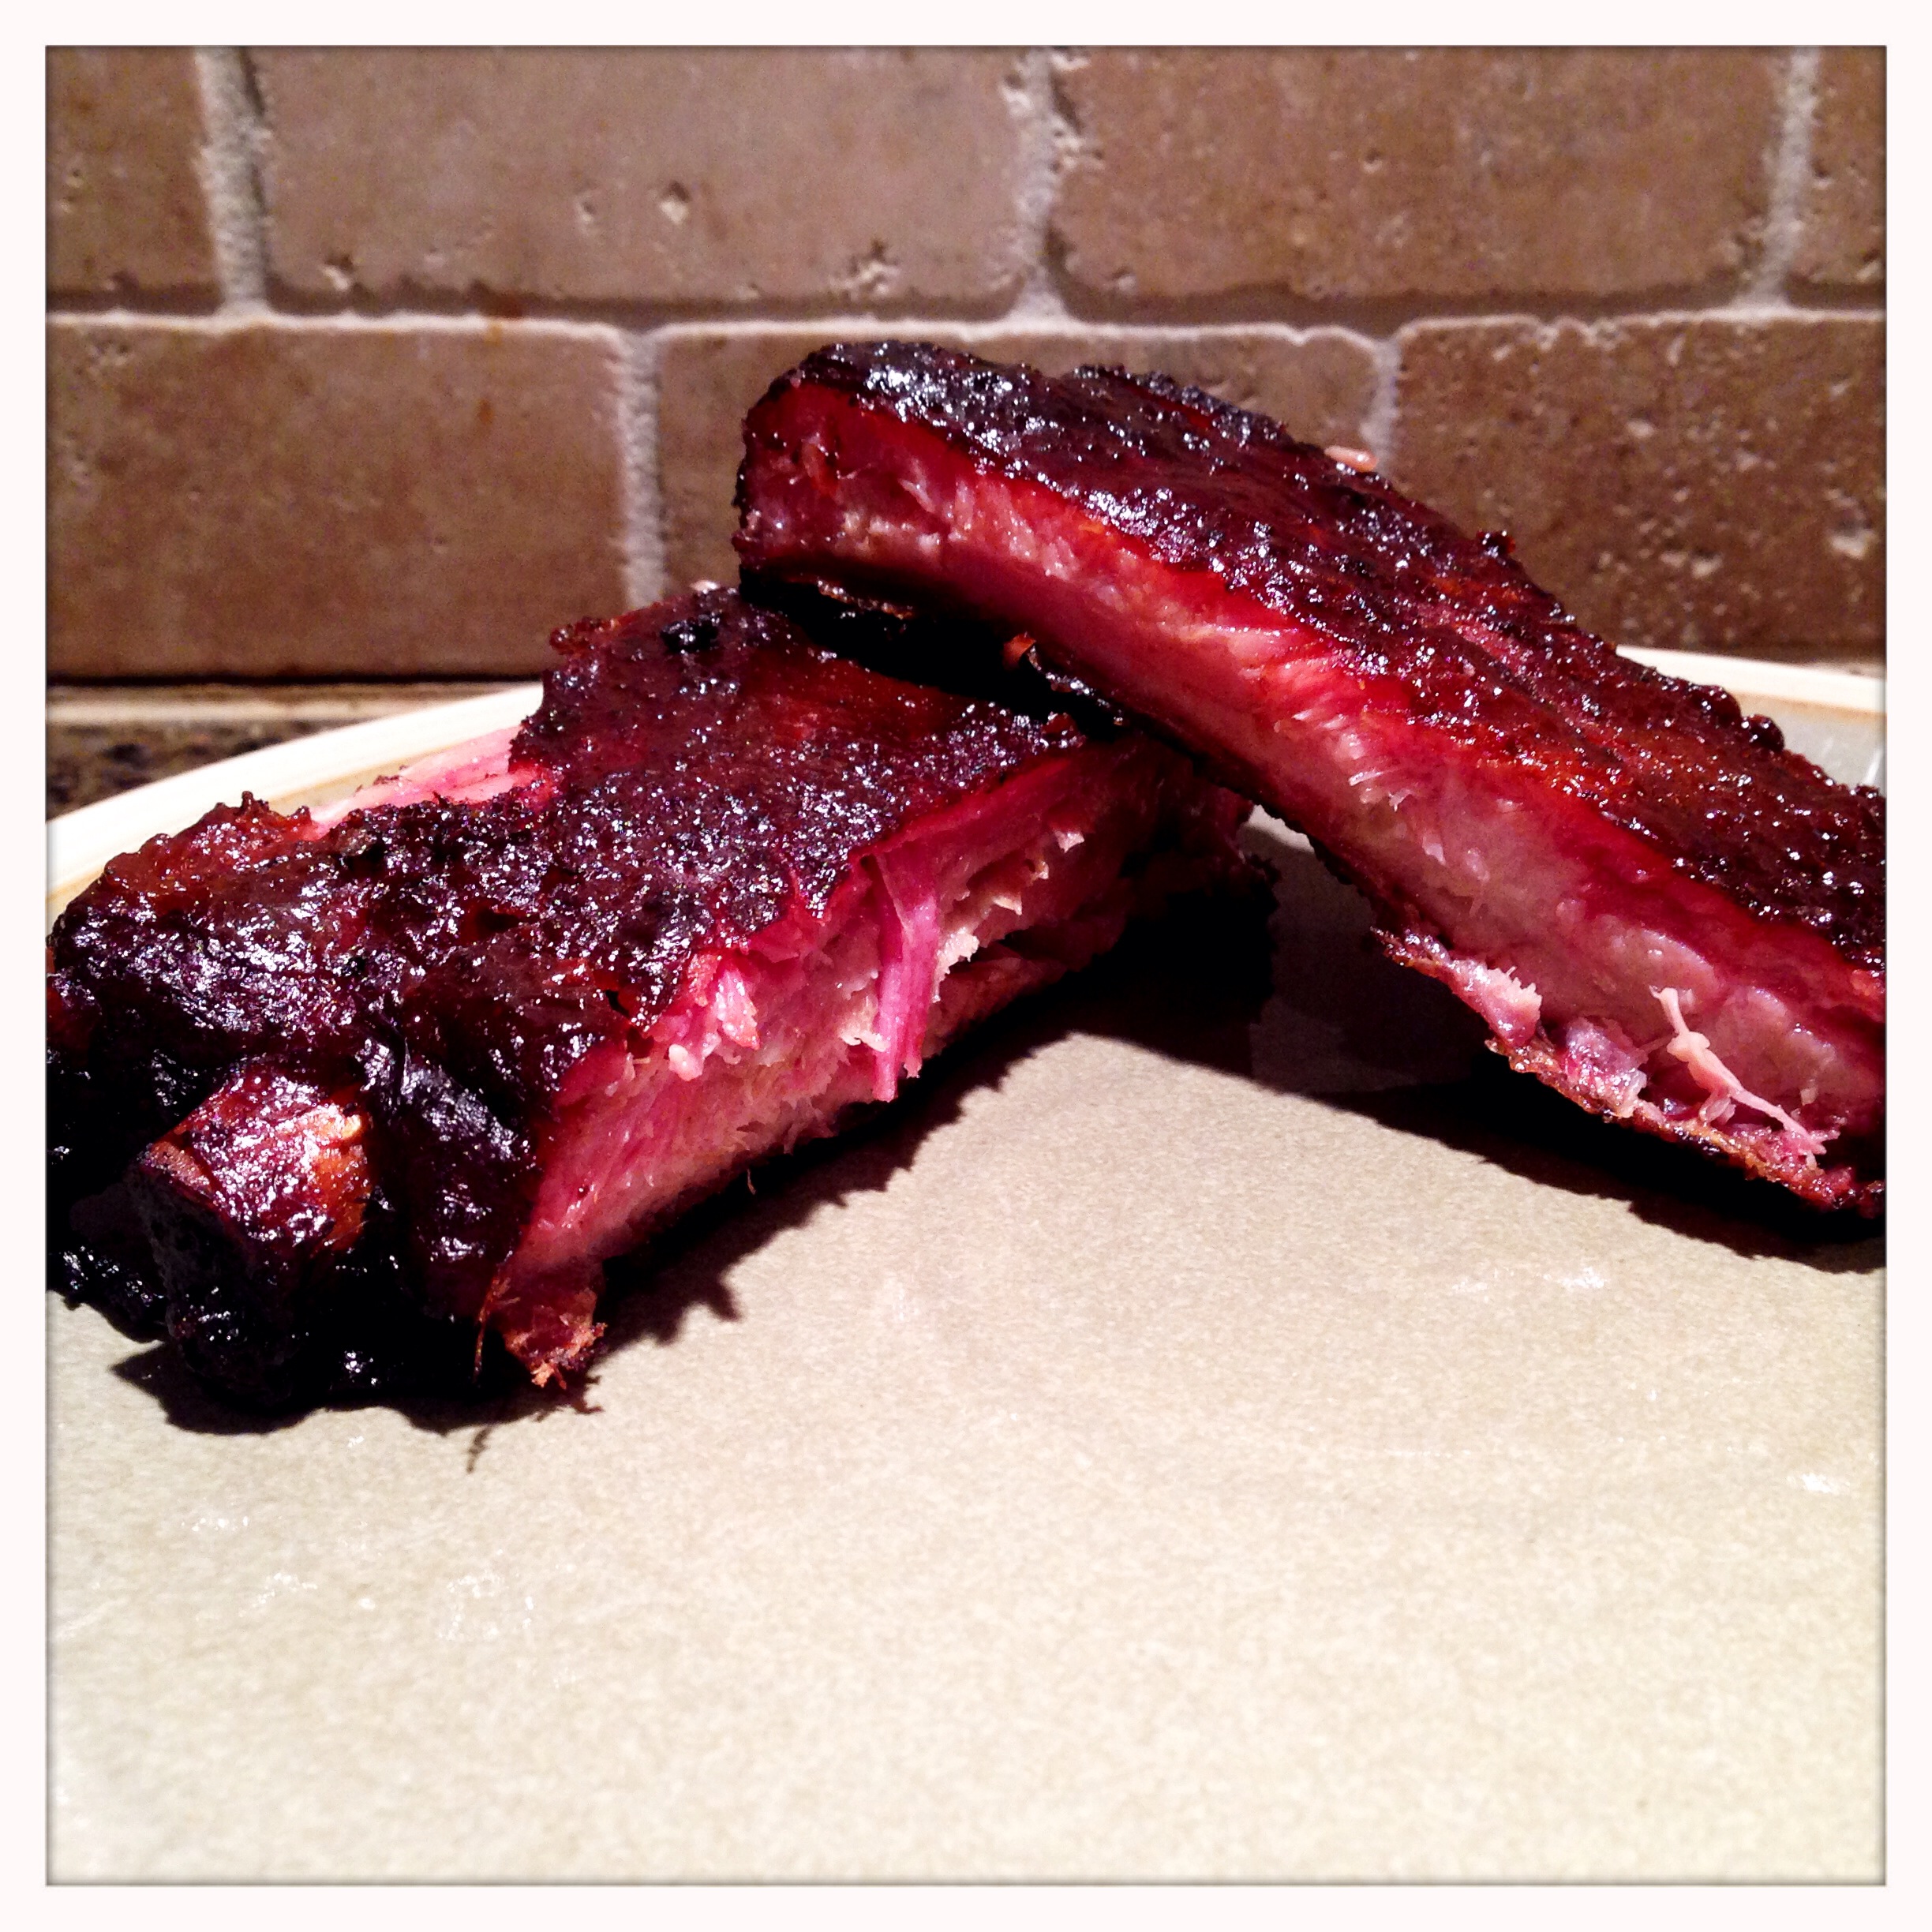
For this rack of ribs, I went with a light rub prior to smoking, sprayed the ribs once midway through, and sauced them towards the end. They came out very nicely, with the flavor of the meat and the smoke perfectly balanced by the rub and the sauce. So, let’s smoke some ribs!
Ingredients:
- 1 rack of st louis style spare ribs
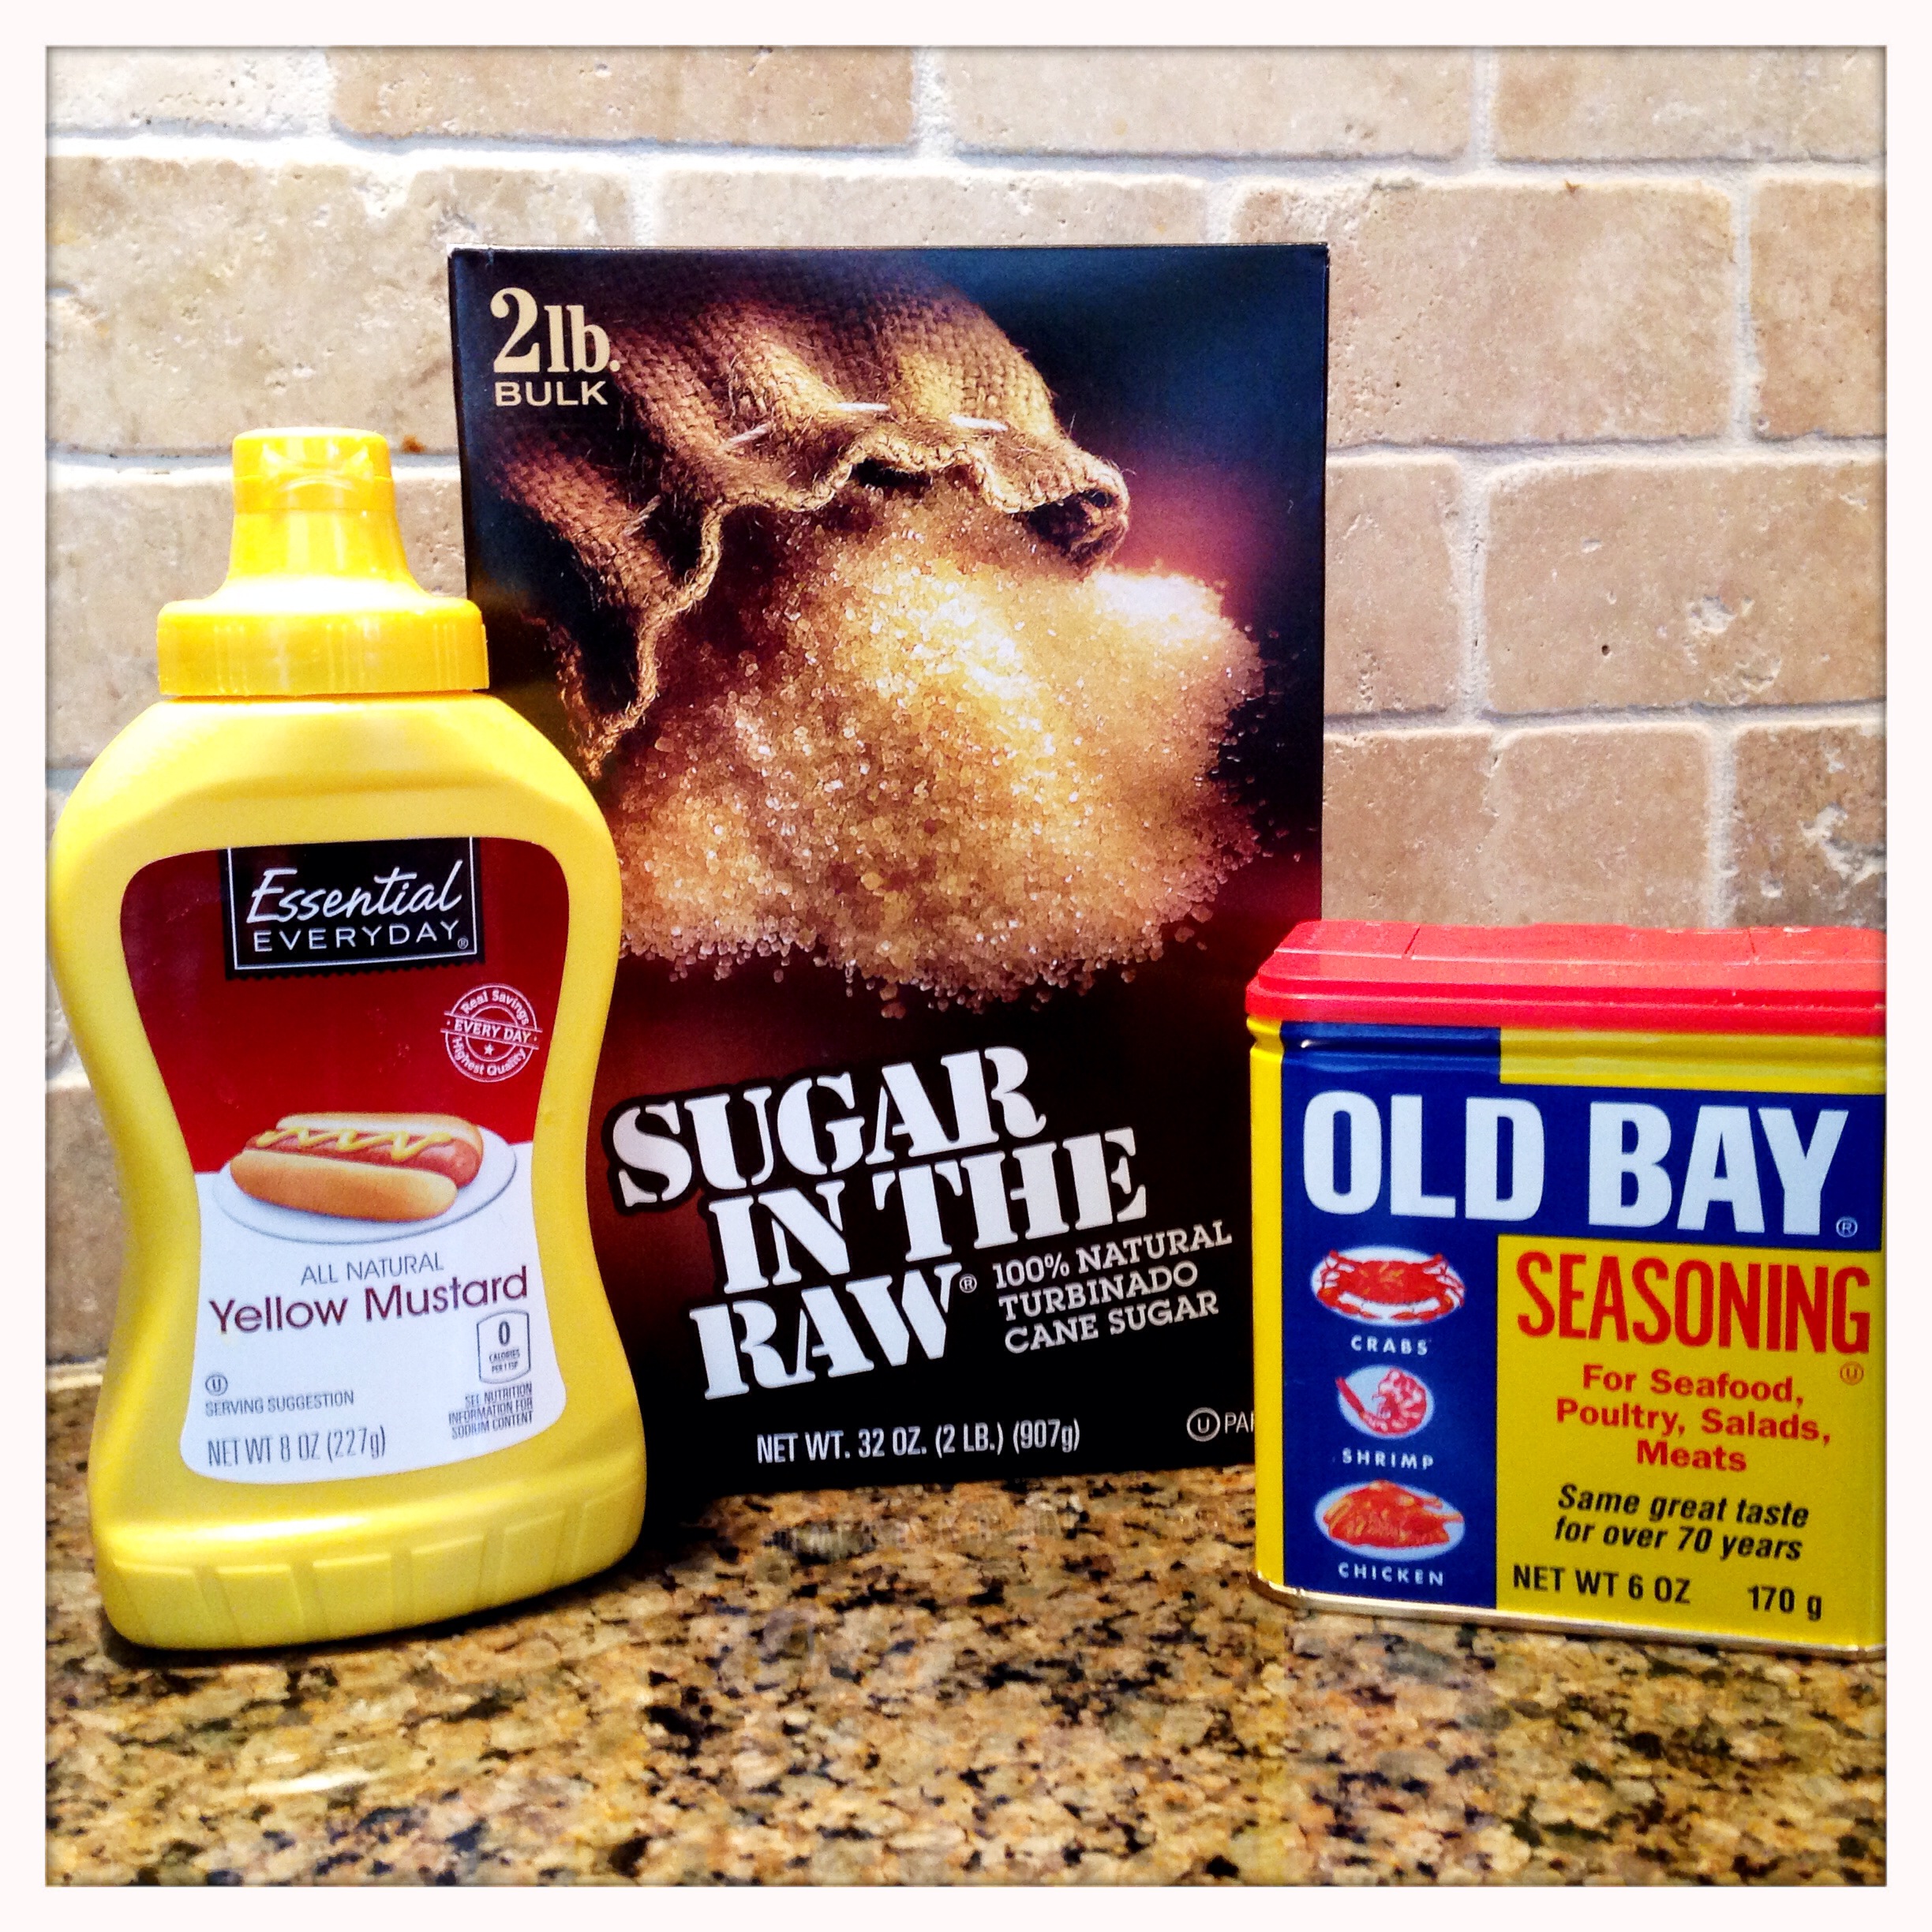
- yellow mustard
- old bay seasoning
- turbinado sugar
- black pepper
- cider vinegar
- beer, preferably a lager
- worchestershire sauce
- BBQ sauce of your choice (optional)
Procedure:
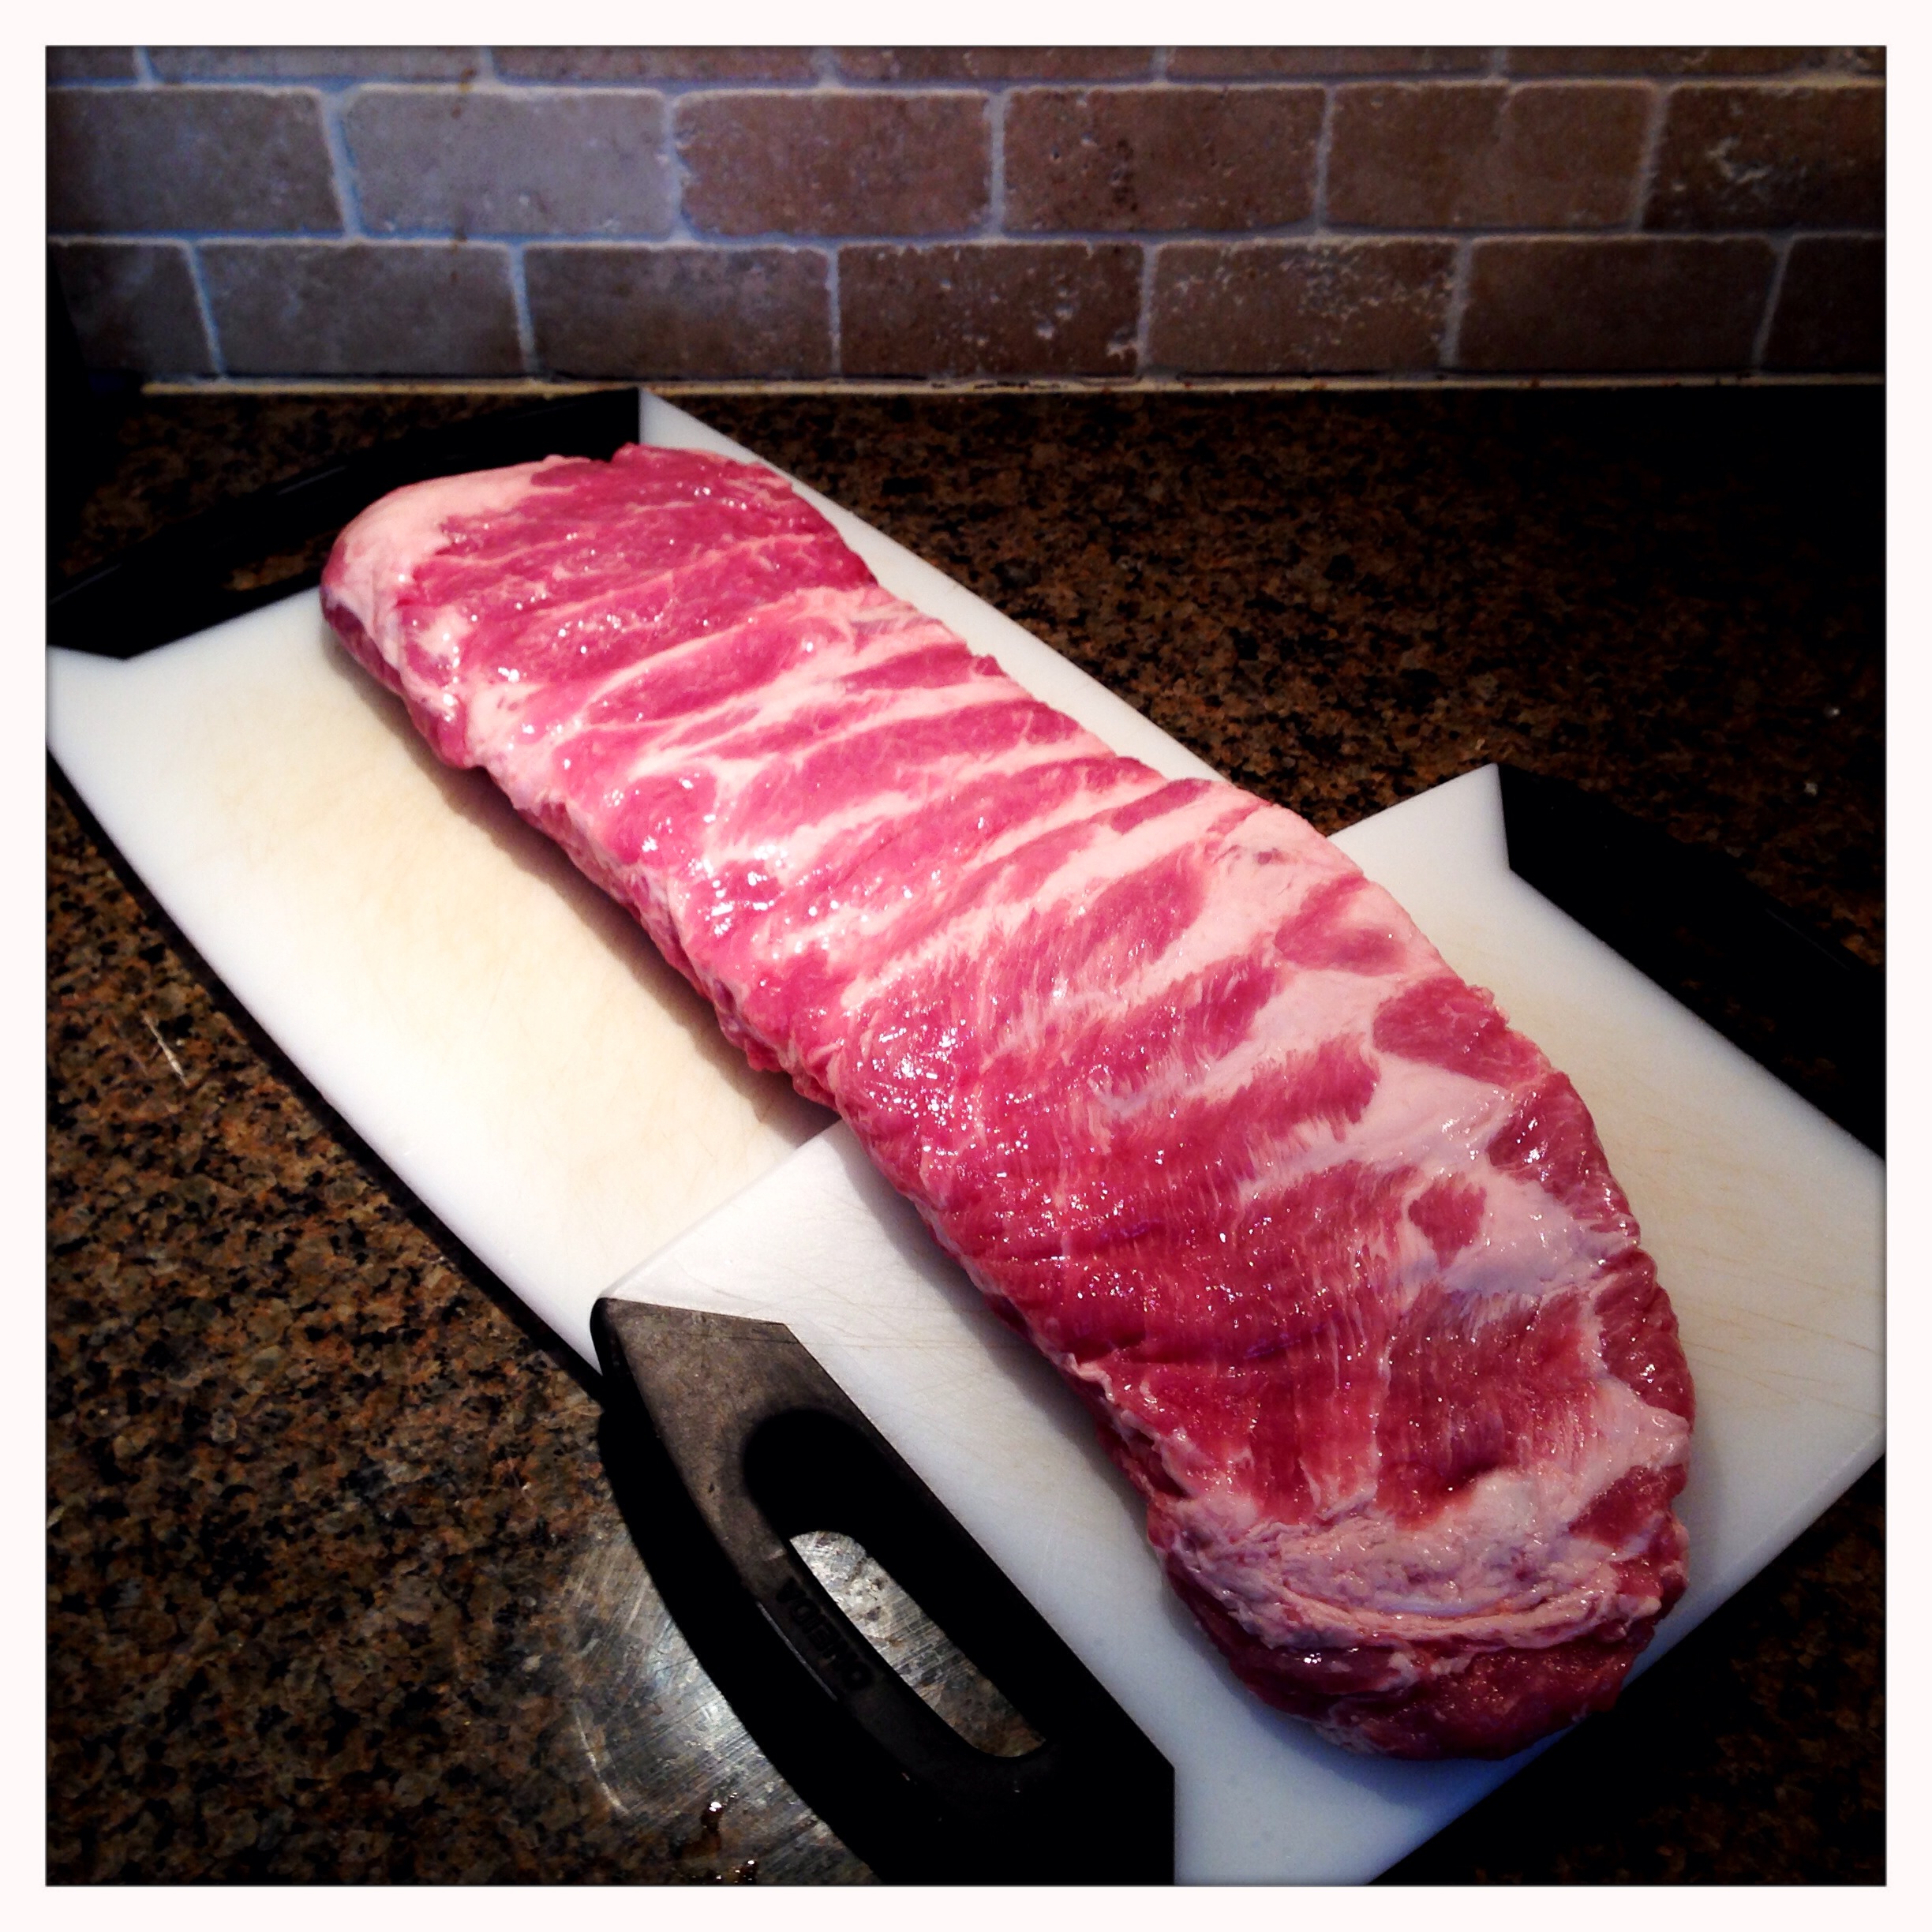
Lay the ribs out flat. Rinse any fluid off of them with cold water and pat dry. Before seasoning, you will need to remove the membrane from the back of the rack if this wasn’t done by your butcher. Some folks recommend sliding a butter knife under the membrane, but I found it easiest to just work my finger under it to loosen it.
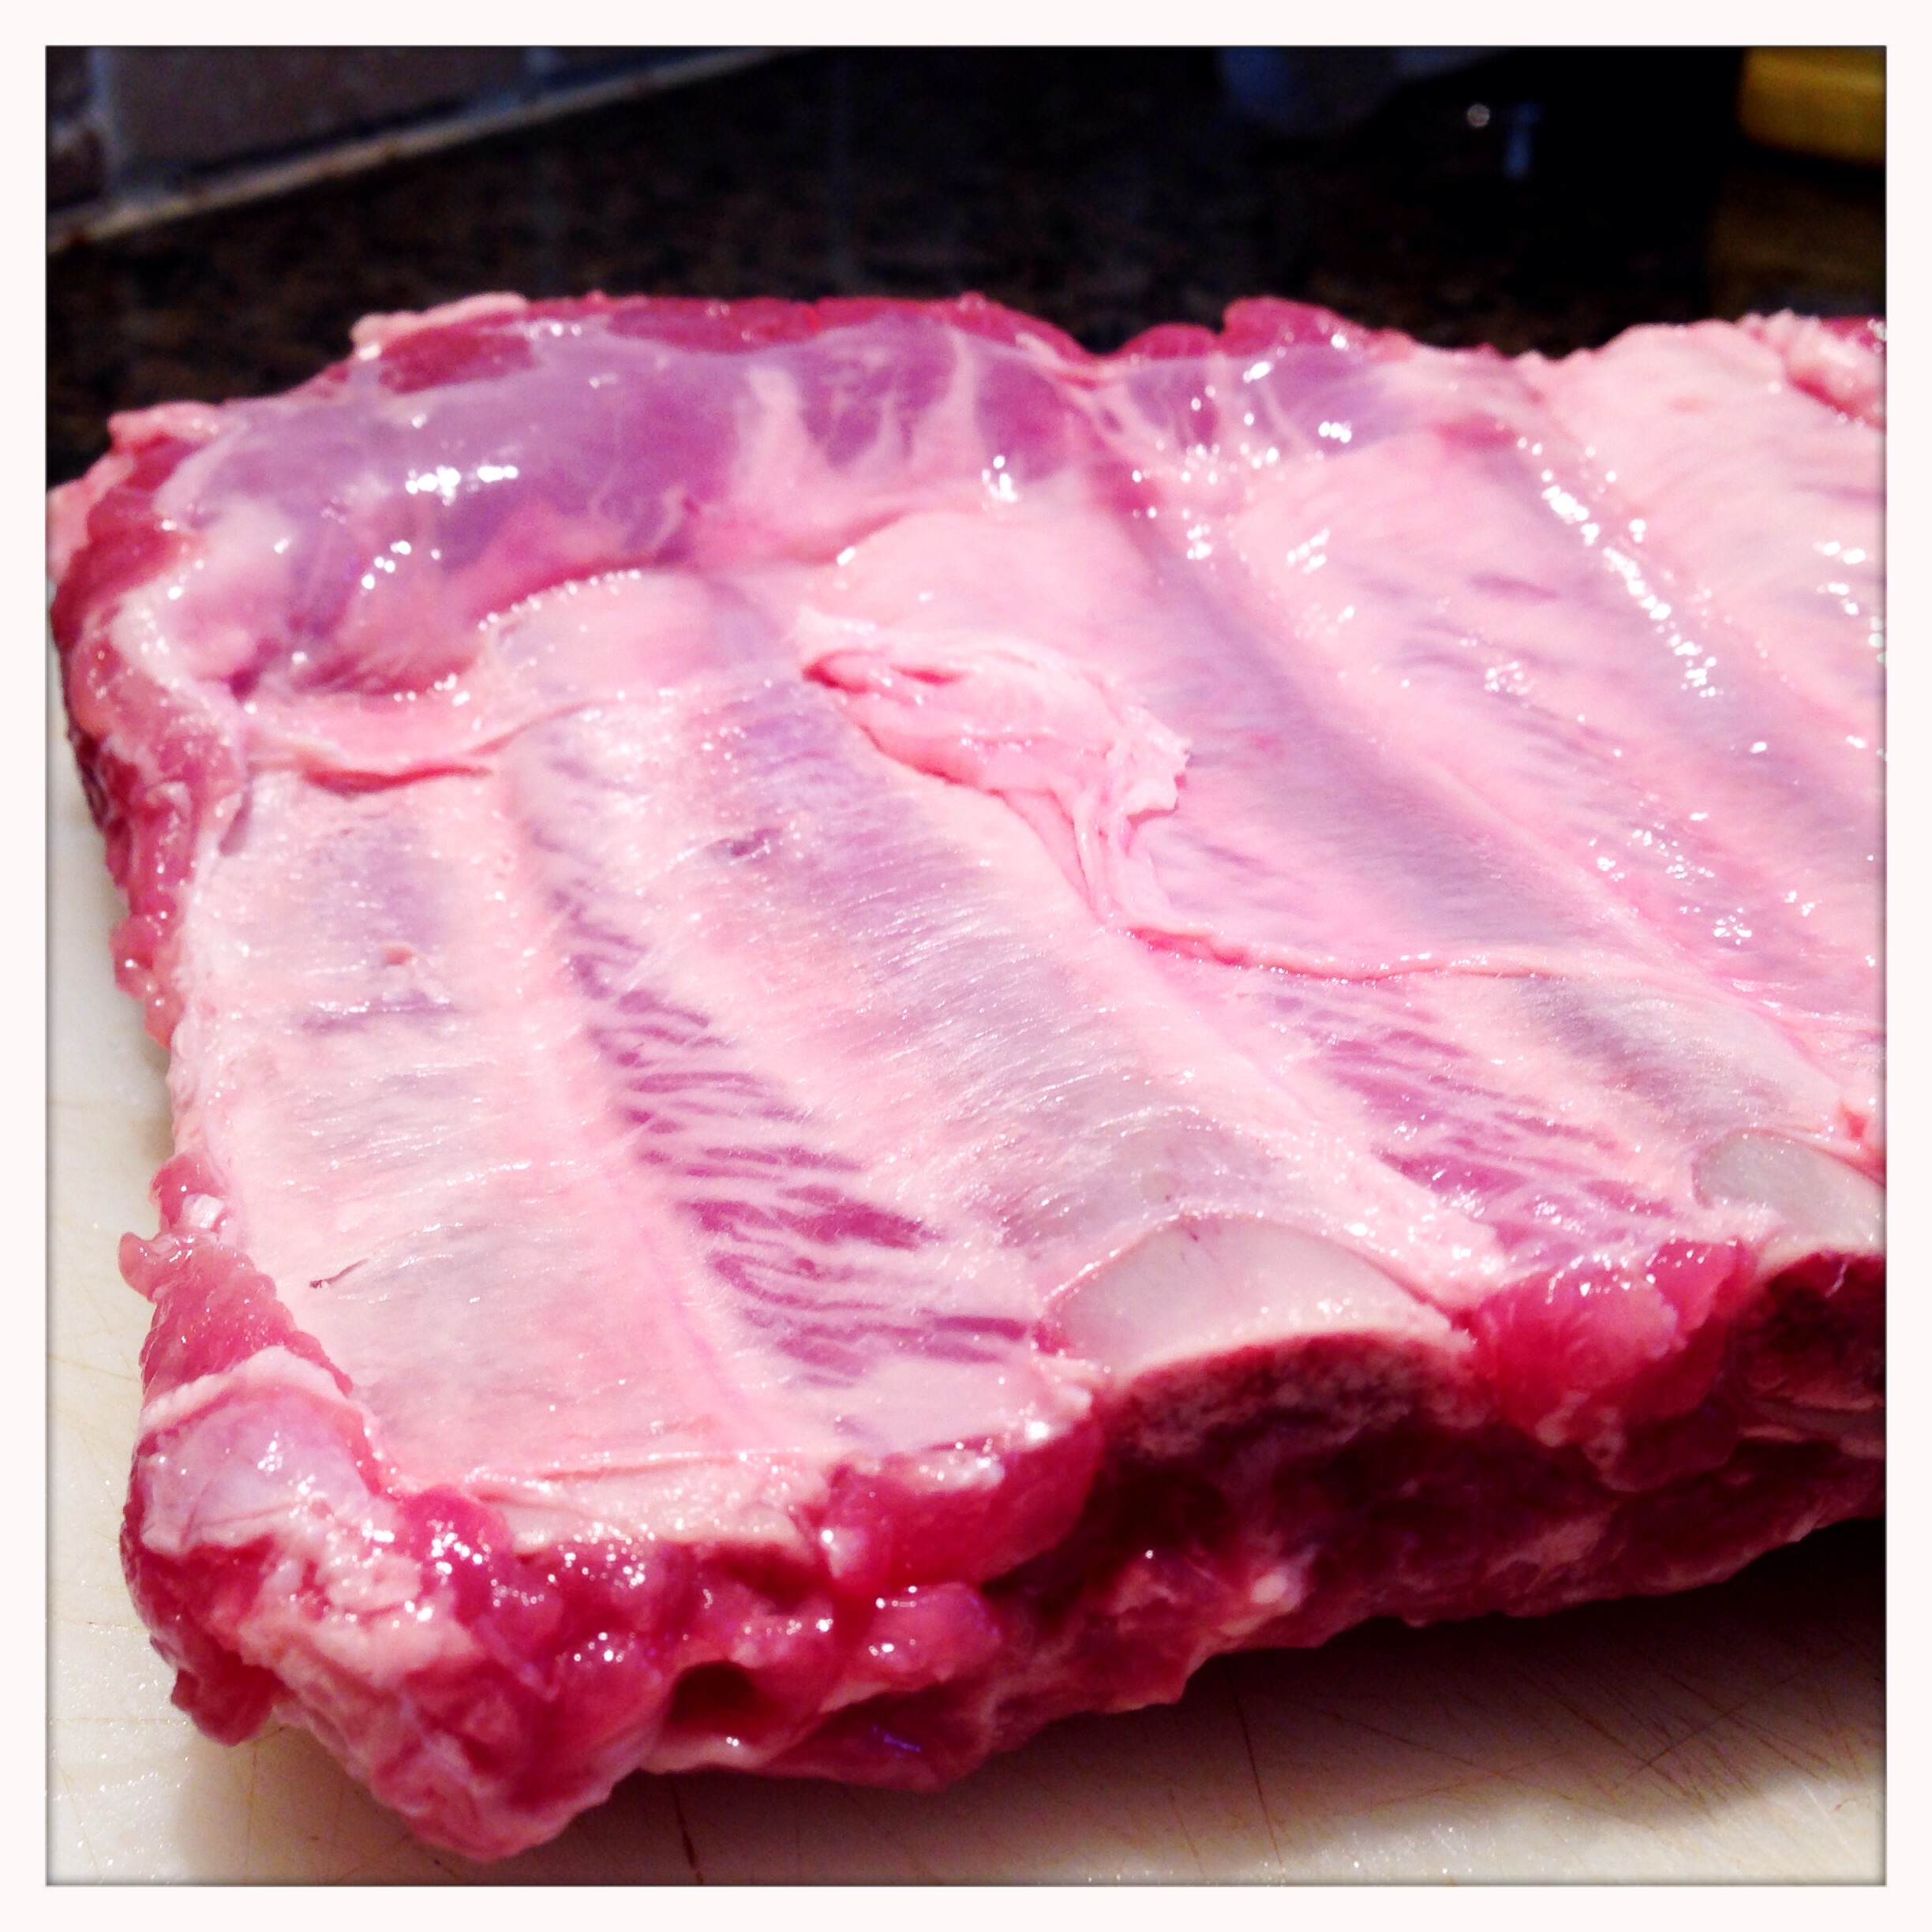
The membrane is visible somewhat bunched up in the middle of this photo. It was removed from the left, but not yet removed from the right.
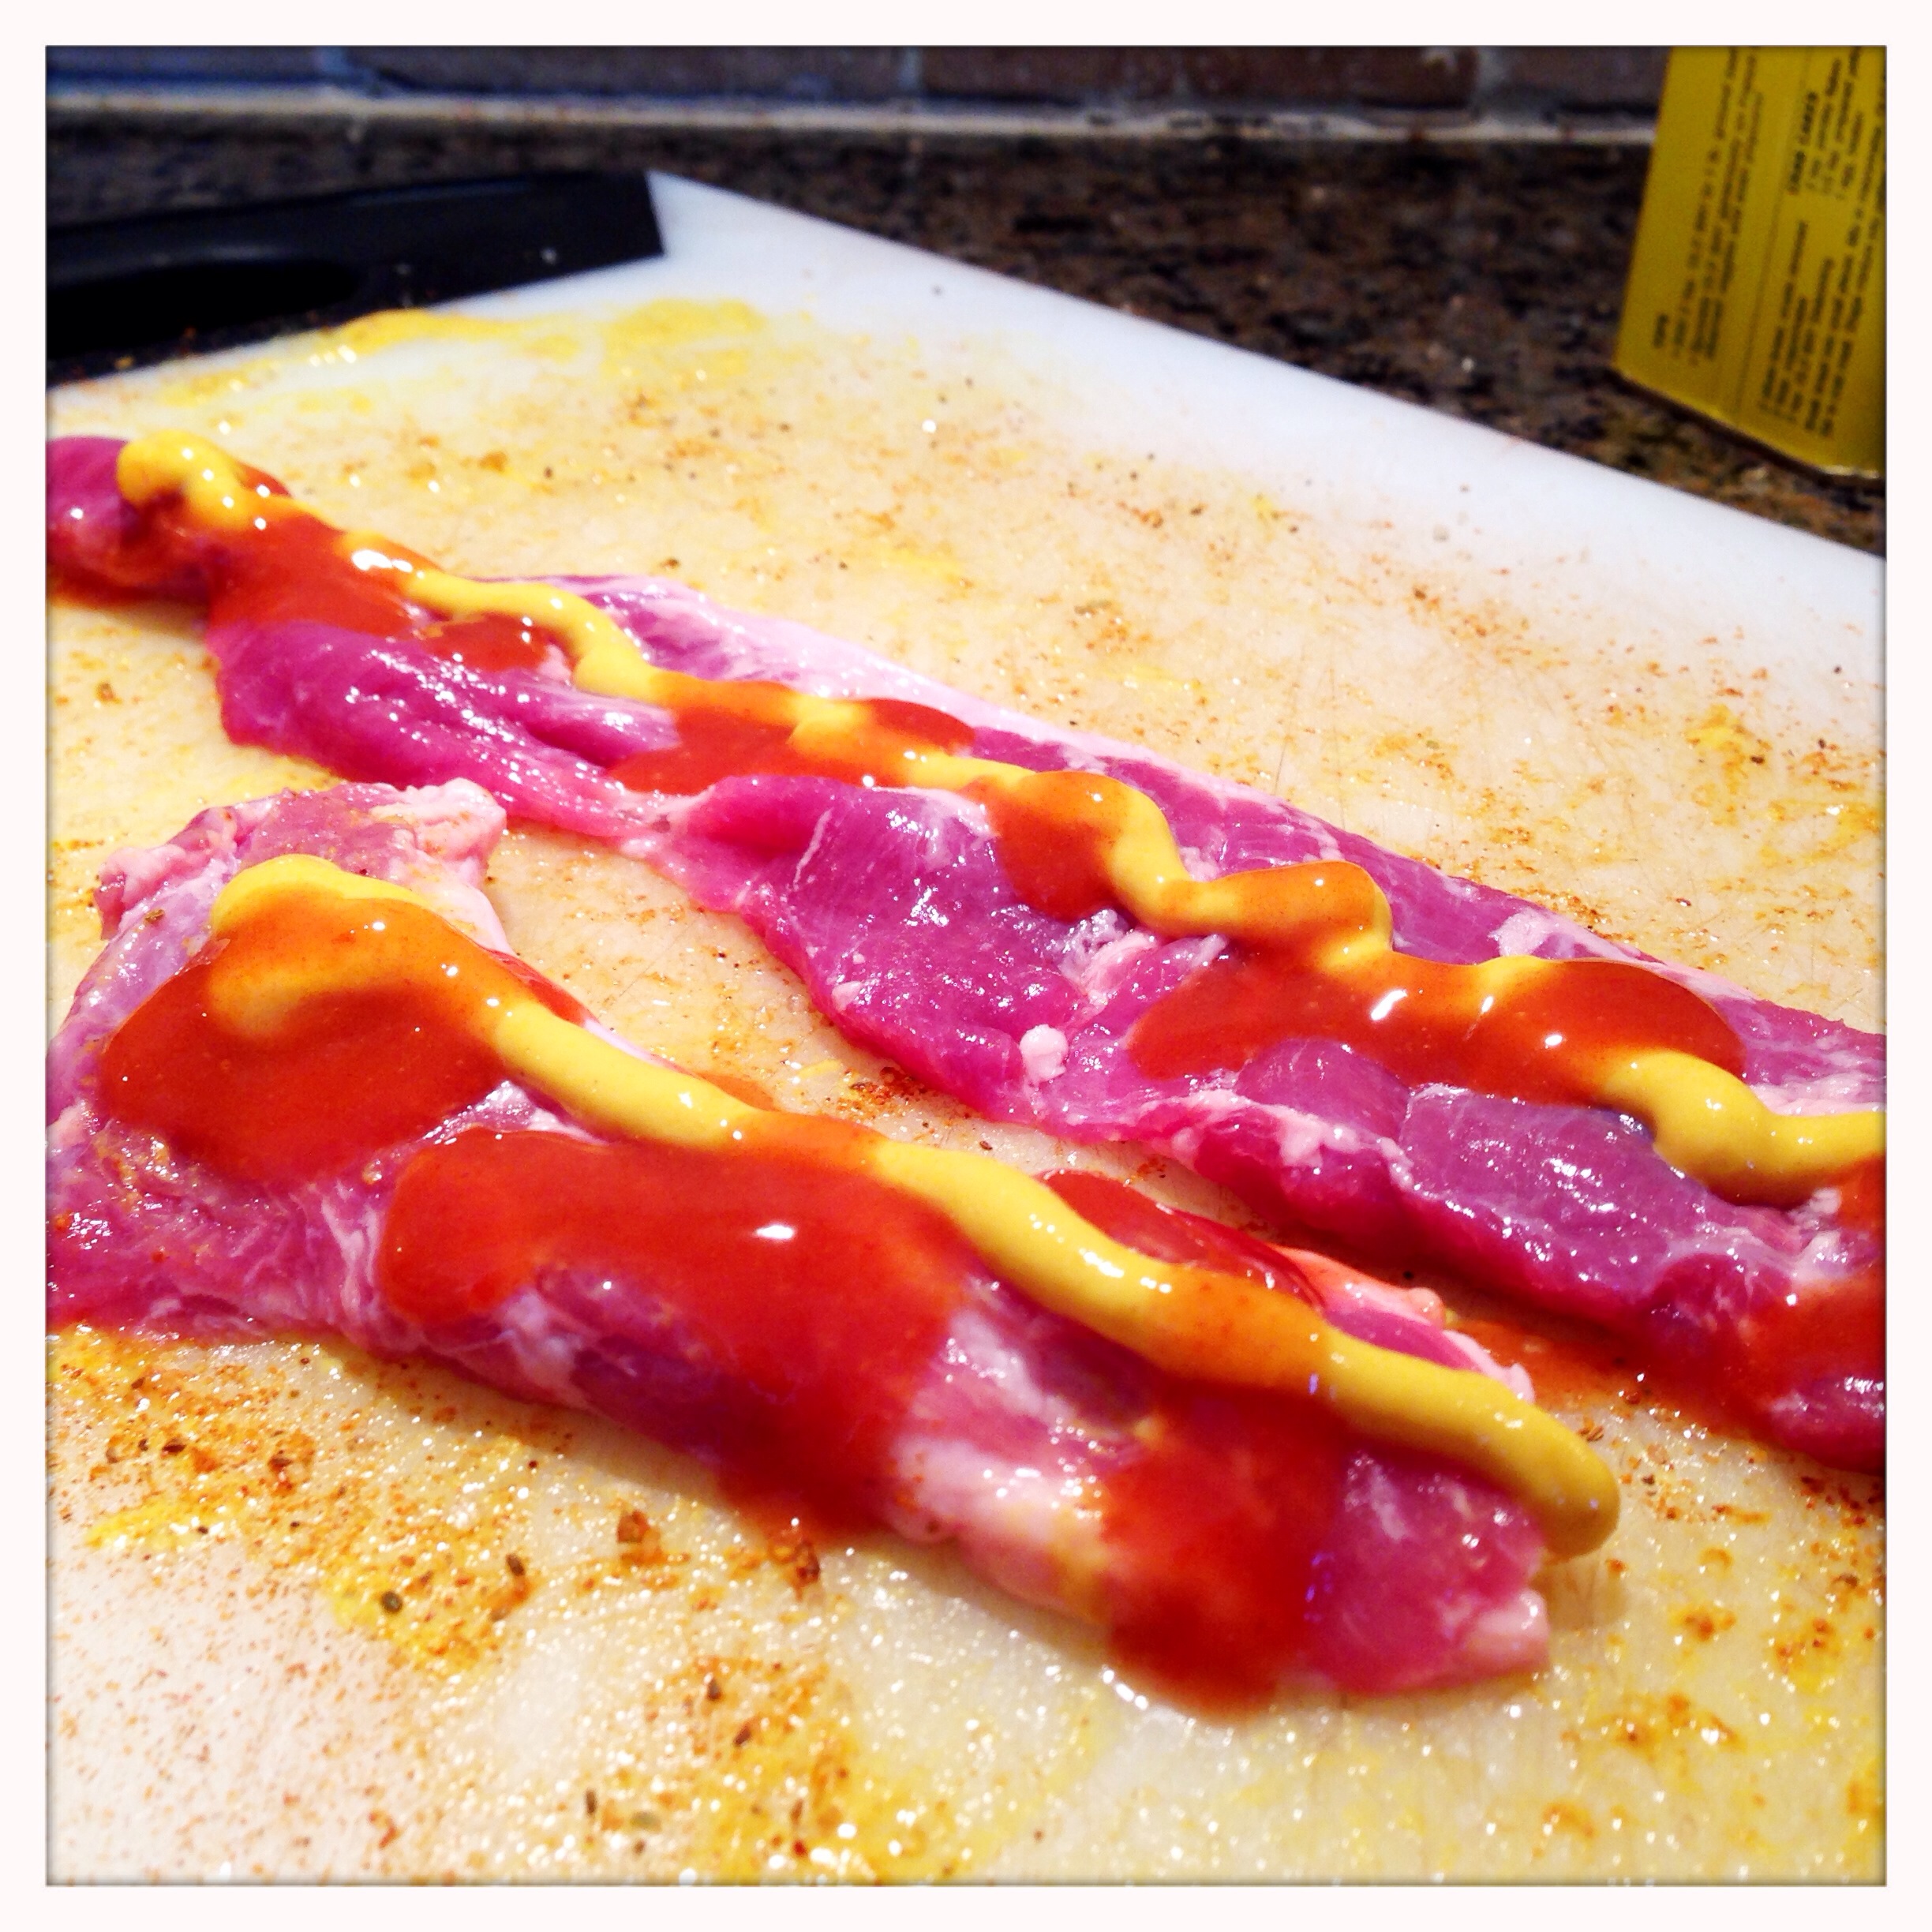
Once it’s loose, it will be slippery, so use a paper towel to get a grip on the membrane, and pull it off. Depending on the size of your grill/smoker, you will probably need to cut the rack in half. Additionally, if there is any excess fat or strips of meat, trim them off so that your rack is as uniform as possible. (Note: Set aside any trimmings. There should be no waste with ribs…) Then coat both sides in a thin layer of yellow mustard.
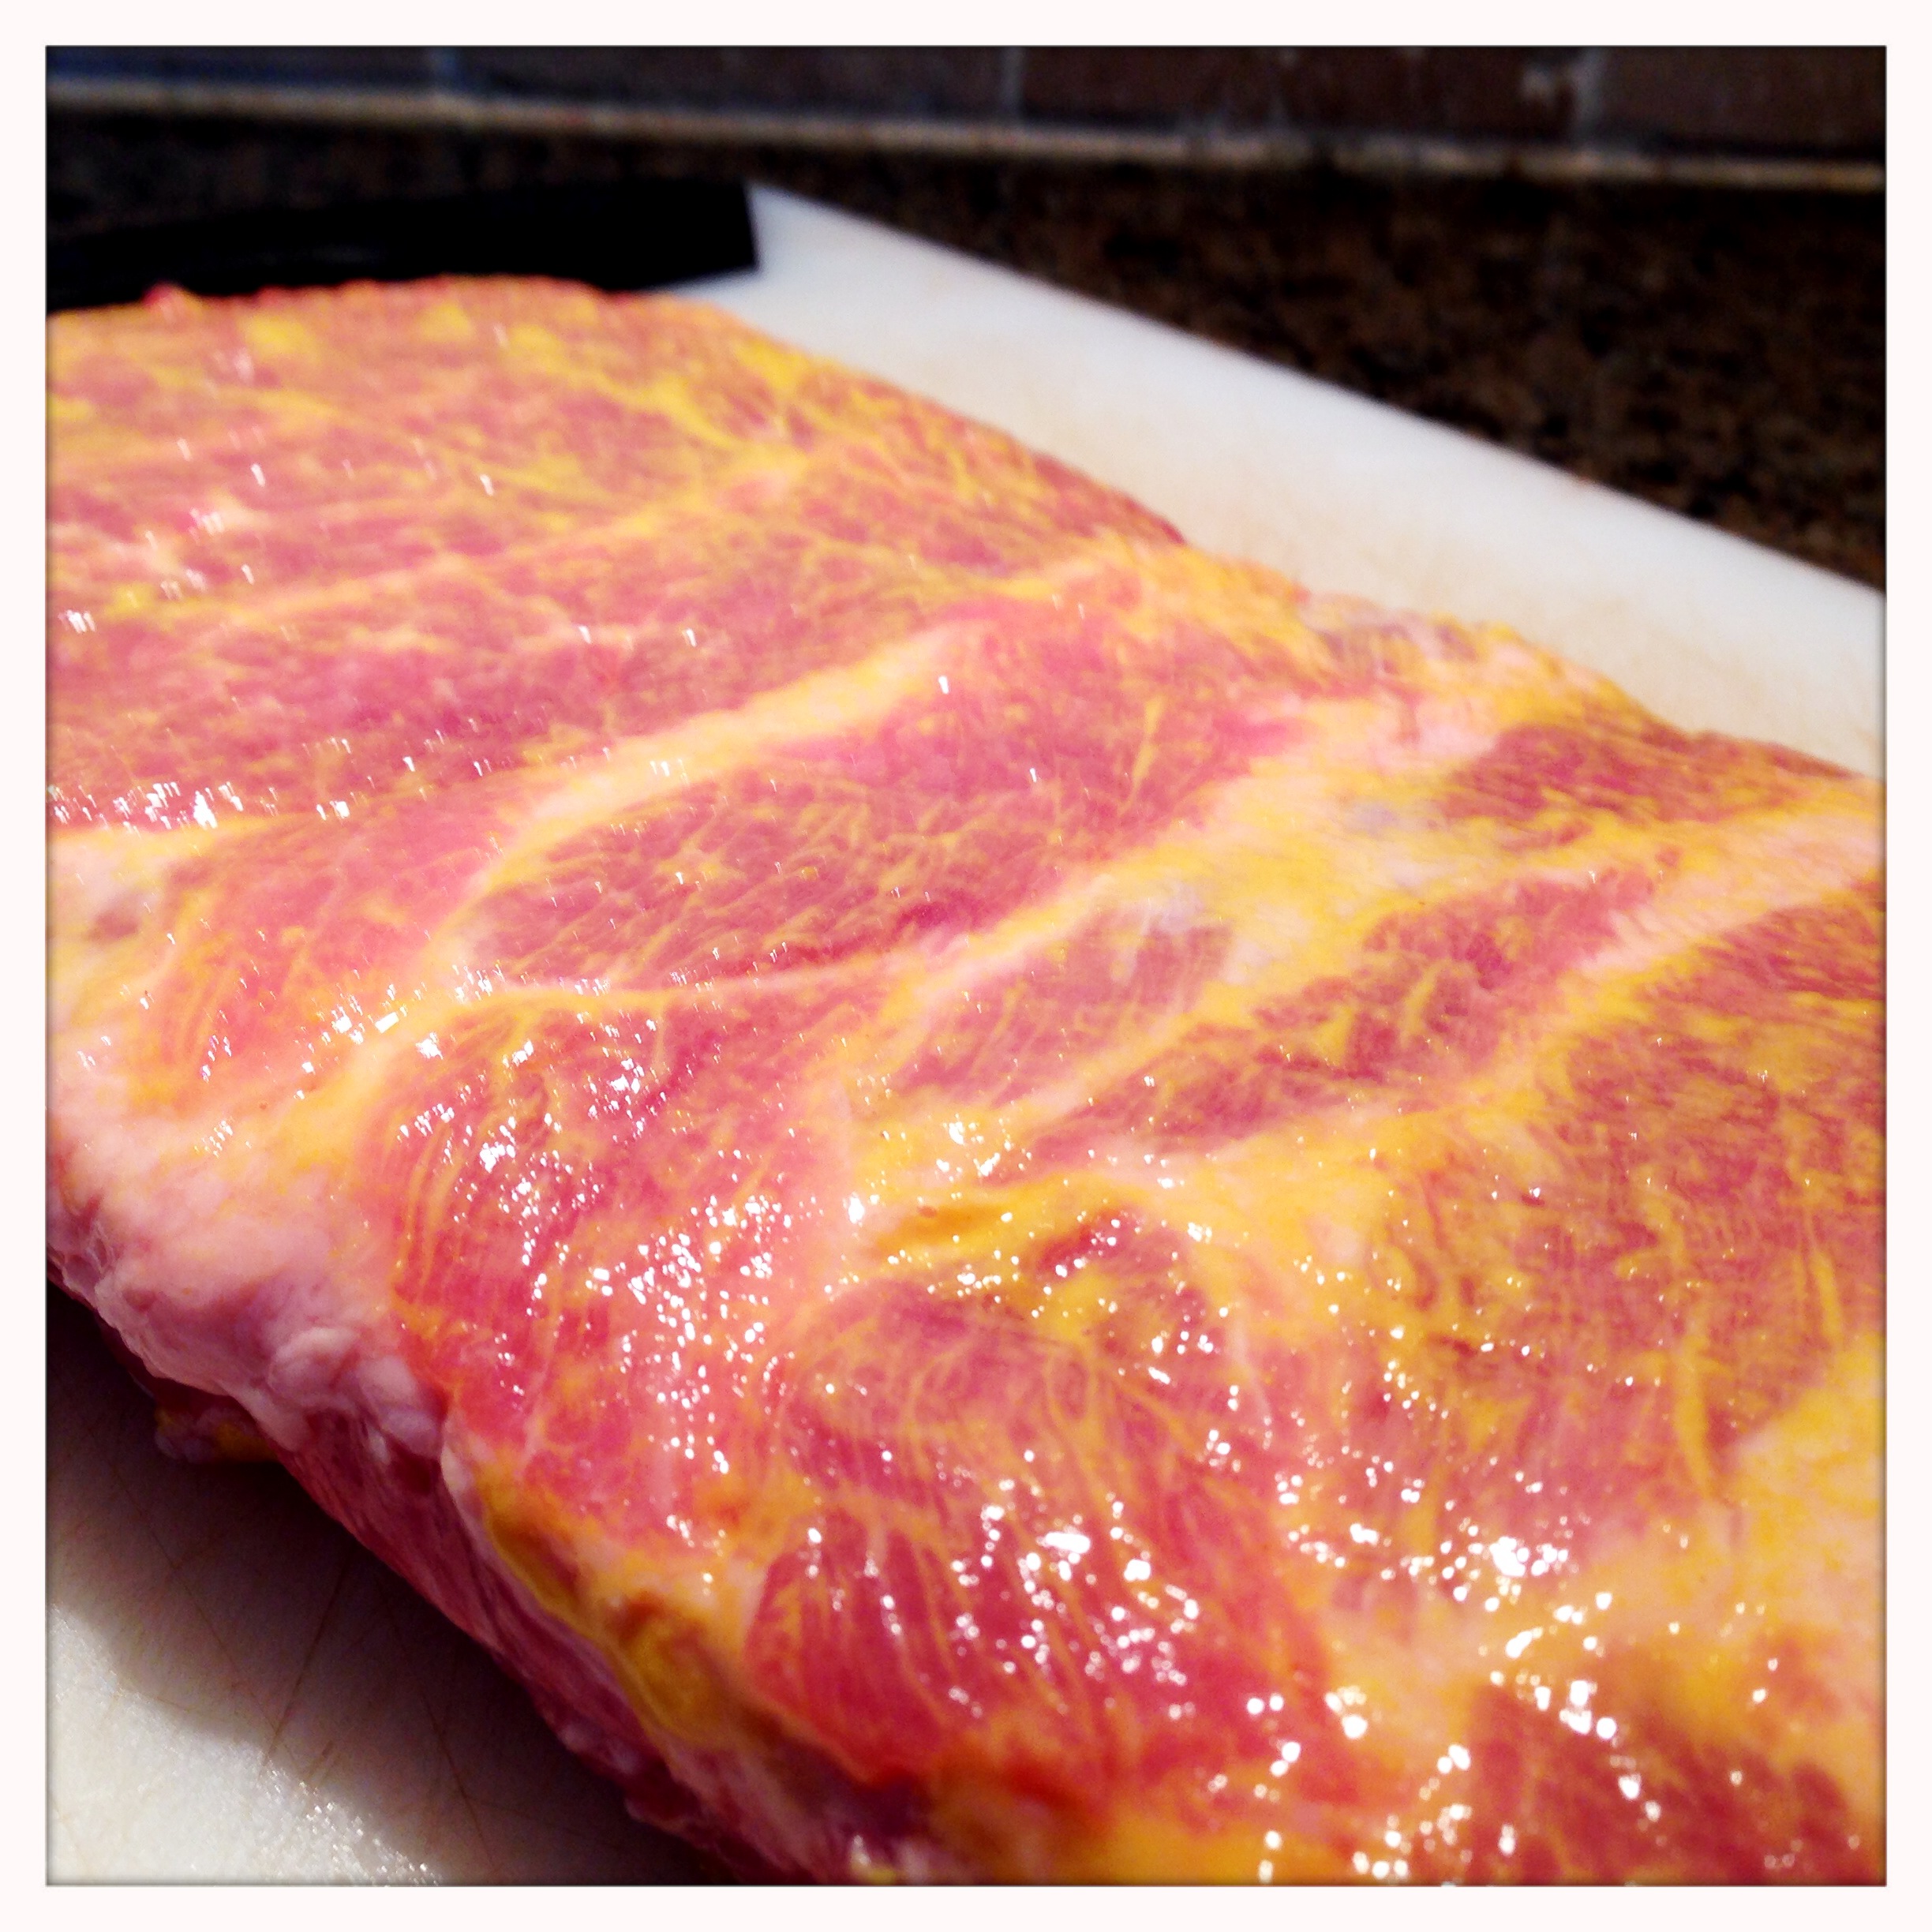
The mustard will cook off during the smoking, but it makes a good binder for the rub without going up in flames like an oil might. Unlike with pulled pork, we are not trying to crust the ribs with rub. Generously dust the surface of the meat on both sides of the rack with Old Bay. Then add about a teaspoon of turbinado sugar to each side of each piece. (Note: I cut my rack in half, so I used about a teaspoon of sugar per side per piece – or 4 teaspoons total for the whole rack.)
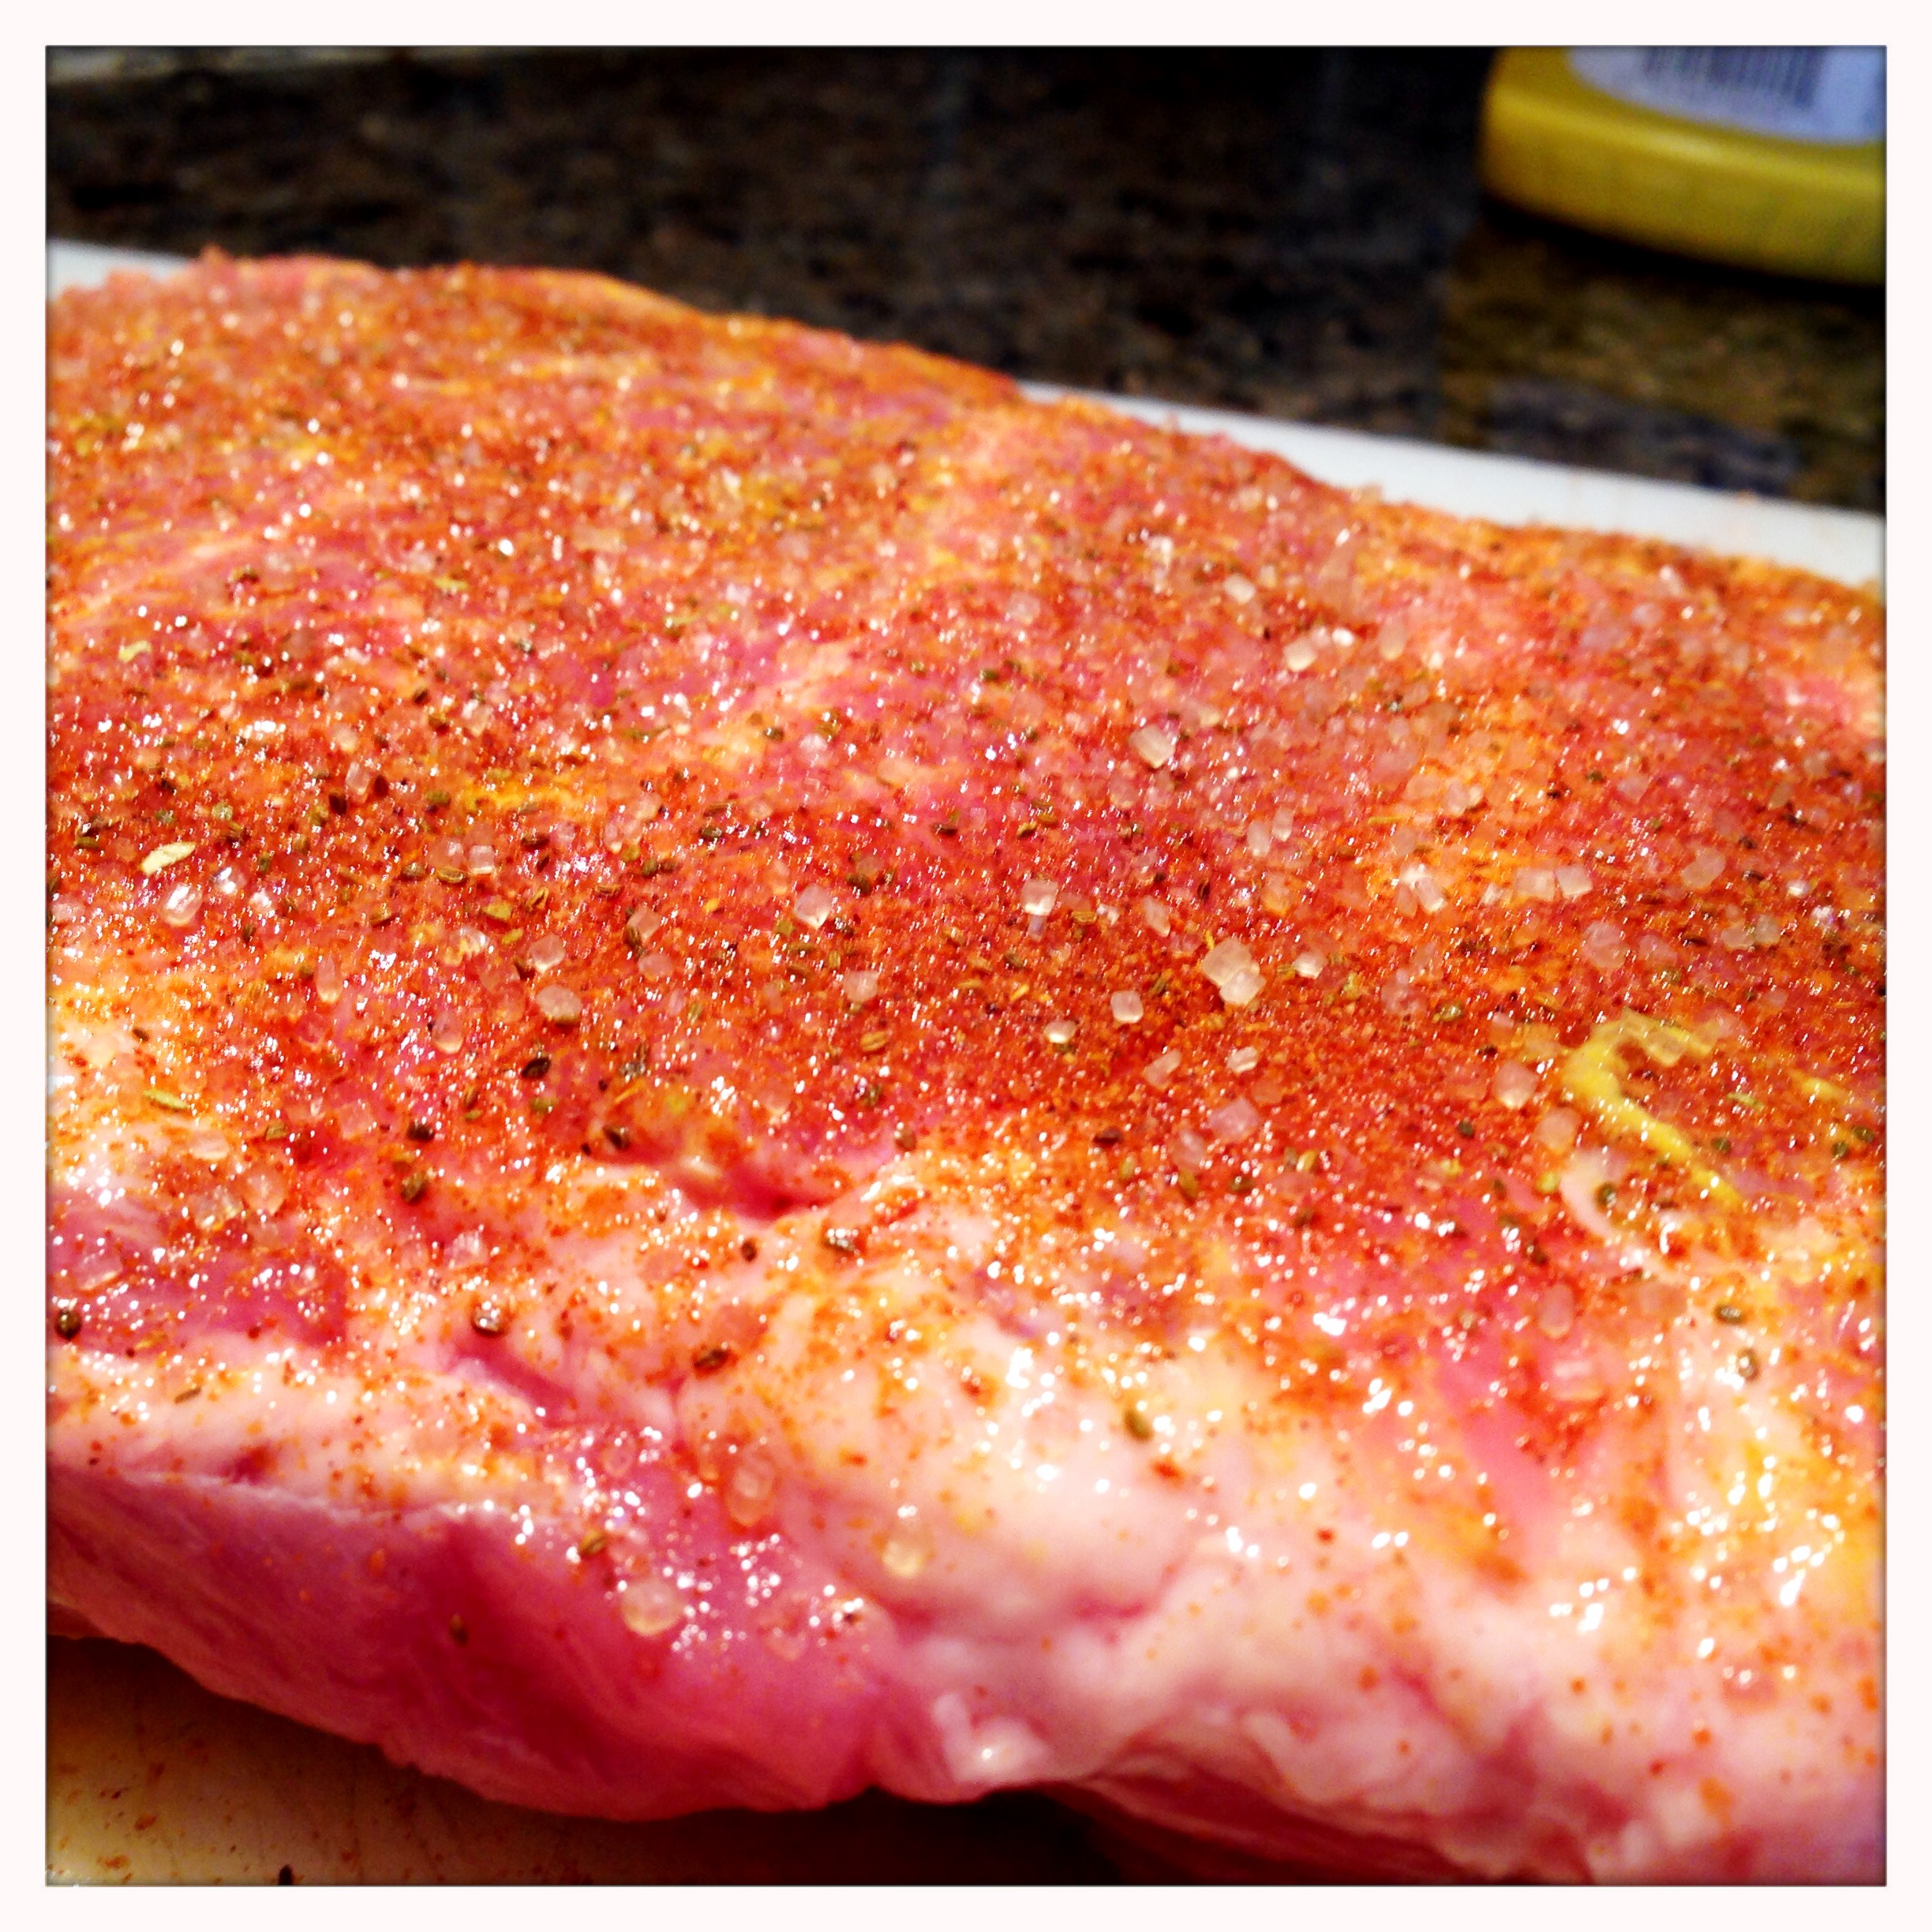
I let the rub rest on the meat for about an hour while getting the smoker lit and up to temperature. Same as with the pulled pork, I used lump style hardwood charcoal. I also used applewood chunks for the smoke. I filled the charcoal pan on the smoker with lump charcoal and then lit one small chimney starter full of charcoal. When the coals in the chimney were good and hot, I added them to the top of the unlit coals in the smoker and covered. This allows the unlit coals to slowly ignite, allowing a long consistent burn for low and slow cooking. We are shooting for a cooking temperature in the 240-275 degree range. I was able to maintain this temperature without adding any additional coals for the length of the cook, which had the smoker lit for about 6 hours total.
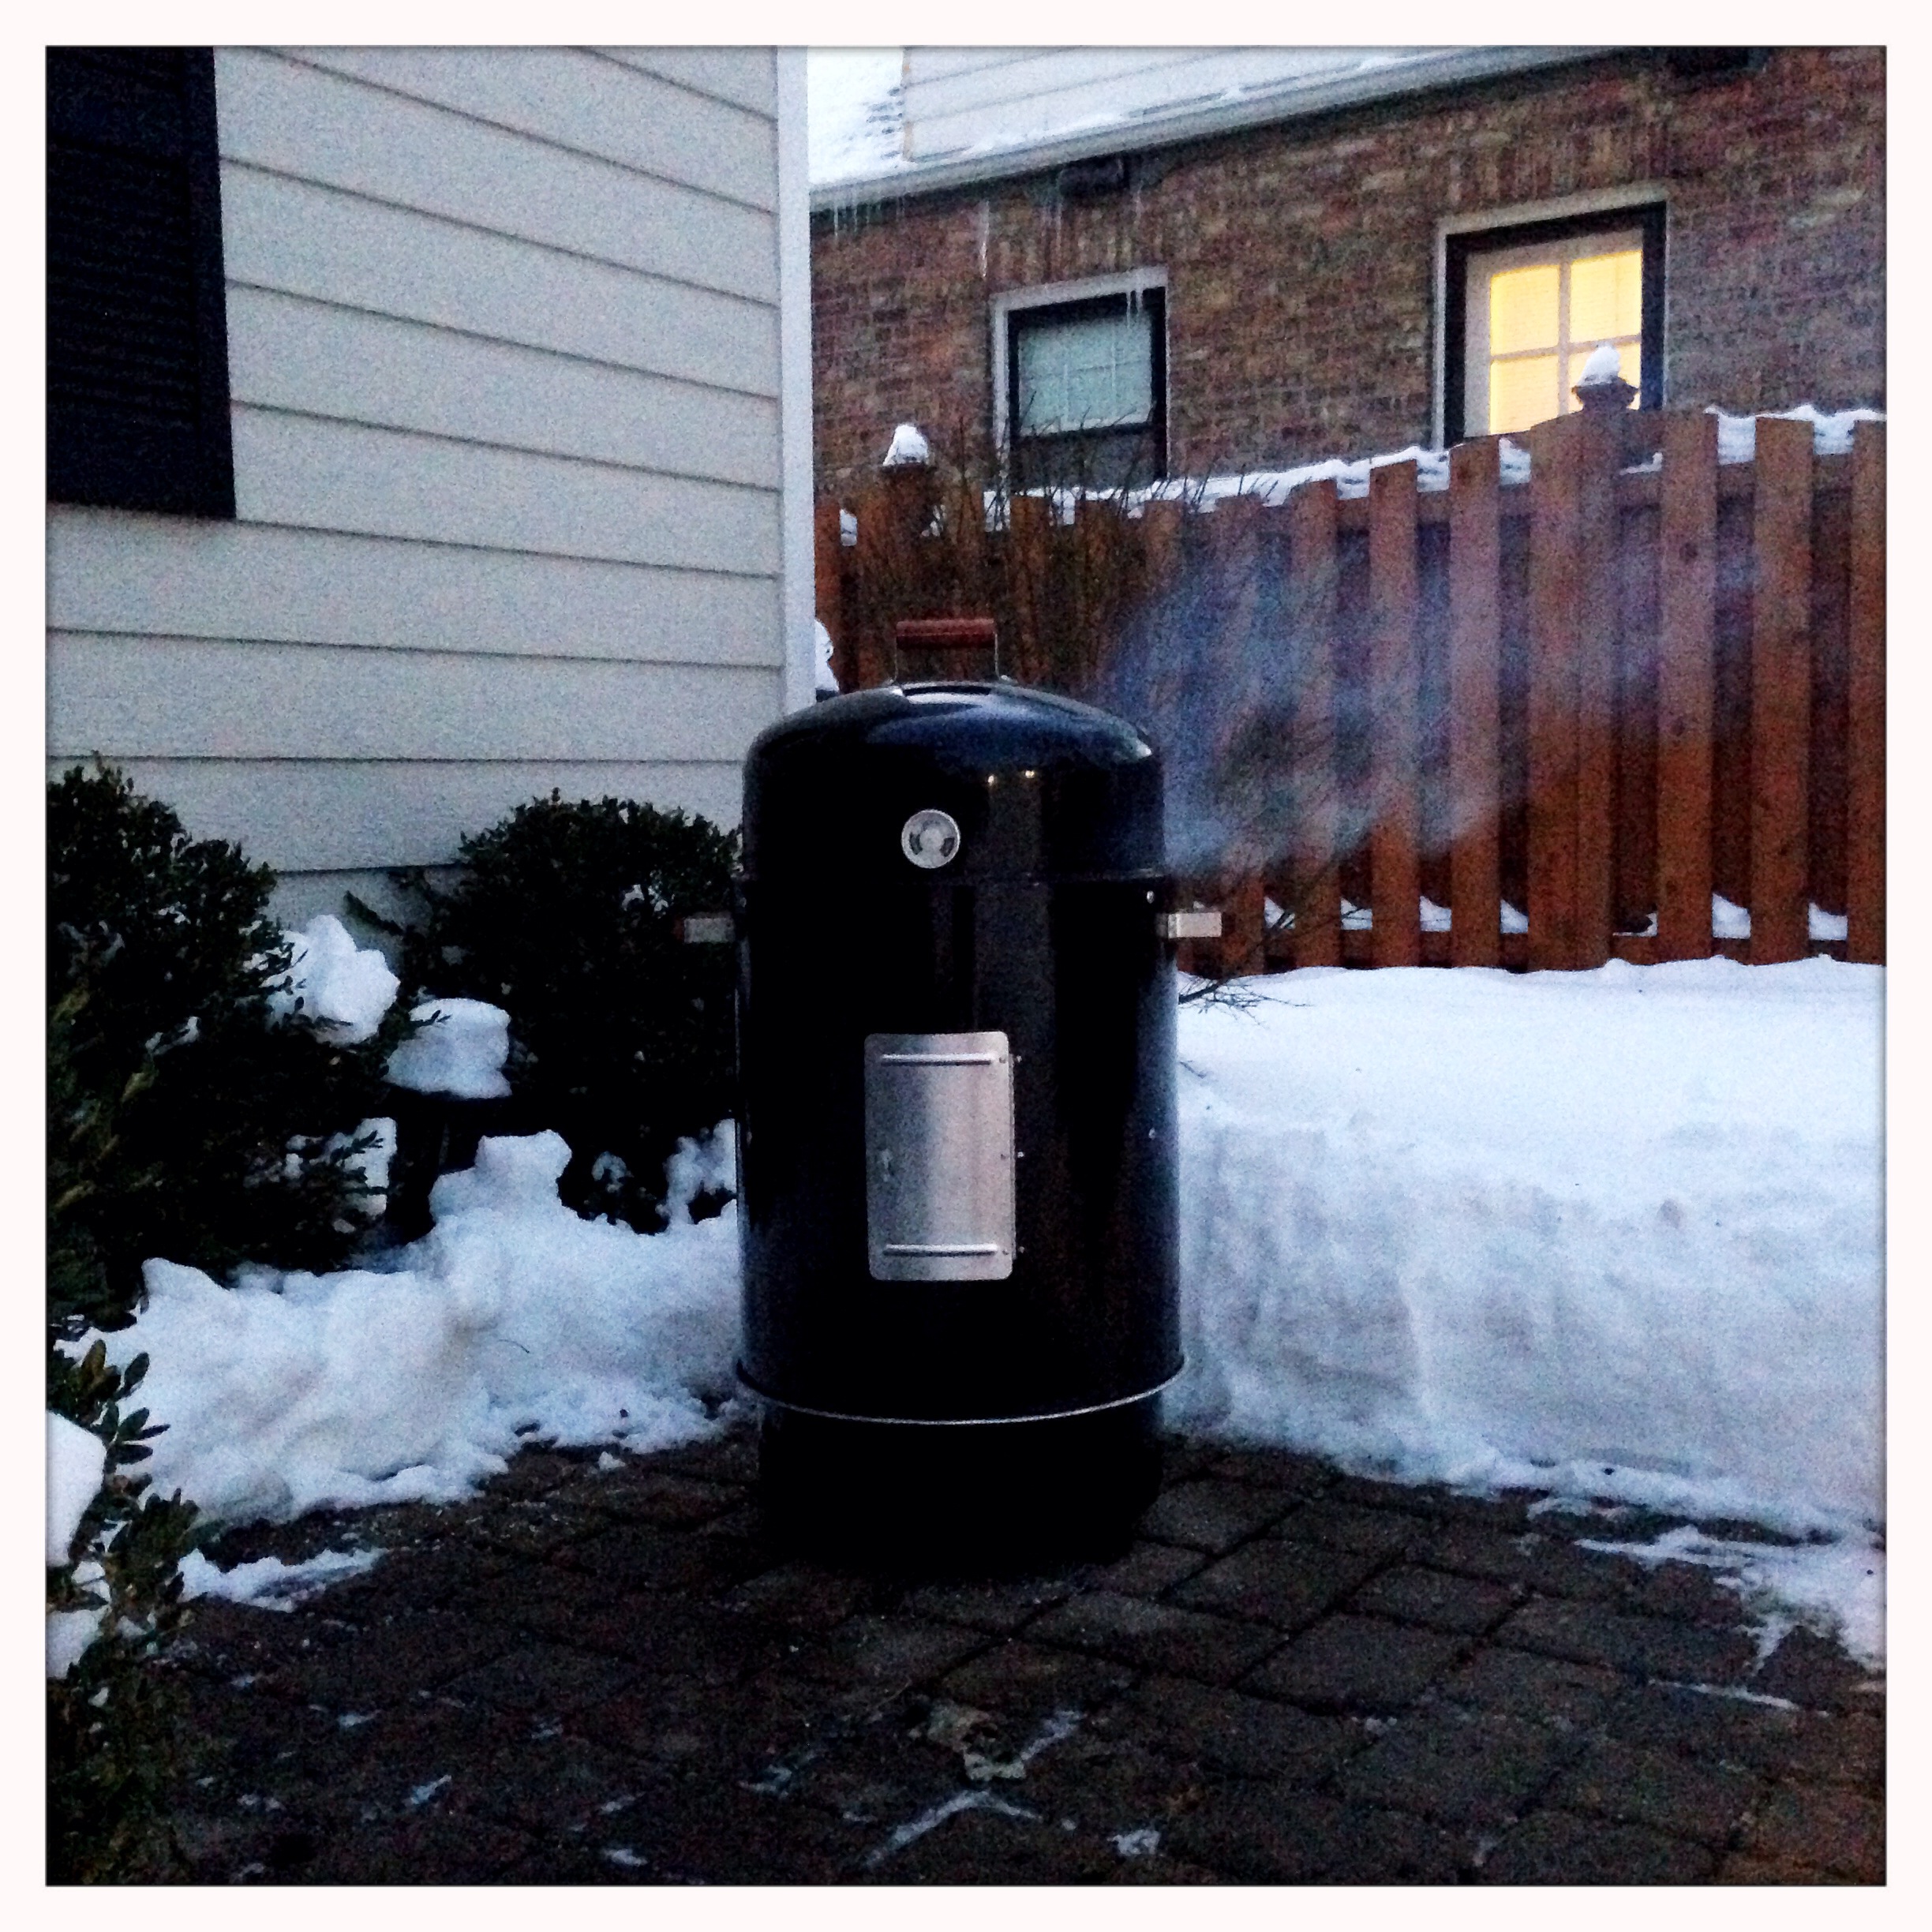
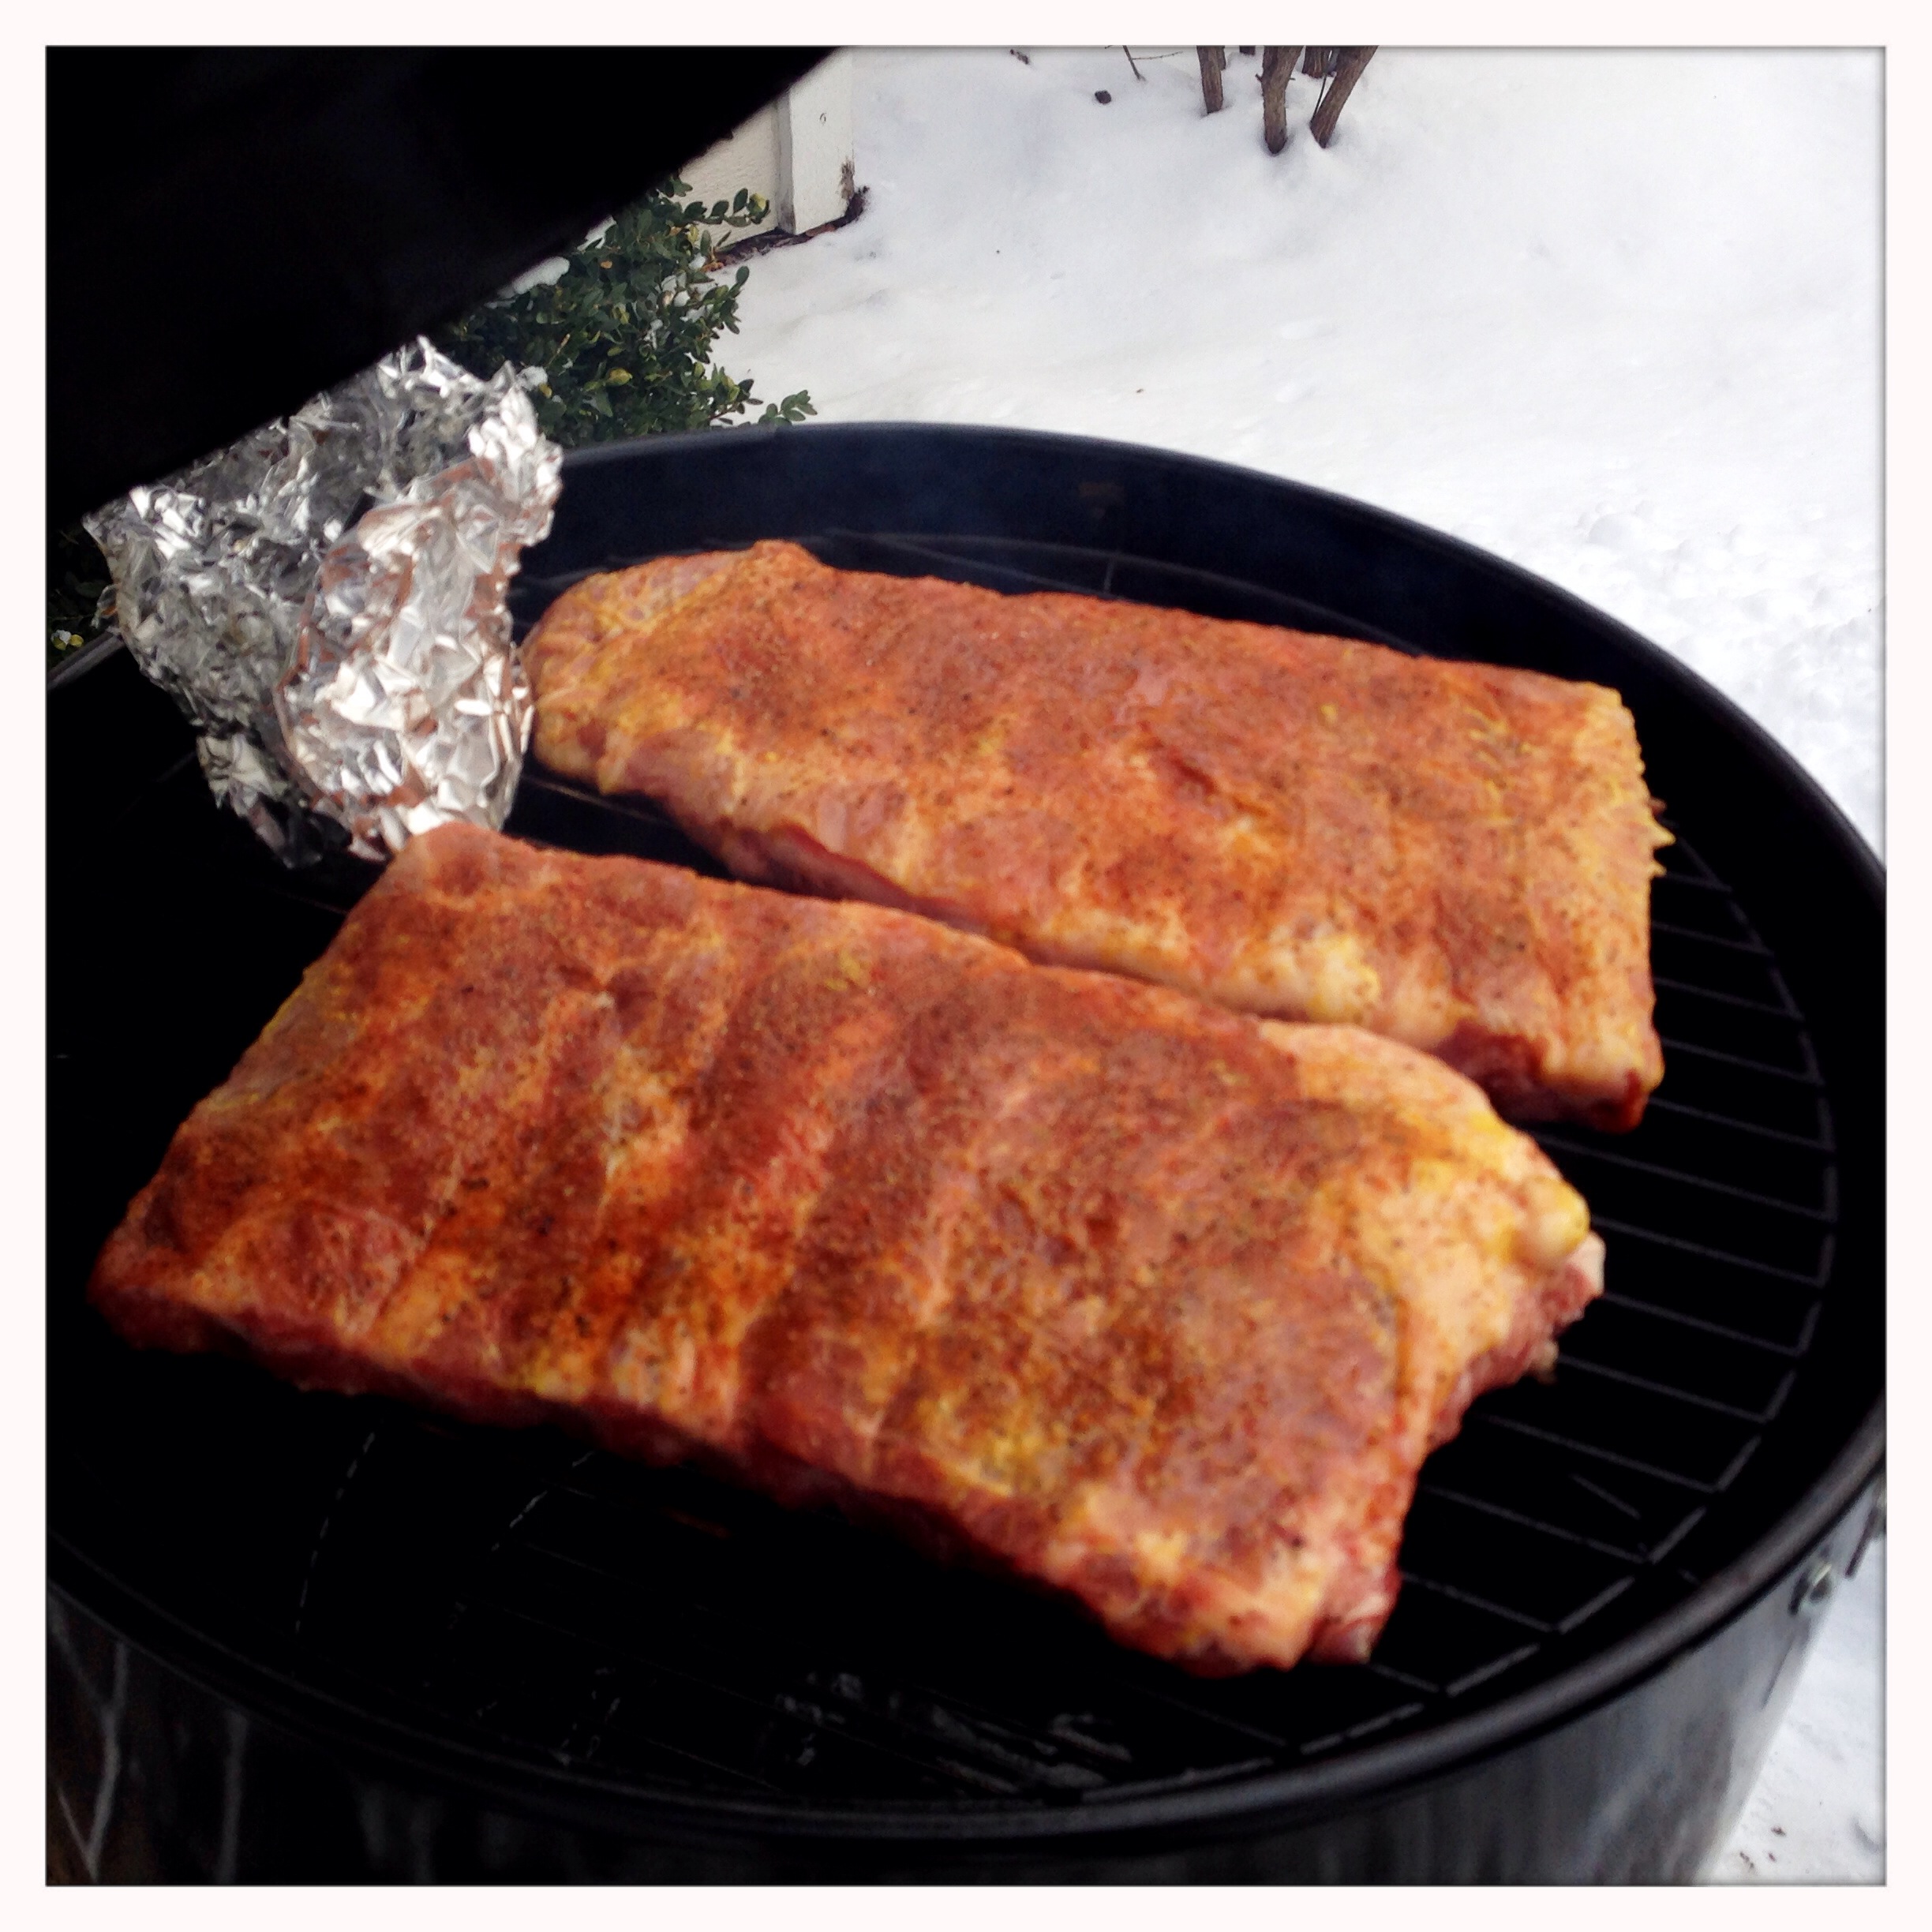
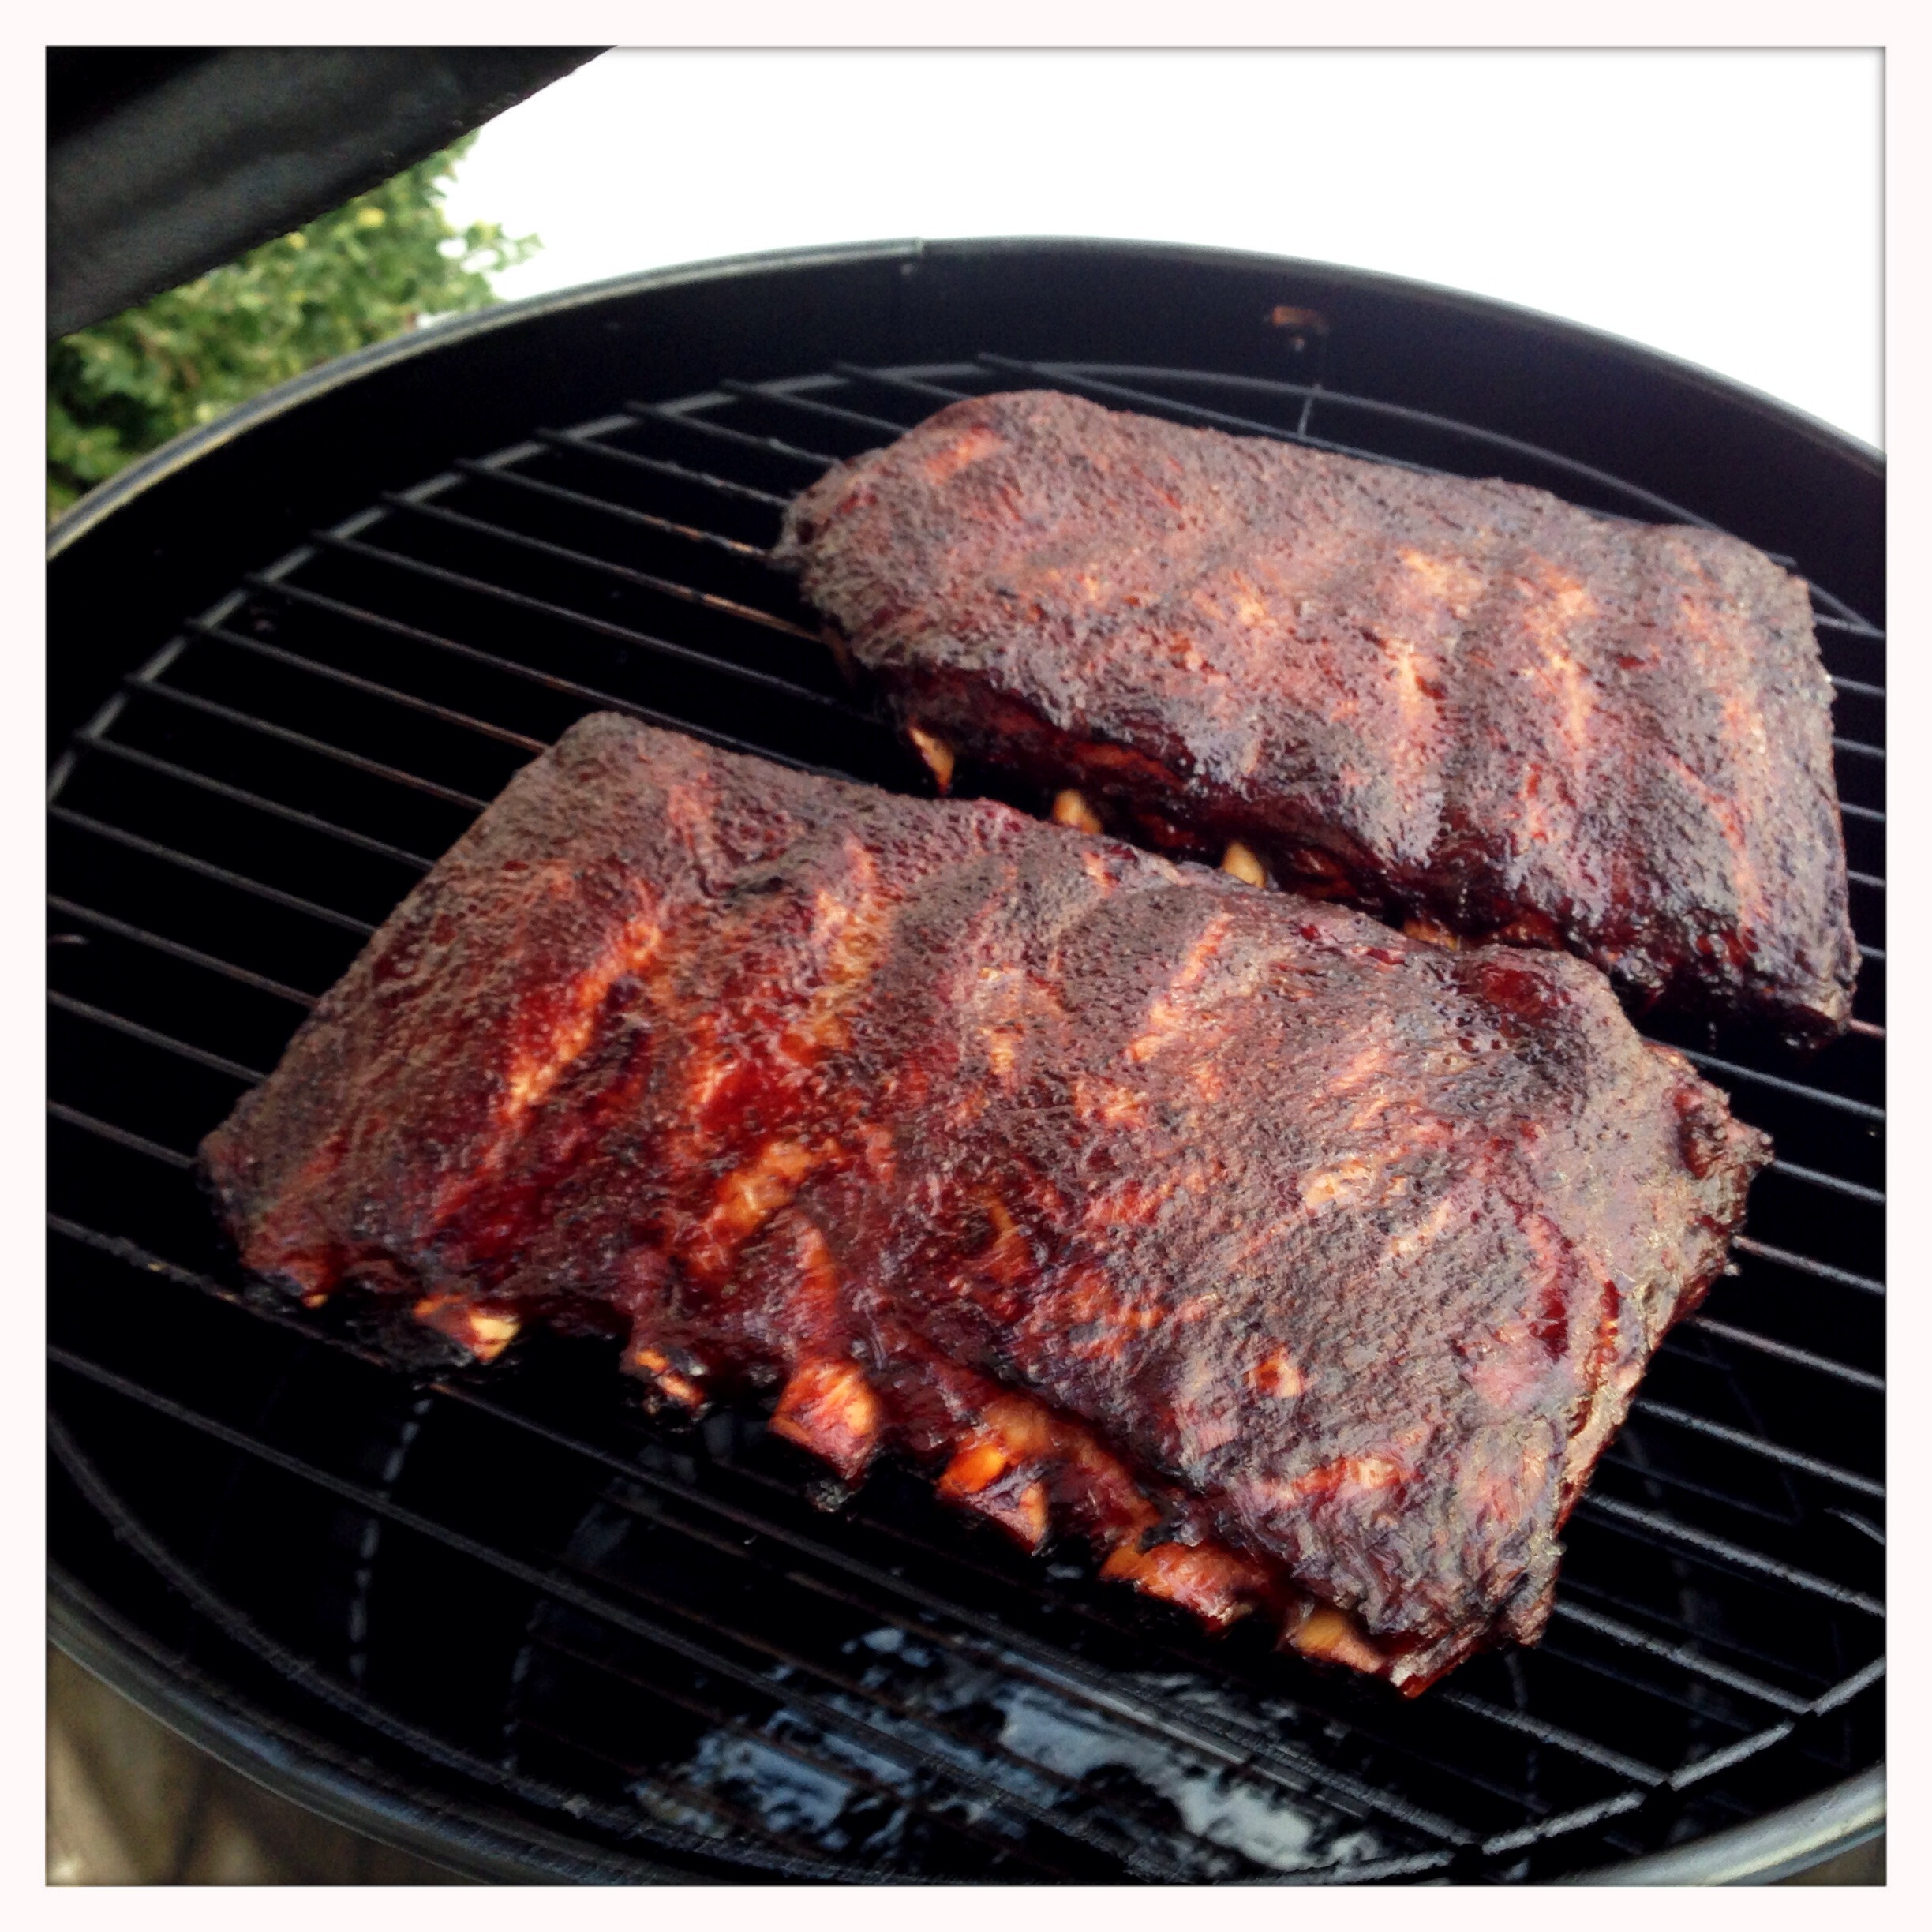
Once the smoker has reached a steady temperature, add a chunk of wood to the coals. Then place the ribs, bone side down, on the grate and cover.
Assuming the temperature holds steady, this will be a pretty low maintenance cook. Every 45-60 minutes, you’ll probably need to add another chunk of wood to keep the flavorful smoke wafting over the meat, but that’s about it. Also, if you’re planning this all out, the ribs smoked for about 4 1/2 hours total, sprayed at 2 1/2 hours and sauced about 45 minutes before I pulled them off. Then rested for about 30 minutes before eating.
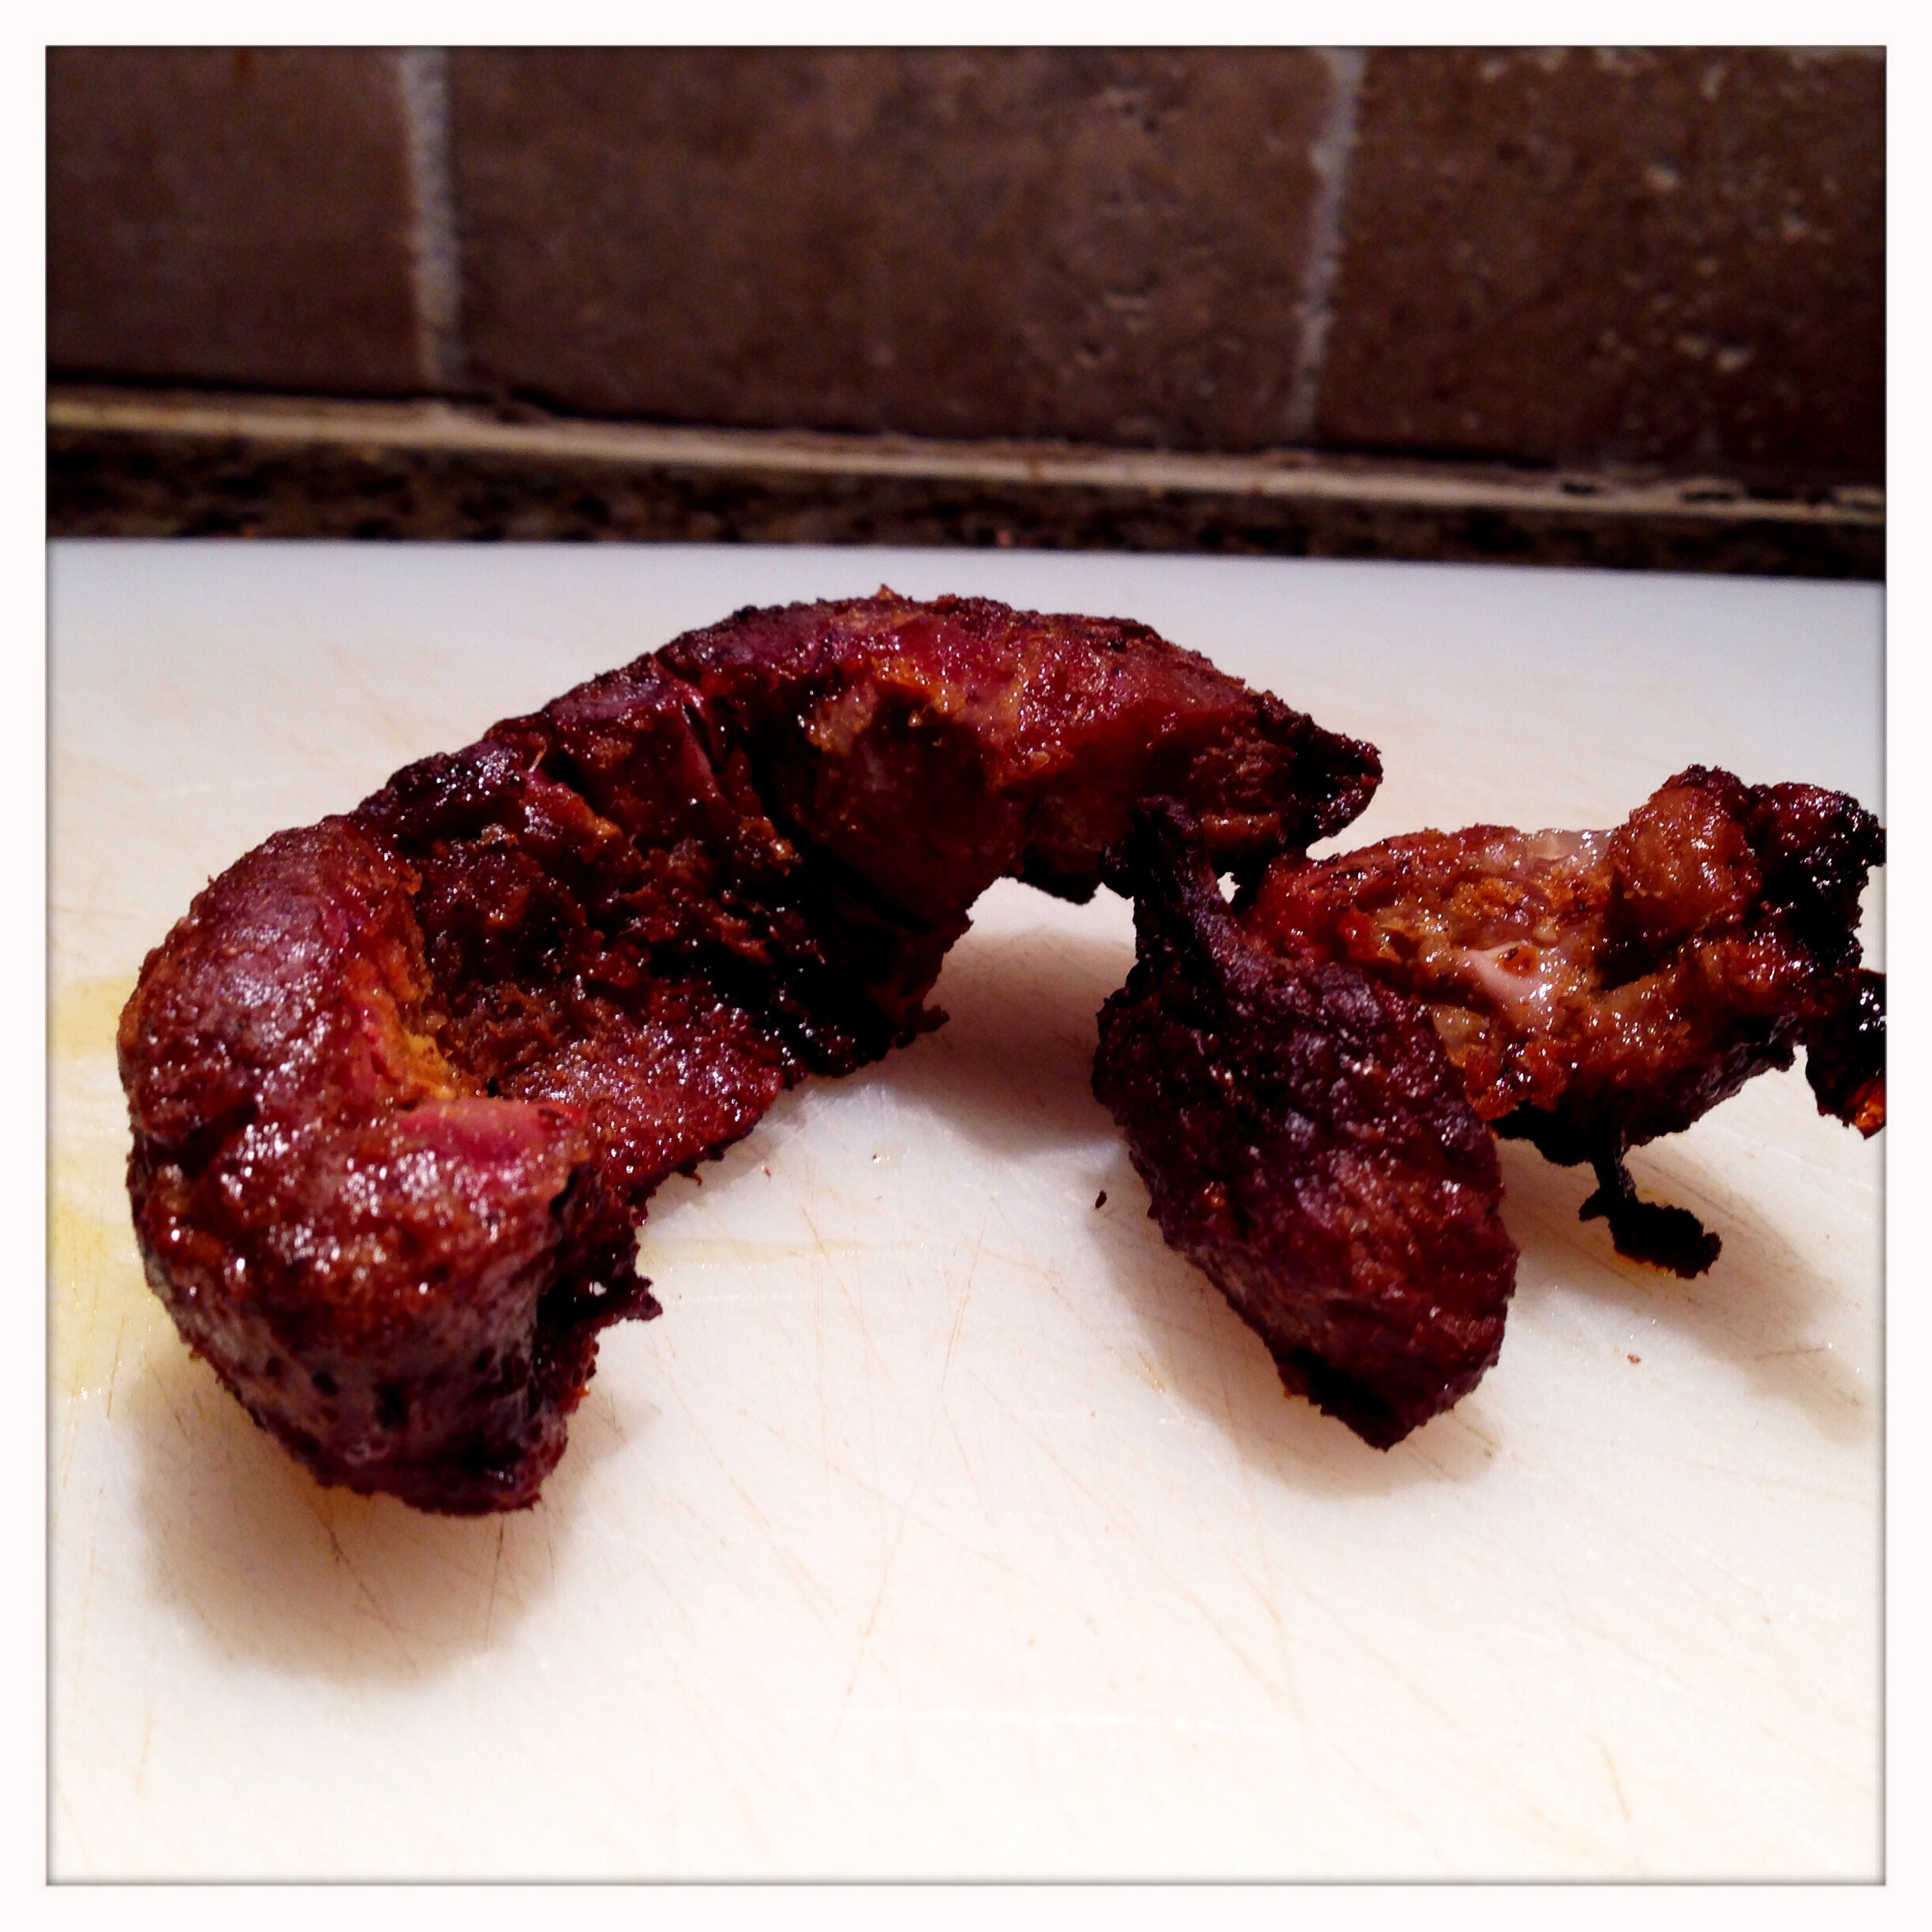
Now you might be wondering what that little foil cup is doing on the edge of the grate. Well, as you remember, I suggested you hang on to any trimmings. Since I am only doing one rack, I had nowhere near enough trimmings to be worthwhile for saving for a stew or other use, so I decided to make some “chef snacks” to munch while I waited for my ribs.
I took the trimmings, which are very similar to the fatty, coveted treasure that is pork belly, and I covered them in yellow mustard, hot sauce, old bay and black pepper.
Then I rolled them up and placed them into a little foil cup so that they wouldn’t fall through the grate while I smoked them. I left them on the smoker for the first 2 1/2 hours while the ribs cooked. When I pulled them off, they were crispy, yet tender and melted like butter. Simply amazing. Highly recommended.
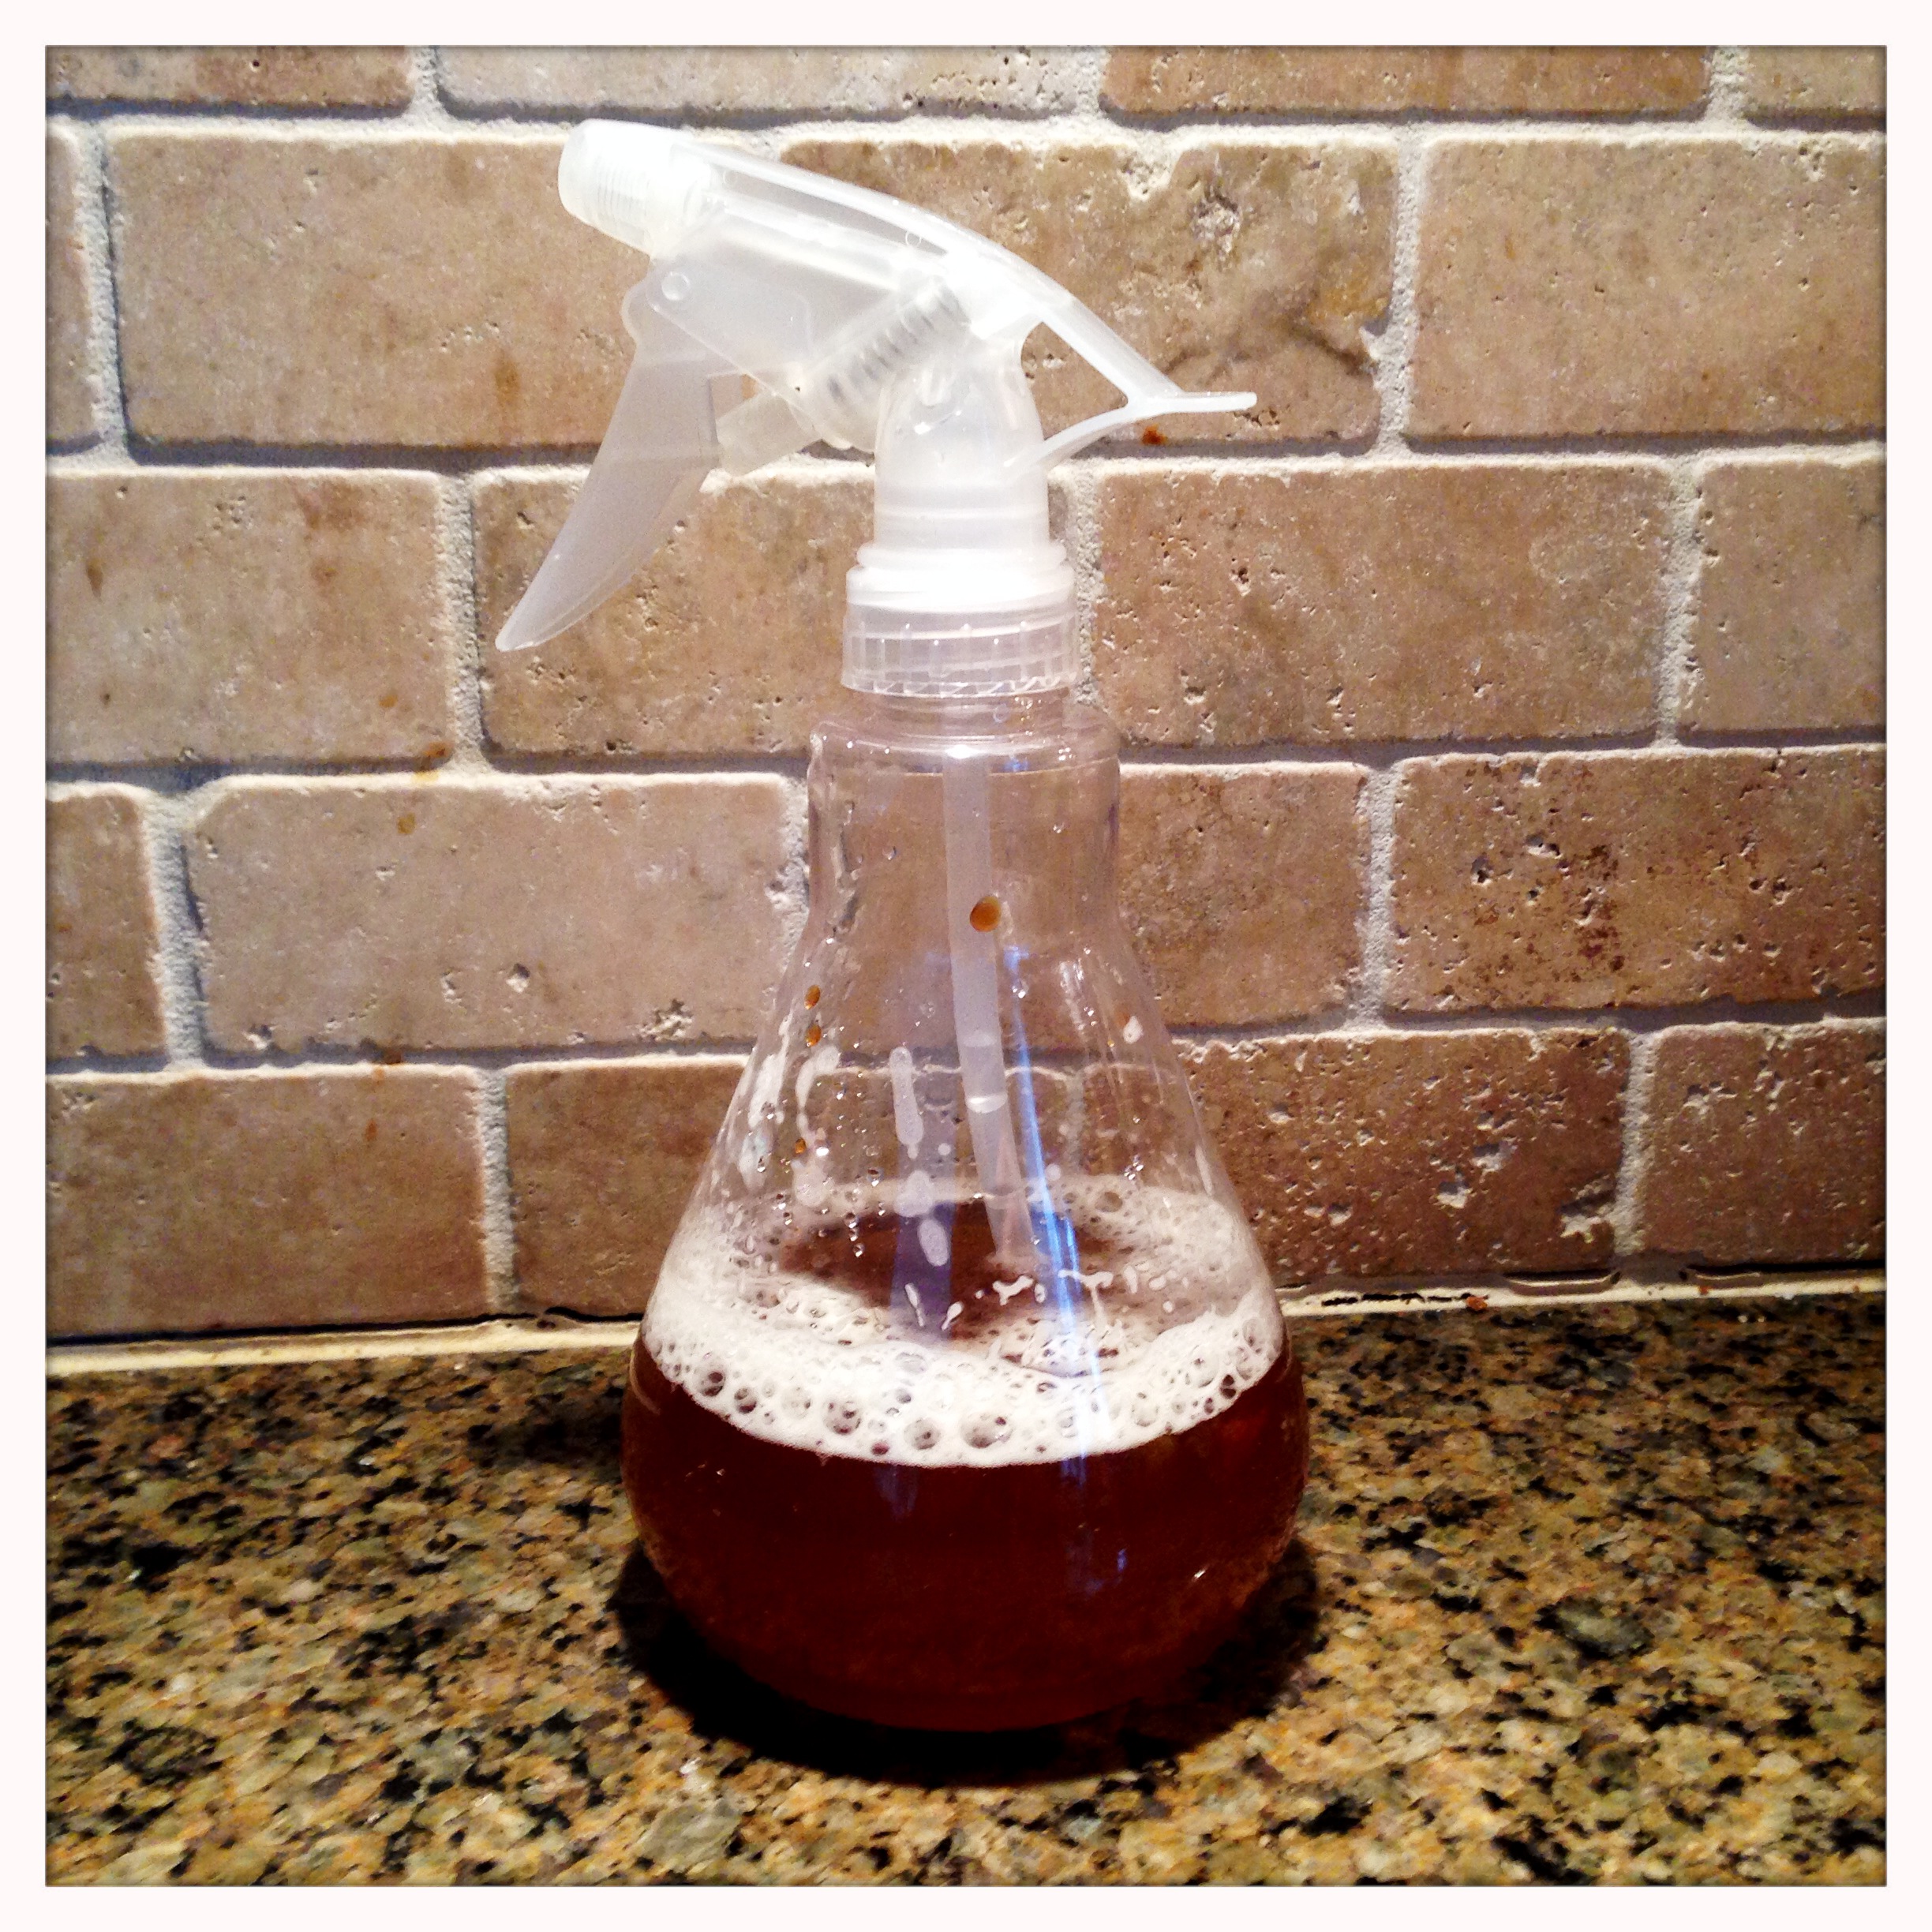
Now, back to the ribs. Spraying the ribs is debated. And, it’s optional. I like to think that any opportunity to add some moisture is probably good, so I sprayed my ribs, but only once. About 2 1/2 hours in, the same time I pulled the chef’s snacks off, I sprayed the ribs. Doing it at the same time minimized the time I had to open the smoker, which reduces the number of temperature swings while cooking. My spray was a simple mix of cider vinegar and beer with a little worchestershire sauce.
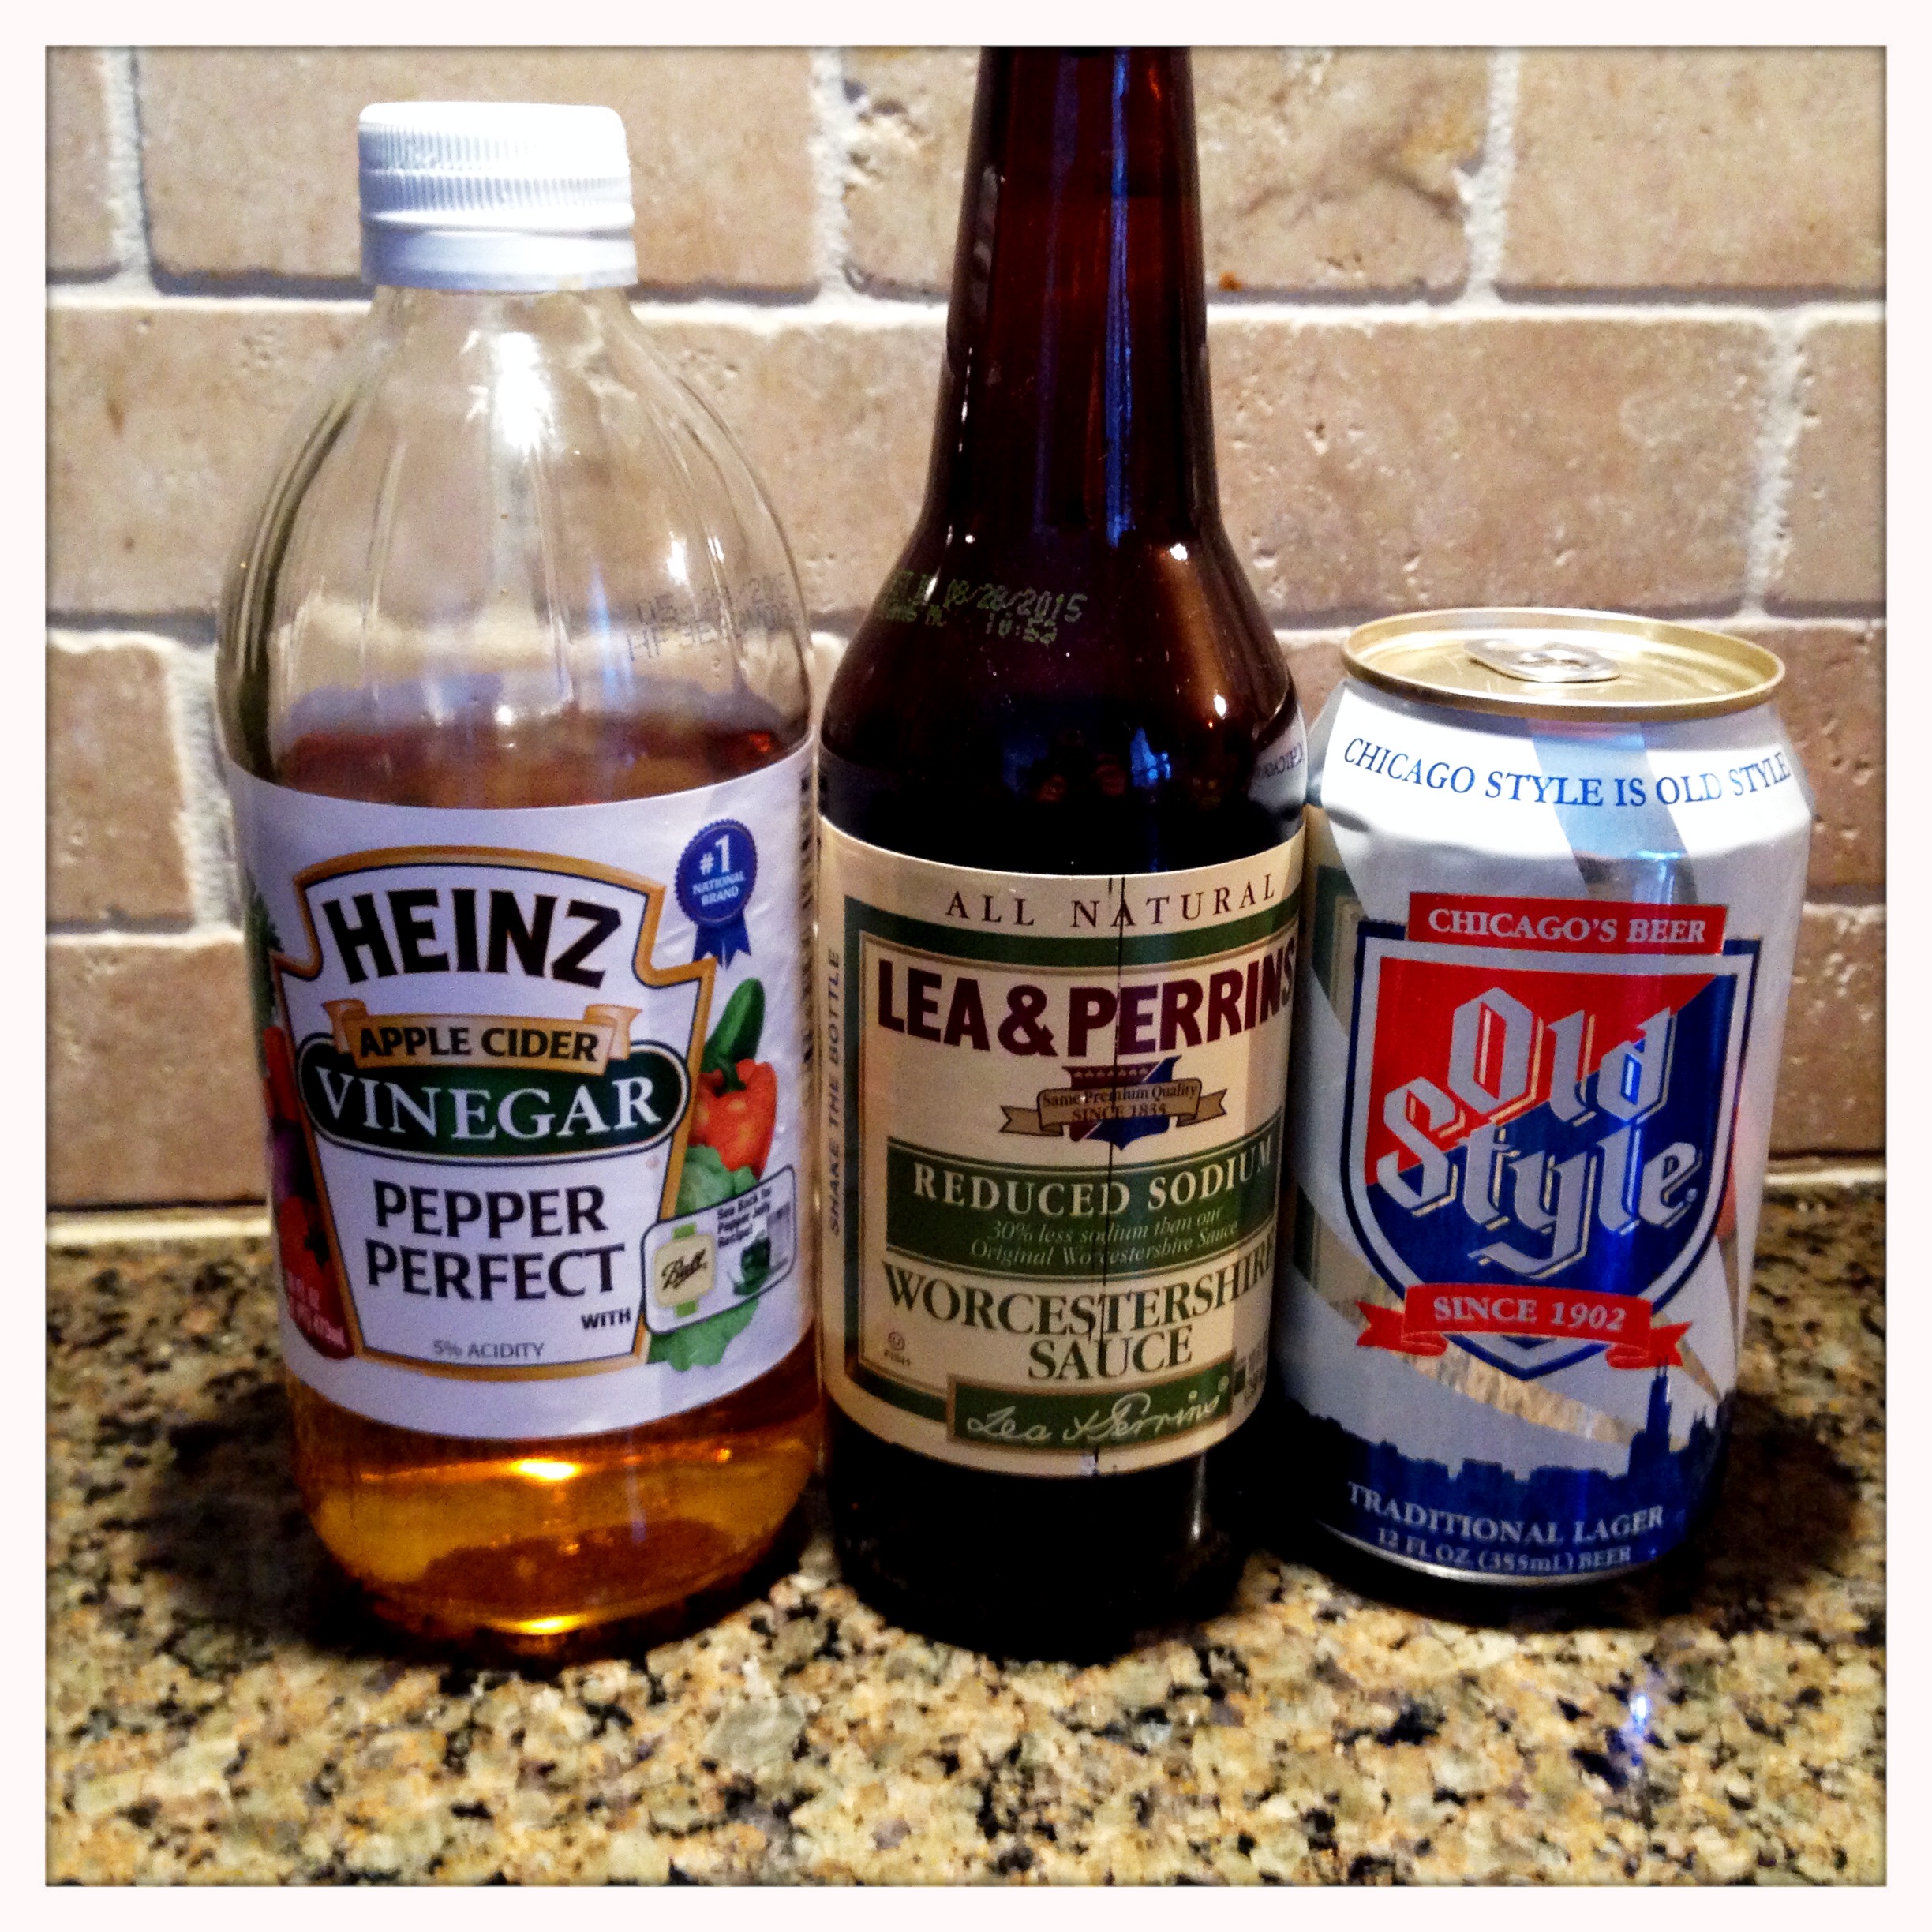
I made a 50/50 mix of vinegar and beer and then added a few shakes of worchestershire sauce in a spray bottle. (Note: I shouldn’t have to say this, but please do not use a spray bottle that has EVER contained cleaners or other toxic chemicals. Buy a new, food-safe bottle that you can use exclusively for food-safe applications.)
At the 2 1/2 hour mark, spray the ribs a few times and quickly recover the smoker. Let them go another 1 1/2 to 2 hours, and then sauce them if you choose. I did one half of the ribs with a spicy sauce and the other with a sweet sauce.

Brush the ribs with sauce, and recover the smoker. You can always add more sauce after cooking if you prefer, so don’t overdo it here. The goal is get a layer of sauce on the ribs that will caramelize and form a glaze, but not enough that it makes a mess of the smoker.
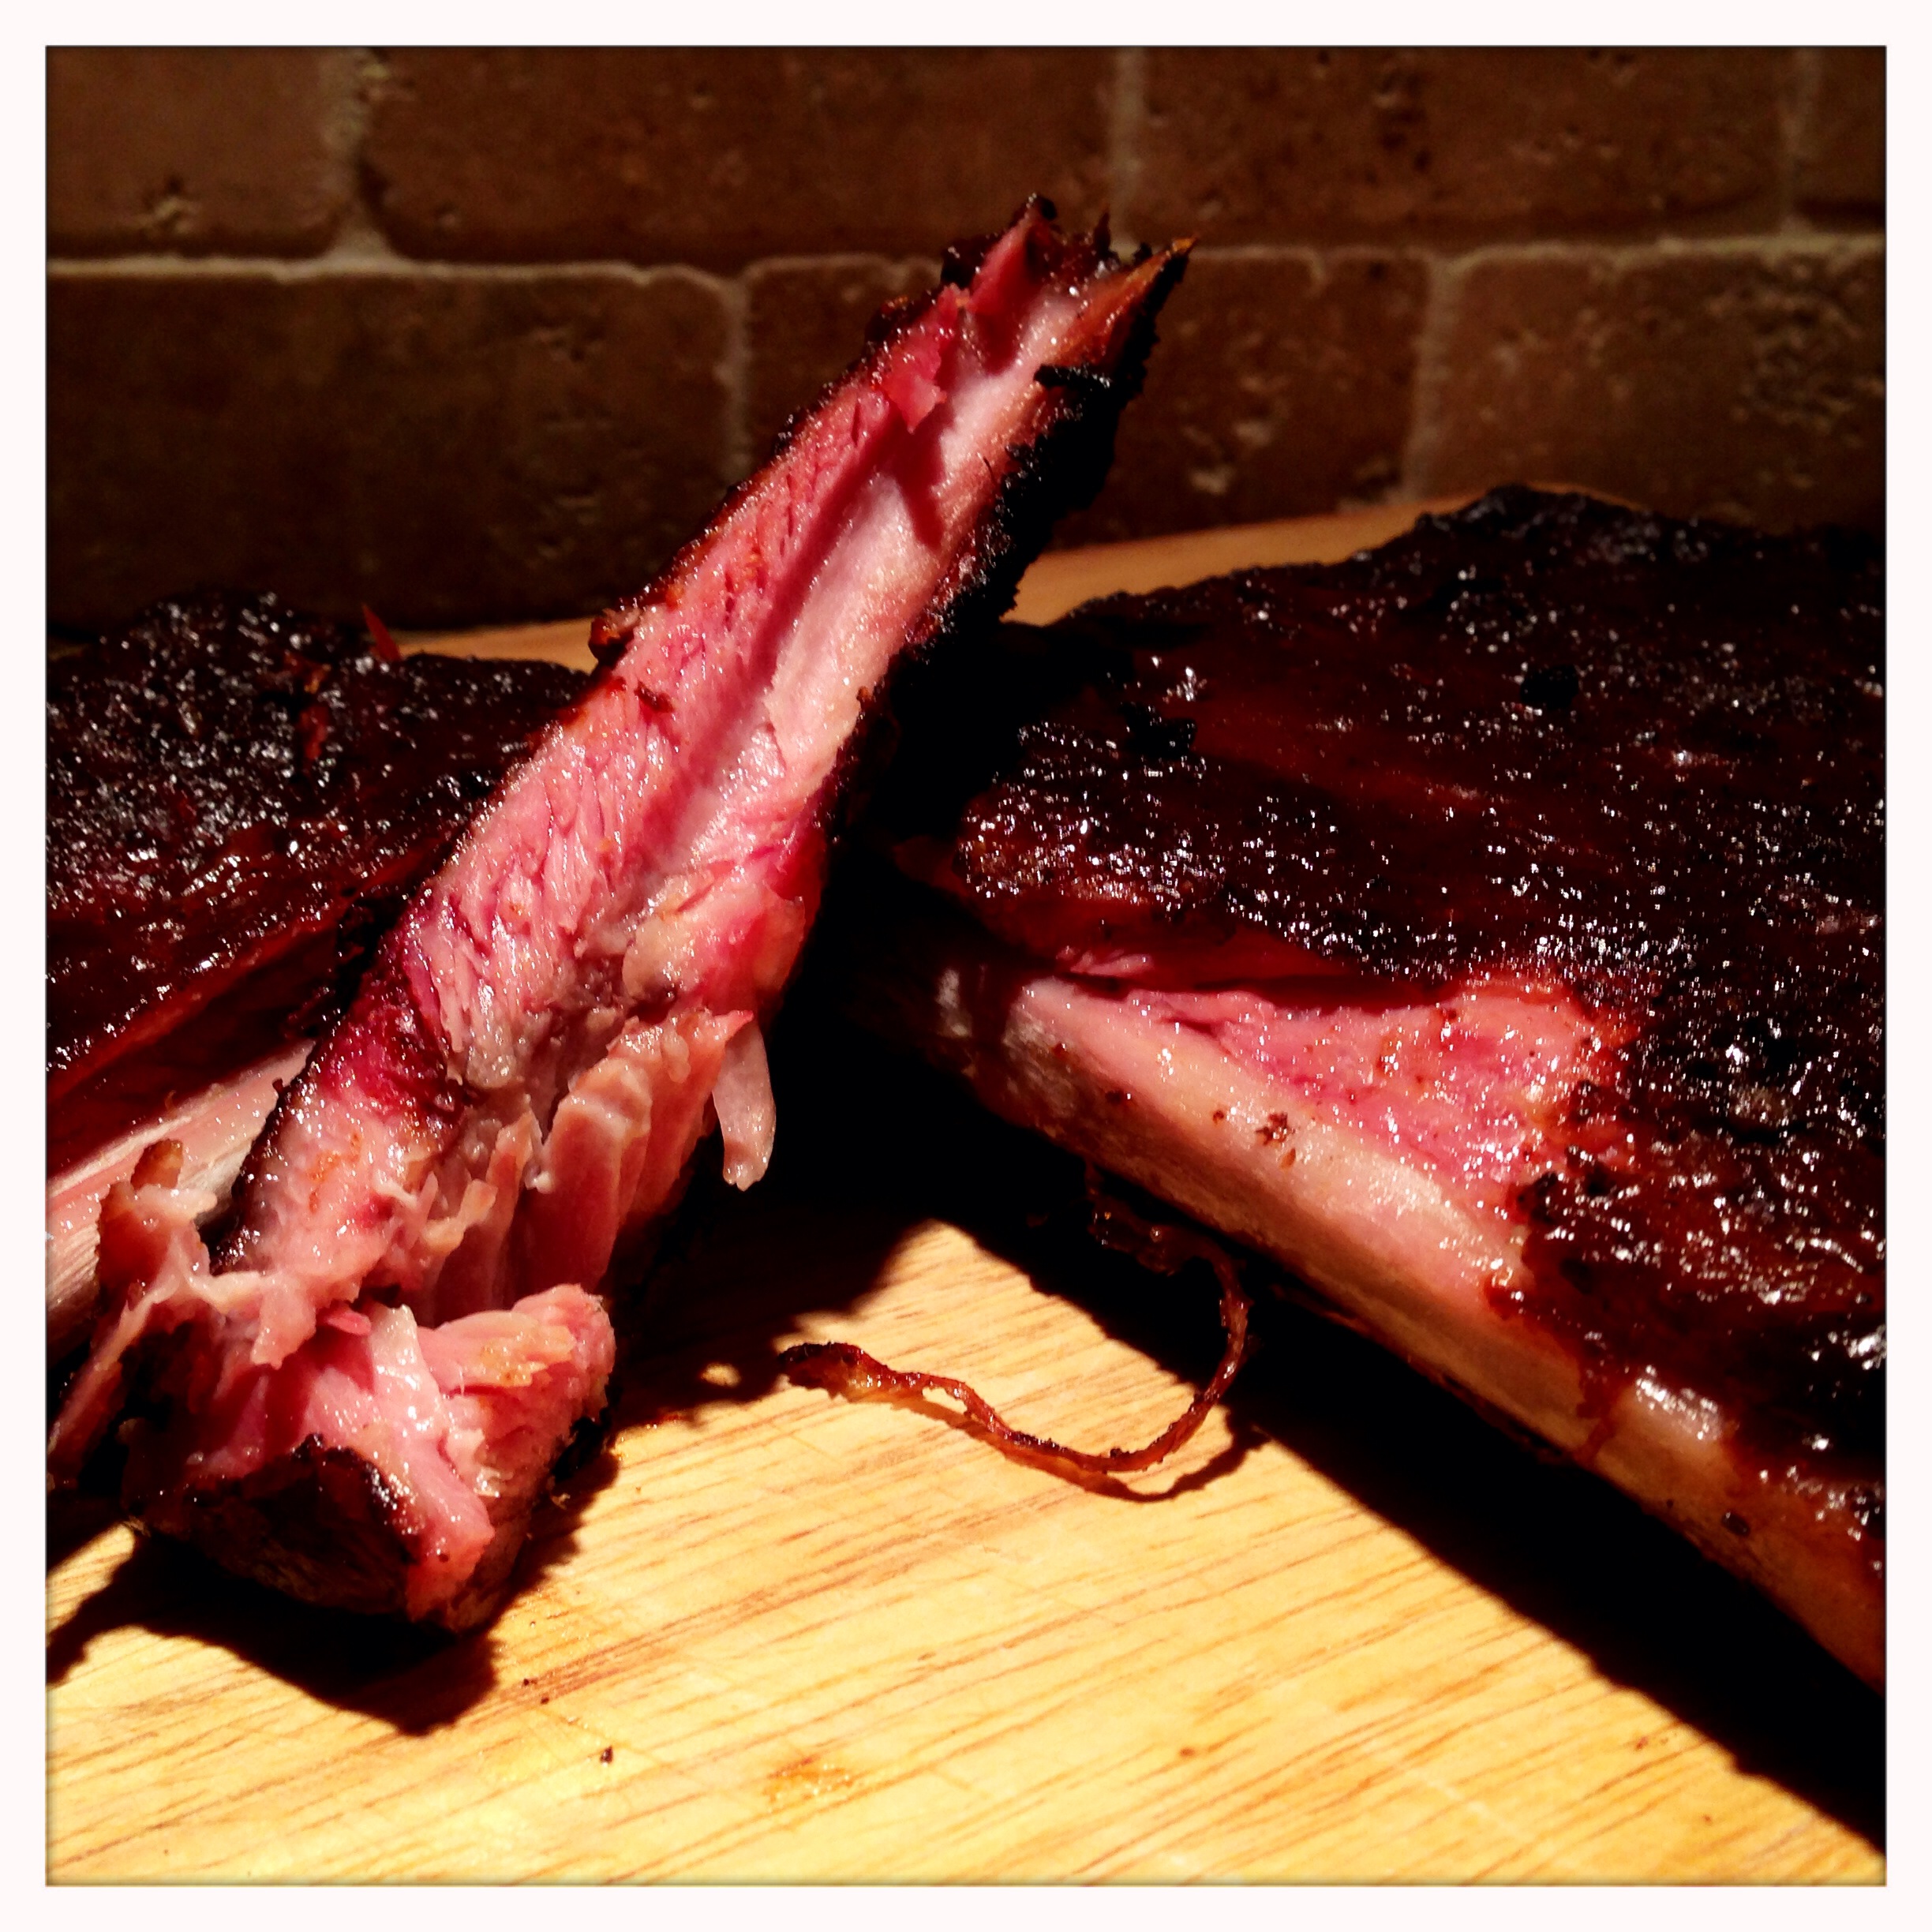
I did not get a good picture of this next step, but you can certainly find plenty on the web. Determining when your ribs are done can be tough. Unlike a pork shoulder or a brisket, a meat thermometer is not easy to use with so much bone and thin sections of meat. Instead, doneness is best estimated using the bend test. This involves gently lifting one end of the ribs and assessing the bend. It should easily form a 90 degree angle when done. A hint that your ribs are approaching being done is when the bones start to become visible where the meat has pulled back, as in the photo above. This is a low and slow cook, so there’s some wiggle room on time where your results will still be edible and delicious, but start checking on them by the 4 hour mark to be sure you don’t overshoot too much on your cook time.
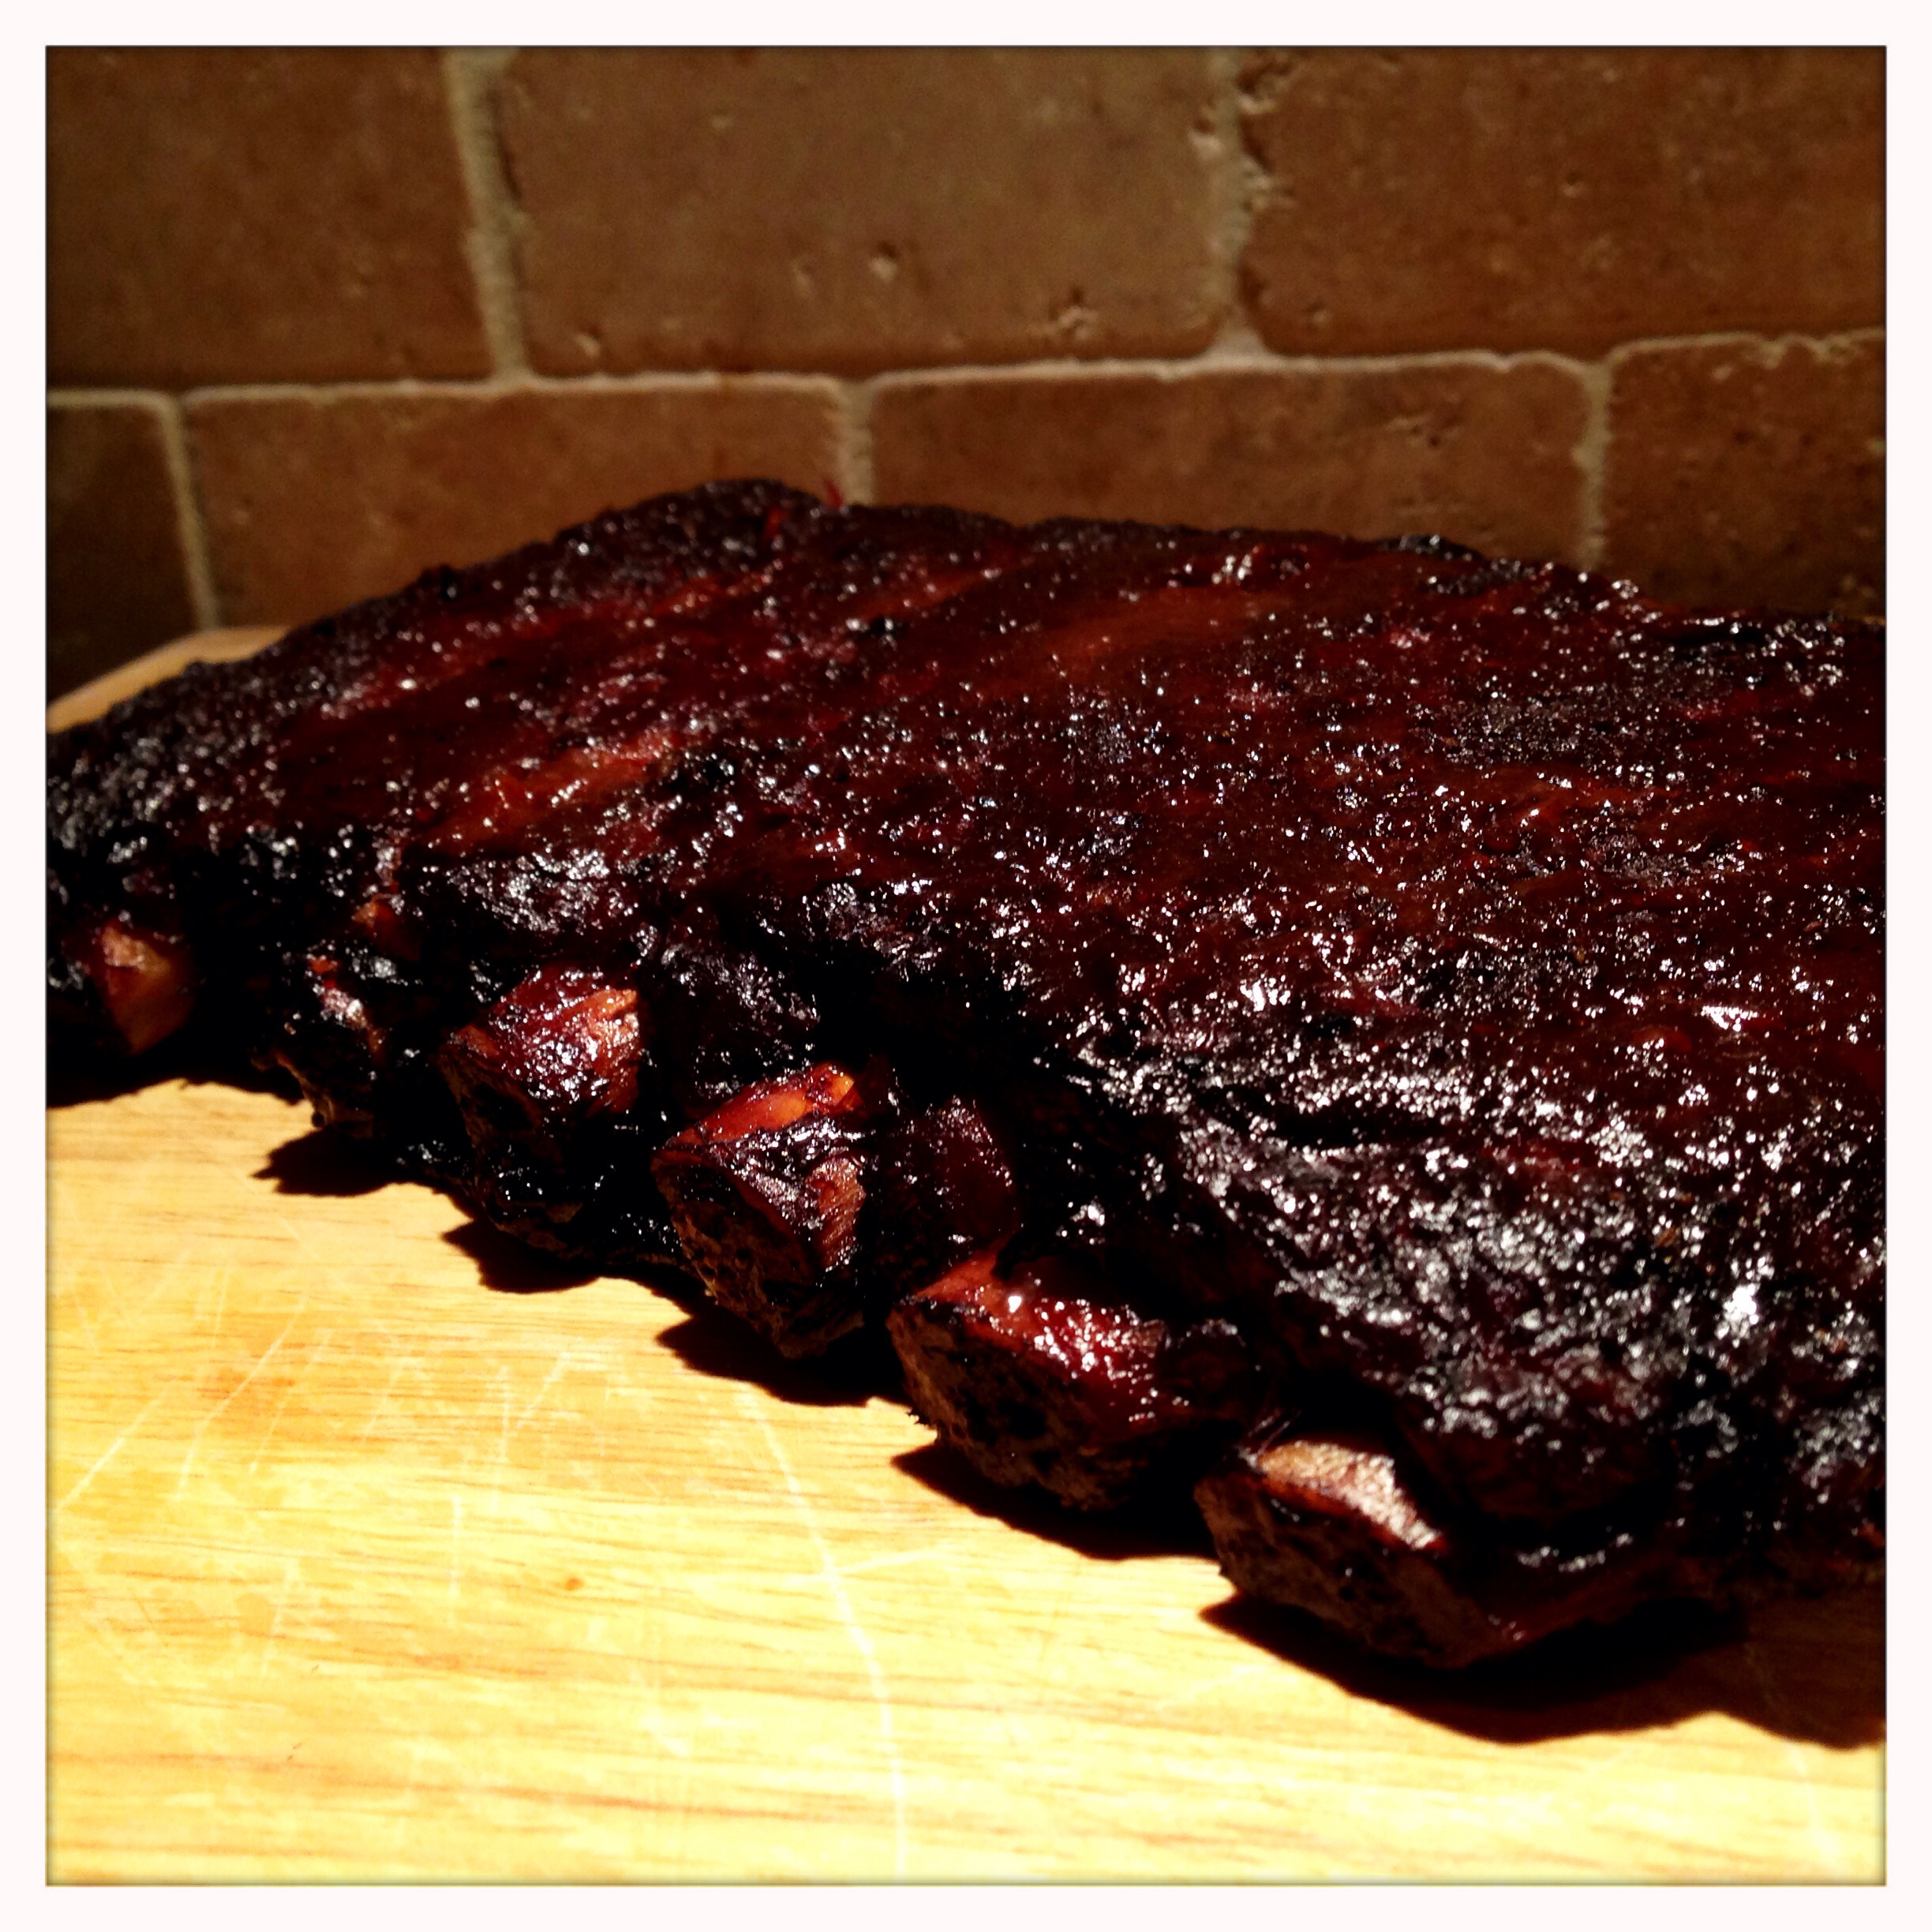
You can trim the ribs into 1 or 2 bone sections for serving, or just go for the whole slab. When you break into meat, you’ll see the beautiful pink smoke penetration. This is the way smoked pork looks, so do not be concerned that this indicates undercooked meat.
Kids will love being able to pick up the bones and chew the meat off of them. For very young eaters, it is still probably best to cut the meat off the bones and into bite-size pieces. Our little guy tore through 3 ribs in no time at all. BBQ is definitely a crowd-pleaser regardless of age!
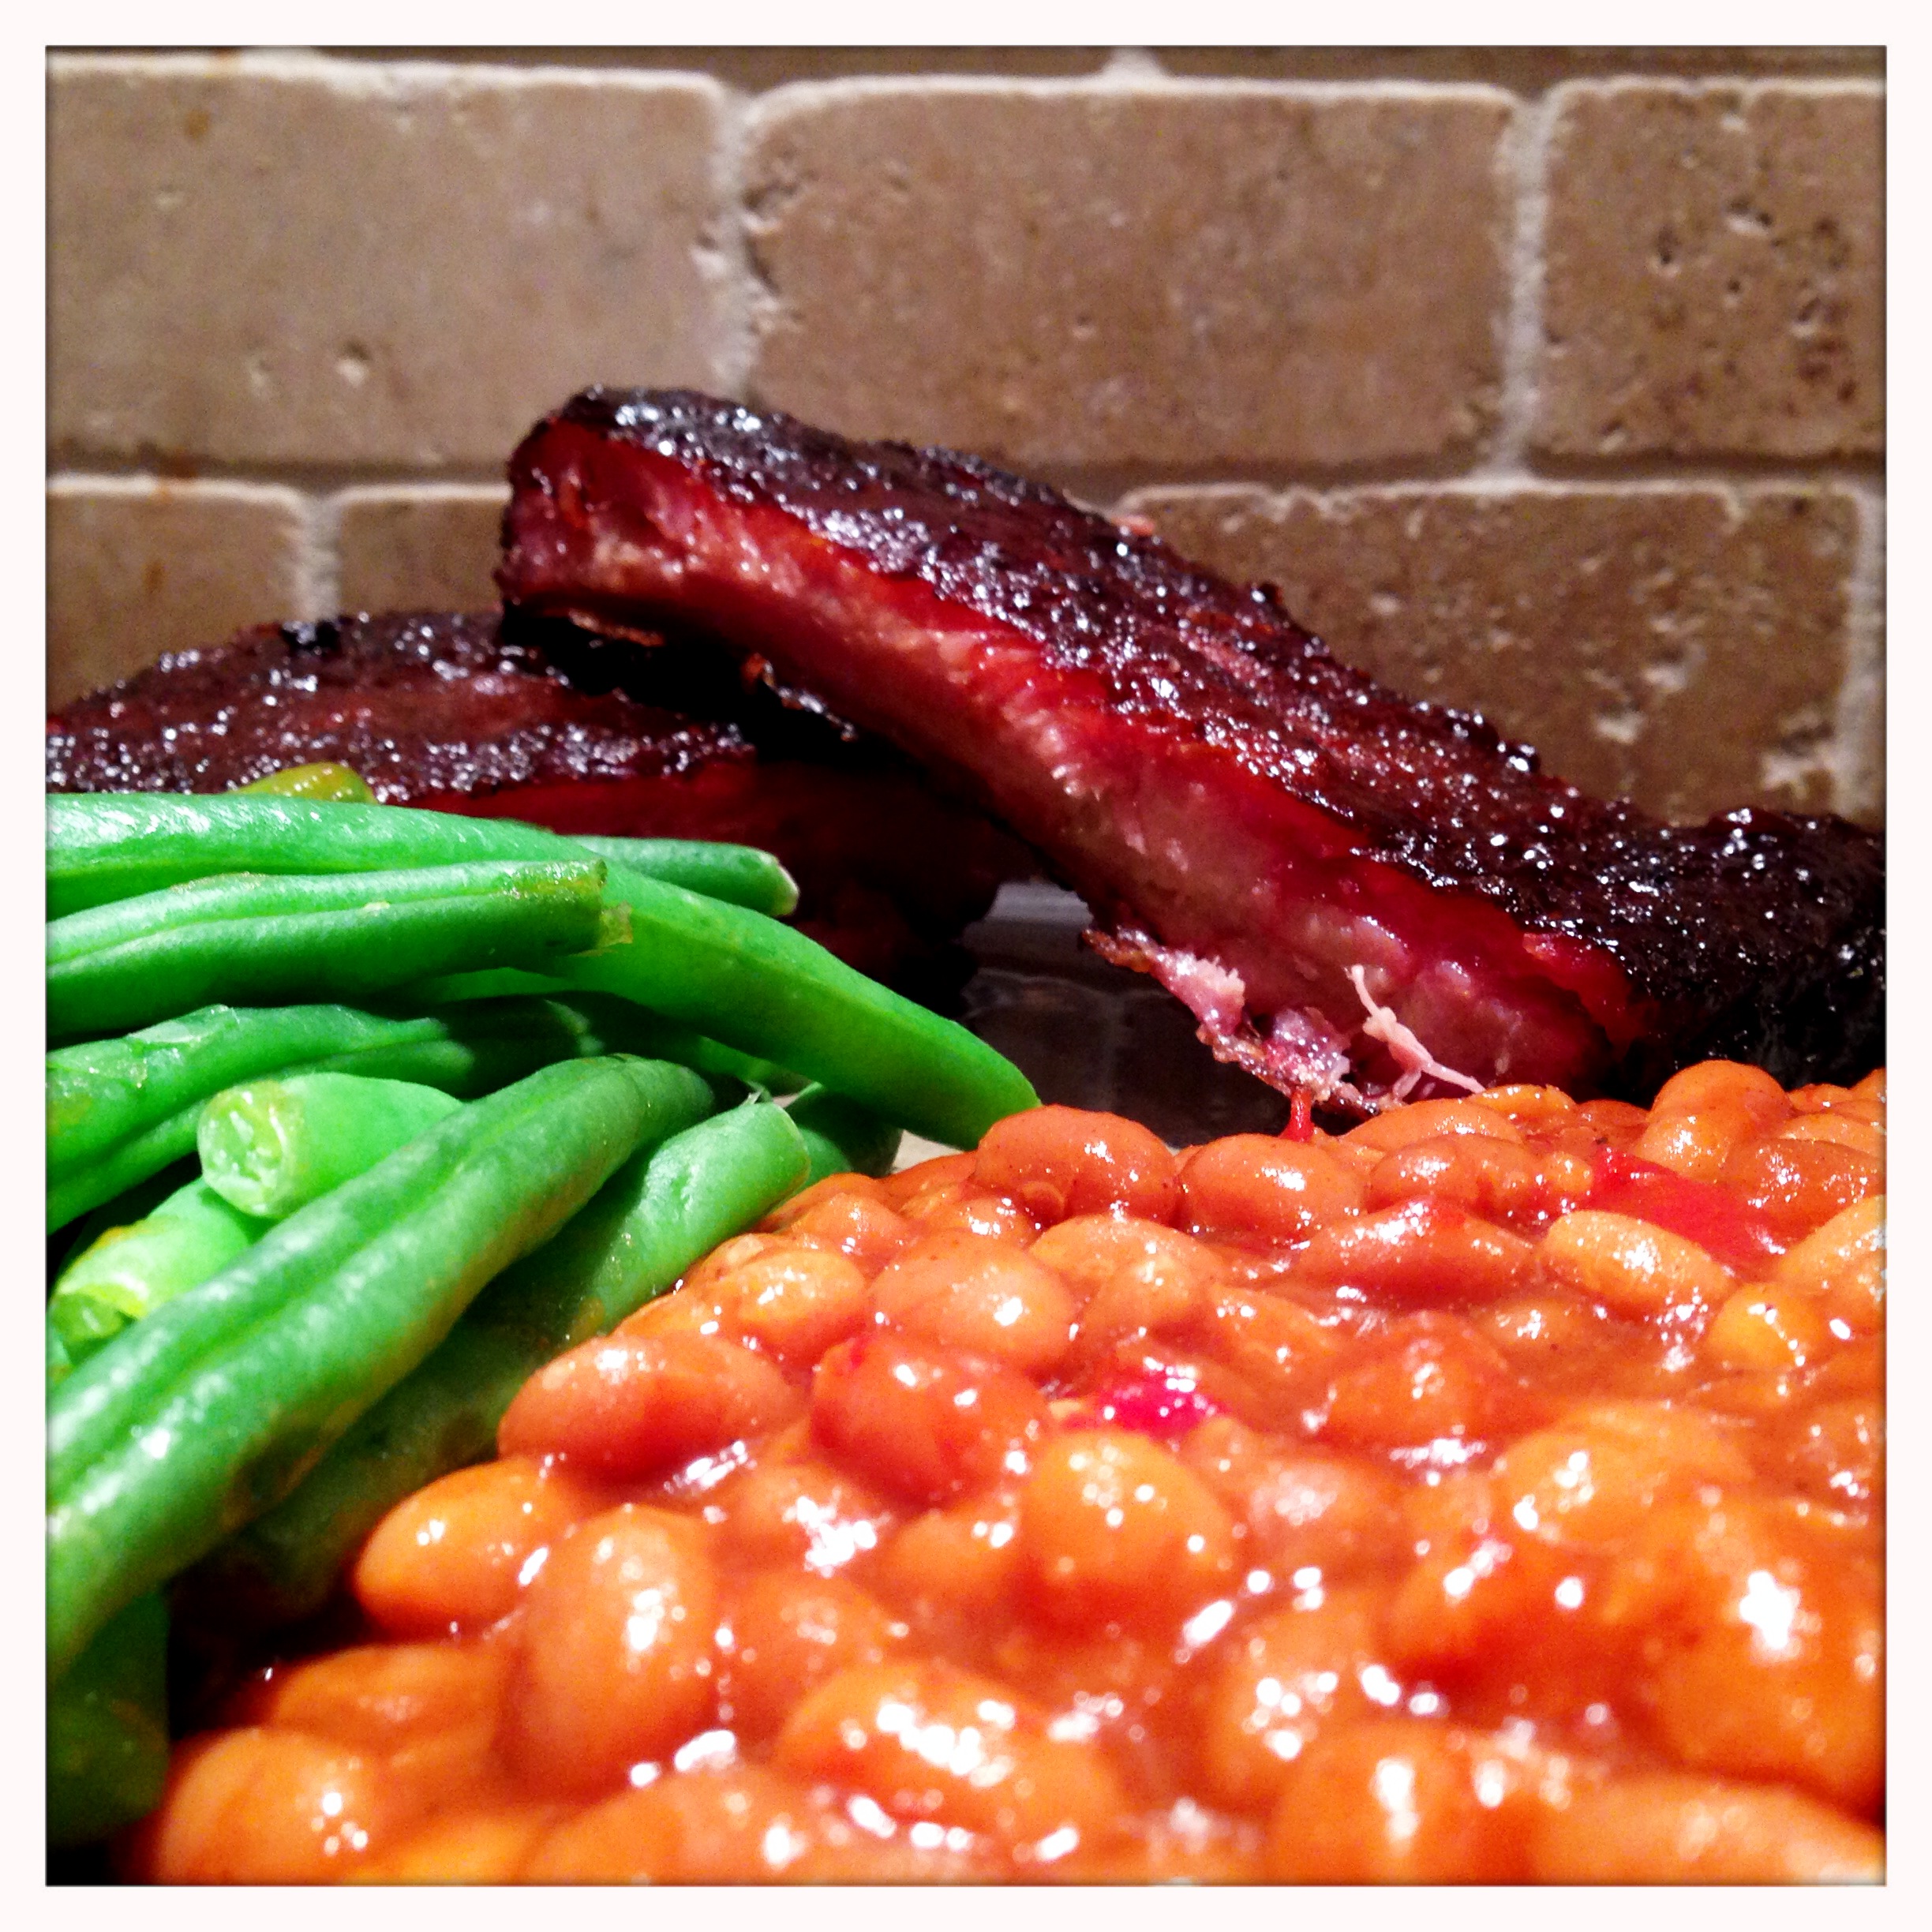
Serve these ribs up with some fresh green beans and baked beans, and you’ve got a classic BBQ meal. And, as always, Enjoy!


[…] my earlier post on barbecuing ribs, I have gotten in some significant practice, and felt it was time for an update on making ribs. […]